Friday, December 18, 2015

Oh, What a Fowl Month

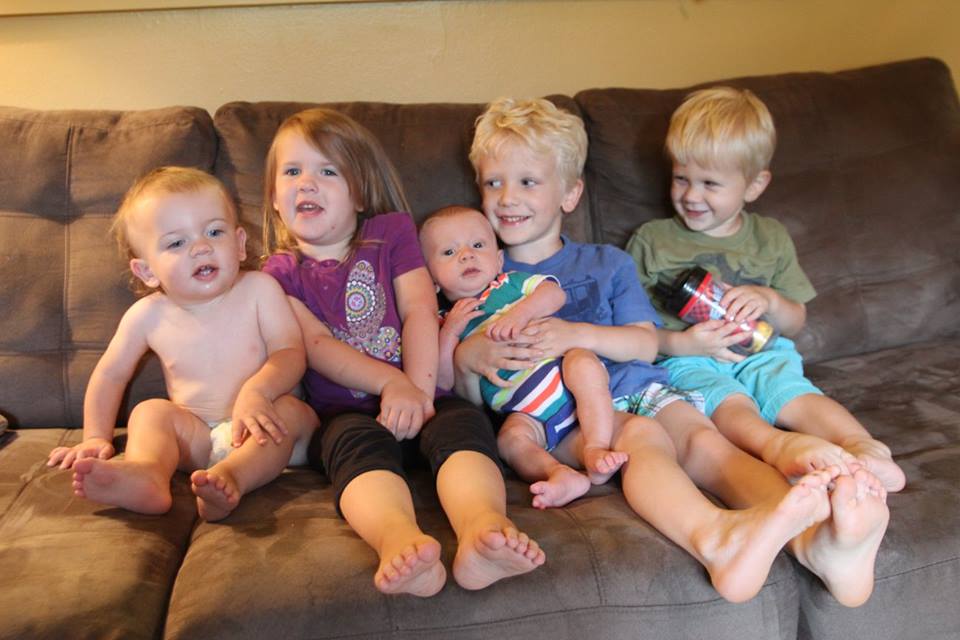
This guy was right across the road
from this year's Turkey Palooza house.
As many of you know, Thanksgiving is our family's favorite holiday and over the years it has morphed into a week long celebration/family reunion that we have dubbed Turkey Palooza. This year we had one of our best Turkey Palooza extravaganzas to date and that was the kick off to what I have dubbed a very fowl month.

This summer we partnered with Carol and Ron, some friends in our self-reliance group, to raise meat chickens. We built a chicken tractor together at their property, ordered in 40 chickens to raise from chicks and planned to butcher them at about 10 weeks, which happened to be when we were returning from Turkey Palooza. Upon our return, we scheduled The Day with our friends. We planned to kill and dress out all the birds in one fell swoop if we could.

Our chickens see the door is open on 'The Day'
and think they are getting fed.
Before I get into the somewhat gory details of The Day, let me give you a synopsis of how this past month has become so fowl. When my children were young, one of my favorite books to read to them was 'If You Give a Mouse a Cookie'. If you are unfamiliar with the book, it is known as a circular tale - a boy gives a mouse a cookie and then the mouse wants milk to go with it. The boy then gives him milk and the mouse wants a straw. This goes on through a dozen or so items and ends up with the mouse wanting a cookie based on the last item the boy gave him. As my fowl adventures progressed I found myself feeling somewhat like that mouse:
Cooling down the new freezer by adding
some frozen turkeys saves on power
from the batteries.

If an off-gridder raises a bunch of meat chickens she's going to want a freezer to store them in before canning. If you give her a freezer, she is going to want 6 frozen turkeys to quickly cool down the freezer when she brings it home. If you give her the six turkeys she is going to make a lot of bone broth to can. If she makes a lot of bone broth she is going to want a lot more canning jars. If you give her canning jars, she is also going to cook and can all her frozen chickens.... you get the idea - it has felt like an unending process. And yes, we bought a small freezer that we can run off our solar system (in sunny weather). Our plans are to use it sporadically as needed, like when we find good sales on meat. And as a side benefit, or what I have been calling a Christmas Miracle, we currently have ice cream at our house!

Back to The Day. I must admit I had a lot of trepidation as to how this newest adventure in homesteading would go. None of us had ever done it before. Carol admitted up front that she did not think she would be much help, and while Alan was game to try, we had already had discussions that once we started hunting game I would probably be the one cleaning it. Our skill sets actually compliment each other in our various chores around the property and this was one area we both agreed was more in my ballpark than Alan's. Albeit, if it was worse than I thought it was going to be, he would owe me big time!

We woke on The Day and donned what we have since been referring to as our 'chicken clothes'. We packed up the items we thought might be needed to make this a more successful venture and drove to Ron & Carol's. As we got out of the truck, Alan said 'Hello, Chickens' and I asked if we shouldn't be saying 'Good-bye' to them instead. That was just the start of the some-what macabre humor we injected throughout the day.

Ron already had water on to heat up, the plucker ready to go and a cleaning station set up. First item on the agenda was to determine who was doing what, well actually first we had to decide what actually needed to be done. Here is the basic process:

Alan and Ron got the messiest jobs that day.
1. Ron would catch a chicken and hold it on the stump while Alan cut the head off with the corn knife we had brought. Note there was experimentation as to if it was better for Ron to first kill the chicken by stretching the neck and then remove the head.I think the jury is still out on the best way and some new methods may be tried next time. I was very proud of Alan taking on the job of head dispatcher (actually the dispatcher of heads not the chief dispatcher of the group). He did a great job even after an incident that included him being hit in the face by the headless, bloody neck of one of the subjects.

Adding chickens to the 'hanging tree' to drain.
2. The headless chickens, most still flapping, were then hung by the feet to drain. We had to think outside the box a bit as there was nowhere set up to hang the birds. Carol had a wrought iron 'tree' for holding four hanging plants leaning against the garage. I suggested we open it up and hang the birds on each of the loops that normally hold hanging baskets. Using this, we were able to kill and hang four birds at a time.

As steps 1& 2 could be a bit traumatic (for us - not the birds), I think we may try the killing cone method in the future which keeps the birds calm and is less messy.

Ron using the plucker.
You can see the scalding pot in the fore-ground.
3. Ron has an automatic plucker, so the next step was for him to dunk the chickens in scalding water and then run them over the plucker. This also took some experimentation as hotter water made the plucker more effective, but too hot and the skin would start to cook and would tear when the feathers were being plucked.

4. Even at optimal temperature the plucker did not remove all the feathers, I would estimate that it removed 75-80% and those that remained were mostly on the legs and wings. So, the next step was plucking the remaining feathers by hand. I would start this tedious process while Ron was running each batch of 4 chickens over the plucker. Then he would join me to finish up the hand plucking.

5. The step I was dreading - eviscerating (gutting). I had prepared as best I could by reading up on the technique in several of our homesteading books and googling it as well. After a bit of muddling through on the first one, I found it was not complicated at all. You just have to take special care in several areas to not nick any internal organs (i.e., intestines) to keep the bird clean (i.e., no escaping poop). To aid in this goal we did stop feeding the birds 24 hours before The Day.


Yep, check this off my bucket list.
All in all, I did not think the process was as bad as I expected, I think the most disconcerting part was sticking your hand up into the bird and realizing it was still very warm. Logically I knew they would be warm, but mentally it was a bit disconcerting.

For those of you who plan on eviscerating a bird in the near future, here is the order I found most natural for me:
- don vinyl gloves.
- bend the legs at the joint at the top of the feet, where rough yellow skin meets feather. Using a sharp knife, cut between the joint to remove the feet.
- use garden pruners to cut of the wing tips at the first joint in the wings, my gardens pruners were a great addition for The Day but, being garden shears, they did complain that they were vegetarians.
- using a sharp knife, carefully cut a slit through the skin below the breastbone and running horizontally from inside thigh to inside thigh and stretch the opening with your hands.
- at this point, after some experimentation, I decide I liked to turn the bird over and cut around the vent (tail) being careful to not cut the lower intestine that is connected to the vent.
- I then used my pruners to carefully snip the back bone where I made the cut around the vent, this way, when it came time to removed the innards the vent was already attached to them and not attached to the bird.
- turn the bird back over so the cut/opening under the breast bone is facing you and stick your hand into the opening and work your hand around the cavity walls to break the innards free. There really is not much connectivity, it just feels a bit weird and warm.
- wrap you hand around the innards and pull them out through the opening, at first I was afraid of breaking open the intestines or some other entrail that may cause a lot of grossness but they are actually quite tough and will not tear when using your hands. You will actually need to pull with a fair amount of force to dislodge the wind pipe.
- as the entrails leave the body, verify the vent you cut away is also fully detached from the bird, if not, carefully trim around it some more.
- before the entrails fall into the discard bucket you may choose to pull the heart, gizzard and liver to save for giblets. Note, if saving the liver very carefully remove the gall bladder from the lower side of the liver. The gall bladder is greenish in color and if broken will taint the taste of anything it's come in contact with.
- now rotate to chicken to work on the neck.
- remove the skin on the neck by cutting the skin down along the neck and around the lower edge next to the chicken body.
- remove the crop which is a small sack on the chicken body next to the neck.
- you may see some wind pipe remaining at this end of the bird, it look a bit like a segmented worm and can be removed by pulling it out of the neck opening.
- use the garden pruners to cut the neck off as close to the body as you can, save the neck for making bone broth.
- rinse the bird and place in a cooler filled with ice water. After the birds had rested a bit we transferred them to a second cooler as the water in the first cooler was being discolored by slight amounts of blood and also had a few floating feathers that had stuck to the birds.


Cooling down the birds.
See, it really wasn't that bad, in our case we repeated the process 24 times that first day. After dispatching and cleaning 24 of the 37 birds we decided to call it a day. We were going to finish off the remaining chickens the following week, but later decided to let the remaining 13 birds grow for a few more weeks. If you wait too long it is supposed to be harder to pluck and process the chickens, but again we decided it was time for some experimentation to see if we could produce some bigger birds, our first batch average between 4.5 to 5 pounds when dressed out.

Wait, you may have noticed I did not mention Carol's duties for the day. She was our 'gopher' and she quickly volunteered to go for ice - twice.

By the way, we are going over to Ron & Carol's for Christmas Eve dinner and the only request we had was 'no chicken'. Carol said that ham is on the menu - they recently picked up a pig they had purchased and had processed by the meat packer. I wonder how many steps there are in butchering a pig, it may be time for some more research....
________________________________________________
Fresh broth on the left - canned broth on the right.
Canning the broth gives it a rich golden color.
HOW TO MAKE BONE BROTH
When not planning to can the broth, I only use 1 chicken. The broth keeps in the fridge for about a week and this makes enough broth for Alan and I to each have a cup at night and use it up before any of it spoils. When making broth to can I start with either one turkey or three chickens.


Ingredients listed for one chicken
  [brackets show amount for 3 chickens or 1 turkey]
1 chicken  [3 chickens or 1 turkey]
1 gallon water  [2 1/2 gallons water]
3-4 carrots  [6-8 carrots]
1 onion  [2 onions]
3-4 stalks of celery [6-8 stalks of celery]
3 garlic cloves  [6 garlic cloves]
Celery, carrots, onion, garlic and crystallized ginger.
2-3 slices crystallized ginger  [4-6 slices crystallized ginger]
3-4 Tablespoons kosher salt  [1/4 to 1/3 cup kosher salt]
2-3 Tablespoons apple cider vinegar  [1/4 cup apple cider vinegar]


As you can seen, most ingredients are an approximation. I like celery and tend to add a little extra, you can adjust the amount to taste.The important ingredient to not leave out is the apple cider vinegar, it helps draw the nutrients out of the bones.

Multi-tasking: pressure canning on the left and
making the next batch of bone broth on the right.
Peel carrots, onion and garlic.
Cut carrots and celery into 2 to 3 inch segments.
Thicker carrot segments can also be halved length wise.
Halve garlic cloves.
Add all ingredients to a large stock pot.
Bring pot to the point of boiling and then reduce to a low simmer and simmer for 3-4 hours
(You may take out the bird when fully cooked, remove all meat to save and place the carcass back in the simmering pot, but I usually simmer the full bird the entire time and then use the meat for chicken & dumplings, soups and stew.)
Remove bird, allow to cool enough to pull the meat from the bones, you will notice the bones are very brittle.
I thought I was well stocked with canning jars,
but I needed to add some to my pantry for
this canning session.
Remove vegetables from the broth, mine all go to feed my worm farm except the onions which worms don't like.
Strain the broth. I use a mesh sieve, but you can use cheesecloth if you prefer a clearer broth
If canning, pressure can at 10 pounds pressure (adjust for altitude) 90 minutes for quarts, 75 minutes for pints.

This must have been one of the first turkeys....
because I am still smiling :-)


Thursday, October 22, 2015

Wait for it.....

Using a food mill to process some of our tomatoes into
tomato soup for canning. We also dehydrated more of
our produce this year as well.
With temperatures often in the high 90's with close to 100% humidity, we are not very motivated to tackle new projects in the summer unless they are absolutely necessary. The daily chores get done, albeit at a slower pace but most everything else making its way onto our to-do lists is placed there with the caveat of 'wait for cooler weather'. That said, we have had a busy summer of gardening and canning but even that required some waiting for a different reason. This spring we found ourselves with a somewhat altered mantra of 'wait for the rain to stop' which was then quickly followed by the usual 'wait for cooler weather'.

So, with my love of lists, I decided this blog would enumerate the various times we have found ourselves waiting over the past few months, sometimes successfully and sometimes not.

Note the weeds in the center of this picture
are taller than the rake to the right of them
Weeds be gone...or not
We do not have a yard per se - no grass, only weeds and rocks. Each spring Alan has a two-part regimine to prepare what we call the yard for the upcoming summer. He sprays the entire area with Permethrin to control ticks and also with a defoliant to control the weeds. The defoliant instructions require the foliage be dry when it is applied and that there be at least 3 days before the next rain.

Well, if you recall from my blogs this spring and early summer, it was a very wet spring. We had rain so often, we were never able to apply the defoliant before I got my gardens planted. We considered using the defoliant later on in the summer as the weeds began overtaking various areas around the house, but were afraid the spray may be carried over into the various gardens. So we decided to live with weeds as the grew, and grew .... and grew.

The luffa qourds are flourishing again this year.
Now I just need to wait for them to dry on the vines.
Then comes the fun of peeling the dried skin away
to get to the luffa 'sponges'.
I pulled and chopped some that became a nuisance on the pathways to the gardens, etc. but those that were in outlaying areas were allowed to flourish. Some of these were actually very pretty with 6 foot stalks filled with small flowers. We also commented that we had a lot of bee and butterfly activity for pollination this year in the gardens as well as a lot less insect infestation destroying our produce. so maybe there were some benefits to living a bit more on the wild side.

Waiting for the harvest... or not
You may recall that we expanded the gardens this year by adding another container garden a bit further south of the house. And also that again due to heavy rains and other interruptions we managed to plant both the south and bottom gardens but did not get much in the north garden which is our main area of raised beds. Despite the near empty north garden, our gardens did quite well. I planted several new items this year and I found my self waiting for them to ripen so I could try them.

First were my Mother Mary's Pie Melons. I had read that these were good to mix with apples when making a pie and decided to try growing some even though I have not had much luck with other melons in the past. These melons grew quite well, but as I had never grown them, or even seen them before, I was not sure when to harvest them. There were several coming on at once and I picked one as a test subject when it started turning yellow, I then waited a few days and then picked another from that group that had ripened further to a full bright yellow. While the first one had seemed a little under ripe when I tasted it, the second one was more flavorful but a little mushy  I decided the optimum time to pick them was just as they were turning completely yellow, at that point they have the firmness of an apple with the flavor of a very mild melon.

Guess which Candy Roaster squash
I picked first (and a bit too early).
As other fruits and vegetables ripened over the summer, I discovered I always have a problem with the idea of  wait for it. Whether it was tomatoes, onions, blackberries, candy roaster squash or anything else that was ripening in the garden, I would always pick the first ones  a bit too early even after I had told myself I needed to wait a bit longer.

Ginger was another new plant I was growing this summer. I knew it had a very long growing season and I kept telling myself  'not yet' as my fingers kept itching to pull it out of the dirt to see how it was growing. Finally in late August the plant was large and leaf and I could see one of the rhizomes (the ginger 'root') starting to stick out of the dirt a bit. I could wait no longer, I grabbed hold of the plant and pulled it out.  I was happy to see a long row of rhizomes that were growing, but in all honesty, I had once again harvested too early and I quickly stuck them back in the ground in hopes they would continue growing despite my rude intervention. I am happy to report I have since harvested said plant and it had grown a bit more.

After pulling my ginger a little too early
I re-planted it and it grew a bit more.
An interesting side note on my ginger - I bought a 'hand' of ginger from the produce department at the local grocery store. I then soaked it for a couple hours to remove any growth deterrent that may have been applied. I then planted the store bought ginger as an experiment and it grew quite well. I am hoping to give it a longer growing season by starting it indoors over the winter.

Waiting for the birds to return... but not the raccoons
I love feeding the birds throughout the fall and winter. We get quite a variety and we always have several feeders and suets hanging from the deck rail and from the eaves of the house outside our living room windows. However, we have an ongoing war with the raccoons to keep them from ravishing the feeders. I can put up with the squirrels as it is quite fun to watch their antics as they hang upside down on the feeders, but the raccoons do their plundering at night and are much more destructive.

Alan working on the new Pulley system
for the bird feeders.
Alan had constructed retractable poles that are attached to the deck rails for hanging our feeders. We pull the pole in to fill the feeders and then push the pole back out so the feeders are about six feet out from the deck. However, we will still hear a raucous at night and when we shine a light out on the feeders there will be raccoons nimbly walking out the pole to enjoy a midnight snack and we awaken the next morning to empty bird feeders. This year we devised another plan to hopefully thwart the pesky plunderers. Alan rigged a pulley system like the one I hang our laundry on. We now fill the feeders, attach them to the line that stretches from the house to a tree about twenty feet from the deck. Now comes another wait. We are waiting to see (1) if the raccoons will attempt to reach the feeders (2) if the squirrels will be able to traverse the line to get to the feeders and (3) if the rig will be able to hold the weight of the full feeders (and possibly the additional weight of squirrels).

Waiting for water... really
After all the flooding I blogged about a few months ago, it's hard to believe that we have actually been waiting for it to rain for several weeks now. We have two tanks we use on a daily basis. The tank outside of our utility room which we use for water in our utility room (i.e. laundry) and also further filter to place in the holding tank for our kitchen use. We have an outdoor hose attached to this tank as well to use for watering the south and bottom gardens. The other tank designated for daily use is the one outside of the bathroom which supplies water for showers and flushing the toilet.

We have two other water storage tanks. One is under the front deck, has a pump attached and is used to water the north garden. The other is behind the house, near the utility room tank and is used as a reserve storage. Our water supplies were getting so low in the two daily-use tanks that we called upon the other two tanks as reinforcements. Since I had not fully utilized the north garden this year, that tank has been full all summer. This past week Alan transferred its water to the bathroom tank.

When we do get a good downpour, the utility room tank is filled and overflowing in just a couple of hours, so last week we decided to plumb the utility tank and the reserve tank so that they will act as one larger tank. This was a good time to do it as we needed to raise the utility tank a few inches so they would both be at the same level and thus fill evenly. The utility tank was nearly empty so we were able to power wash the inside, even though that meant using more of our dwindling water supply, and then raise it up to be level with the other tank. With the tanks plumbed together, the gutter still empties in the utility tank, but the water flows freely from that tank to the reserve tank so they fill (and empty) as one container. Well, that is the theory - we are still waiting for rain to see it in practice.

Waiting to start some new projects... chicky-chicks (hopefully)
We have several projects in the planning stages that will boost our self-reliance. All of these take place on more out-lying areas of the property so we are waiting for the end of chigger season before starting construction. These include a chicken coop, rabbit hutches and an orchard. I am writing about these upcoming projects in hopes that it will spur us on to get them completed this year.

There is an old structure at the north end of the property that we graciously refer to as 'the cottage'. We were told that it was built as an enclosed porch that had been added to an RV that had been parked there at one time. Our plans are to rehab this somewhat decrepit structure into a chicken coop. It is large enough that we have plans to build rabbit hutches inside of it as well. We will also add a run for the chickens that they can access from the coop.

There is currently a hole in the roof that we are going to cover with the corrugated sheets that are made of transparent fiberglass that are sometimes used on green houses, this will supply sunlight for the rabbits.  Due to fewer hours of sunlight, chickens tend to slack off in their egg laying in the winter. Many people have lights in their chicken coops that they use to extend the hours of light the chickens receive to keep up egg production. Our plans are to 'sacrifice' a few of our original, smaller, solar panels from our house system to set up a smaller solar system for the livestock.

As for the orchard, I have a list of about a dozen dwarf fruit trees I want to order in this fall. There is a clearing at the north west corner of the property that we want to fence in to establish the orchard. We had originally planned to plant the orchard last spring, which would have been wonderful since we had such a wet spring, but funds were not available before the ordering cut-off date for the trees. The fall ordering window is now open, so hopefully there will be funds available before the winter cut-off date. However that leads us to one final thing we are anxiously awaiting....

Turkey Palooza... our annual family extravaganza
Each year we have an extended (week long) celebration with our kids and grandkids. We rent a house big enough to hold us all and have a week filled with love, laughter and lots of quirky traditions. The past few years my parents have also been able to join us and they get to meet a new great-grandchild each year. This year's house is near LaCrosse, Wisconsin. The amenities include a 4-season room with heated floors and an out-door hot tub, but the extravagances I am most looking forward to are the washing machine and shooting range!

My next blog will talk about some new tools we recently purchased to help with our fall chores as well as some new hobbies aimed to improve our self-reliance. But you will just have to ....wait for it.

Tuesday, August 11, 2015

The Next Generation of Garden Pitfalls

Every year, despite my claim from the previous year that 'Next year will be different', our garden ventures seem to hit the same pitfalls. Actually, I can't really call them pitfalls as the the largest 'garden issues' are the result of grandchildren. Specifically the increase in the number of grandchildren we have. Let's see how the 2015 garden saga is playing out.

January(ish)
As usual, I started getting the 'itch' in early January. The Rare Seeds catalog arrived in the mail from the Baker Creek Heirloom Seed Company. Even though I had a supply of seeds that I saved from last year's garden, along with seeds I had received from friends, I began perusing the catalog and their web site for new varieties I wanted to add to the gardens this year. I had plans to add a new garden area and was excited to expand the types of produce we would be harvesting this year.

Based on my notes from last year's garden, I knew I wanted to start my seeds earlier this year - both those I started indoors like tomatoes, peppers, and cabbage and those that started directly in the garden like beans, onions and carrots. Since our annual addition to our grandchildren was due in May I decided I better make up a timeline to make sure everything was in the garden before we headed to Kansas City in mid-May for the birth of grandbaby #5. My planting scheduled looked like this:

The Location for the Newest Garden
(aka the Bottom Garden)
Early March - begin start seeds indoors
Early April - have all indoor seeds started
Mid April - Prepare the new garden area (designated the Bottom Garden)  and start bringing in loads of garden mix soil for the new containers as well as the raised beds in the North Garden that did not get filled last year due to 2014 'garden pitfalls' (i.e. the birth of grandbaby #4). This will include moving the tires I used in the South Garden down to the new growing space and re-arranging the South Garden to include more containers for tomatoes as well as some additional pallet beds and wading pool beds. I plant my luffa gourds and squash in the tires and let them trellis on the feed lot panels that surround the garden. Since we recently moved the solar panels into the South Garden I need to make some changes to make sure no tall or vining plants will cast shade on the panels.
Hardening Off the Young Plants
Mid to Late April - 'Harden off' indoor plants by placing them outdoors several hours a day and direct sow remaining seeds in the various raised beds in the North Garden.
Early May - Transplant all indoor plants to gardens and set containers in wading pools as a watering system for while we are in Kansas City.

Well, that was the plan... I had it all scheduled out to work around the annual garden pitfall who was due to be born on May 16th. As the daughter who was this year's provider of the new grandchild tends to pop them out a week early, I also had plans to bump my garden schedule up a bit just in case we needed to make the trip the first week in May. I had this covered with a contingency plan. Well, that was the plan...

The First Load of Dirt for 2015
Mid-April
Everything is going as planned and we're even a bit ahead of schedule. The Bottom Garden has been cleared of rocks and small trees, the landscape fabric is covering the entire garden area and the feed lot panels are in place. Some of the plants that were ready  have been transplanted to the containers in the South Garden and we have brought in our first load of dirt for the year. I am anxious to finish out the Bottom Garden so this first 2 cubic yards of dirt is used to fill the containers, tires and raised beds in the Bottom Garden. Last year we learned that a pick-up load of dirt does not go as far as you think it will. It seems to be never ending as you shovel it into 5 gallon buckets and then lug said buckets into the garden and dump the contents into the various containers and beds, but after what seems to be hundreds of such trips, your truck bed is finally empty yet many of your new garden planters are still empty as well.

I am also experimenting with growing
ginger this year. I bought ginger root
at the grocery store and it is growing!
My thought process at this point is to transplant as many seedlings as I can so that none get left in their little starter beds should we need to leave earlier in May (the contingency plan). So, while we still need to get another load of dirt, if I am honest with myself I know it will be at least 2 more loads of dirt, to complete the Bottom Garden and finish out the North Garden from last year, I make the decision to hold off on bringing in another load until after I plant all I can with the load we just finished hauling. The dirt that was still needed was mostly for the direct sown seeds like beans and cow peas and I could plant them later on if need be, after the impending garden pitfall arrived. OK, more honesty, I was probably using that as an excuse so as not to have to move more dirt around for a few days.

I quickly filled all the available containers and beds with my transplanted seedlings. I still needed to fill some containers in the Bottom Garden to fit in the last of my starter plants so I started stealing dirt from the raised beds in the North Garden that I had used last years for beans and cow peas. Since bringing in more dirt for that garden was the next thing on my list, I would just re-fill those beds at the same time. Yes, I was procrastinating once more on going to get more dirt, but this was a quick solution to finish getting my plants into the ground.

Late-April
No more putting it off, time to go get another load of dirt. It's April 23rd and we have over three weeks before we head to Kansas City or maybe more like two weeks if this baby decides to follow in his brothers' footsteps and come a week early. We will go get more dirt today. Well, that was the plan...

Weyland Sage
(aka Garden Pitfall 2015)
That morning our daughter calls us from the hospital, the sonogram she had that morning showed there was not enough amniotic fluid around the baby and the doctor said they would be inducing labor immediately as the baby was at risk.We quickly pack and leave the garden to fend for itself.

Baby Weyland was born a preemie, one day short of what is considered full term, but all was well. We stayed in Kansas City for a week or so and then it was time to head back home to see what was left of the garden. We were pleasantly surprised to find everything had survived , we were thankful that there had been enough rain while we were gone to keep everything watered.

Early-May
With the annual garden pitfall's safe arrival, we can now get back on track with our garden plans. The advantage of the early arrival is that we are back to the property earlier than expected. In fact, we arrive back home about the time my schedule shows us heading to Kansas City. Now, to get that second load of dirt and fill up all the raised beds in the North Garden. Well, after the rain stops, we didn't want to haul and shovel mud....

Mid-May
Well, after the rain stops....

Late-May
Well, after the rain stops....
You can refer to my last blog post, Better Build an Arky-Arky to read about our unprecedented rainy season this spring. Oh, and we also had an unexpected trip in May. One Sunday morning in May we get a call from our oldest grandson in Kansas City - big brother to Baby Weyland. I answer the phone to hear Zeke's plea of "Grandma, we need help!". It turns out that Weyland was not allowing Mom & Dad to get any sleep and they decided it was time to call in some reinforcements - Hammy & Poppa could watch the two older brothers so that Mama could catch some sleep during the day when Weyland was asleep, then she could get up at night more and give Daddy a chance to get more sleep as well. The plan worked great and we got to spend another week playing with the grandsons - always a treat.

The candy roaster squash starting to
trellis on the feed lot panel.
Early-June
We return to the property, but it is still raining. At this point, I start rethinking my plans for the North Garden. What had been my 'showcase' garden last year was now my dilapidated after-thought of unused beds, beds that had their dirt stolen from them and a few beds with odds and ends planted in them - plants that had still needed a home after I ran out of room in the South and Bottom Gardens.

I told myself that the Bottom Garden was a great success, that it and the South Garden were well stocked, and I managed to convince myself to let the North Garden languish this year, to not plant the seeds I had planned for these beds, to wait until fall to get more dirt. In a month we would be heading to Kentucky to help our daughter with her annual sales event and then heading from Kentucky straight back to Kansas City to watch the two oldest grandsons for a week. That, along with the fact it was still raining and getting very hot made it easier to decide to abandon some of garden plans this year.

Instead I focused on the two gardens that were flourishing. Knowing we would be gone for two weeks in July, I kept up with the weeding and fed everyone healthy doses of the worm juice my worm farm has been producing.

One of the wading pools set up
to keep some of the containers watered.
Mid July
Once again we must prepare the gardens for our absence. As I was putting our smallest planters into the wading pools for self-watering I had an idea on how to do something similar with my larger planters. With the wading pools, I place an inch or so of water in them and then set my smaller pots in the pools. Besides the water I pumped in, the pools will also collect any rain water while we are gone.

I had been picking up gardening supplies on clearance to set aside for next year's planting - seed starter flats, potting soil, etc. One of the items I bought were a dozen or so very large planters for $5 each. When I realized these new planters did not have any drain holes yet, I decided to use them like the wading pools. I placed my large containers which hold tomato plants into the even larger clearance planters, thus creating a reservoir for watering my larger plants while we were gone as well.

The dill did not survive, but the
Honeydew Sage is making a come-back
Late July
As we returned home from our two weeks of 'vacation', I was anxious to see the state of our gardens. Would anything be ready to harvest? When we had left there had been small green tomatoes. Would anything have died? We have been having a heat wave this summer.

As we pulled up our driveway I saw bright red tomatoes hanging in the Bottom Garden. As soon as the truck stopped, I hopped out and did my rounds to all the gardens and was pleased with the state of almost everything. A few of the herbs had died, along with my cabbages, which I have yet to successfully grow to completion. The three types of ground berries I had planted were also in a pitiful state, but that was because I thought I would give them a head start by starting them indoors only to later learn that they do not transplant well. It is best to just scatter their seeds directly on the soil. We will try those again next year, item one to order from Baker Seeds next January.

The South Garden on our return
On the bright side, I had over a dozen tomatoes ready to be picked and only one that was over-ripe as well as some huge candy roaster squash that should be ripe in a few weeks. I have since picked another 2 to 3 dozen tomatoes and am in the process of cooking down and canning tomato soup. So far, these have all been my German Strawberry tomatoes, that Amish Paste tomatoes are just starting to ripen now.

So, in conclusion of this garden saga, I would say this has been the best garden season yet in our Ozarks adventure. The season is not over, the harvest is just beginning, but the next generation of garden pitfalls did not wreak havoc despite his early arrival. On second thought, maybe I should change the title to "Garden Pitfalls - The Growing Generation". I wonder if there will be another new little garden pitfall next year?

The Growing Generation of  Annual Garden Pitfalls
From Left to Right: 2014 (Connor), 2012 (Hanna), 2015 (Weyland), 2011 (Ezekiel) and 2013 (Ellison)


Thursday, June 4, 2015

Better Build an Arky-Arky

About 15 feet to the north of our house.
There is no stream here, this waterfall was just
from run-off down the hillside.
This entry is more photo journal than blog. We wanted to share some photos of what our spring has looked like this year. While we are not in the same boat as Texas, we have had a lot of rain this spring. I was doing some checking online and in the month of May we had 21 days with rain and the total for the month was just over 13 inches. I checked and the average rainfall in May is 6 inches.

The year we moved to the property was a drought year, as we explored the area we saw lots of dry creek beds and gulches, in fact there were some areas we didn't even know occasionally had flowing water until the following February when we first experienced spring rains in the mountains.

With all the rock and clay comprising steep slopes down into valleys, lots of rain means lots of run-off. With the huge rainfall totals this past month, the ground quickly became saturated and then everything falling from the skies became run-off. By the last week of May we were having 'Flash Flood' alerts pop up on our phones multiple time a day.

While our place is never threatened by flooding, we do occasionally  get a 'seasonal' stream running down the mountain on the south side of the house. There is a small rocky ravine that water funnels into there. This year we had a rather impressive waterfall just north of the house where there is no seasonal stream. These pictures show the run-off coming down the hillside.

This is a close up of a section of that
run-off waterfall. The reddish wood is
our deck rail. There is not even a
seasonal stream on this side of the house 
I use this pallet at a low section of the
path that goes to the north garden. It spans
a small dip that fills with damp leaves in the fall.

Fording the run-off as it crosses
the north end of our driveway
We decided to drive a longer route into town one day to view some flooding along the north end of our road. There is a stream that meanders along the length of our road and if we head north the road does not climb out of the valley as it does when we take our usual southern route. We had taken a walk heading north and saw a lot of wash-out damage and that is what prompted us to drive the north and circle around into town. Most of the pictures of flooding are from that drive.


A neighbors driveway with the
flooded stream flowing over it.
We had to ford this as we drove
north on our road.
This was our road when we headed south.
(Our usual route into town)
The stream that is usually a trickle
meandering alongside our road.
Once we reached town, we stopped at a riverside park.
The river, along the rock cliff is usually not visible
from here as the bank drops off from the grass.
This is a three foot high concrete weir that is dry
all summer and has a trickle going over it the
rest of the year. You can see a tree stuck on it.

The rain was coming down too fast for the water
to drain out of the various container gardens.
My pools of onions looked like rice paddies.
All this rain has also wreaked havoc on our gardens as well. The raised beds drain fairly well, but all the containers I use in the south garden were flooded multiple times this spring. All my containers have holes for drainage, and they all worked well last year. However, with the huge downpours we had last month, the drainage holes could not keep up with the rate the rain filling the pots. I even went out in a middle of a downpour to drill holes above the dirt line of the wading pools and various containers to help drain the standing water.

This cat, that lives up the road from us,
decided to head for higher ground.
The good new is that we have had no rain in June (yet). We no longer have a waterfall rushing down the side of the hill or standing water in the gardens. The bad news is my gardens already need watered! The raised beds, buckets and pots I fill with garden dirt drain and dry out much more quickly than if I could actually plant in the ground which means that even with a month of flooding, after three rainless days I have to go out and water the gardens .

Monday, May 11, 2015

If You Do What You Love, You'll Never Work A Day In Your Life

Reggie, our wood burner , is a real multi-tasker
 with his chore list. Here you can see him 
(1) heating the house, (2) humidifying the air, 
(3) heating rocks to warm our worms, 
(4) raising two loaves of sourdough bread and
(5) keeping our seed beds warm for germination.
Several people have asked how we manage both our homesteading work and our real work - that which provides our income. We have also been asked how our day-to-day life has change over the last 3 years, that is, how things have evolved since we first moved to the property three years ago. Yes, it has been three years.

Back in May 2012, Alan wrote a guest post describing a typical day on the property. It was fun to read back through that and reminisce about the good old days when we first jumped off the grid.

But, for those who are curious, this post will give you an idea of what a typical day is like now.

The first thing I realized when thinking about how to start this entry is that there really isn't a typical day. There are however daily chores, semi-weekly chores, weekly chores, monthly chores, etc. and all of these can vary from season to season. So, I think the best way to paint a picture of our current off-grid-life activities is to use a list of various chores that fill our days. I will be focusing on the off-grid centric chores - those that pertain only to this lifestyle, and also those common daily chores that we now do in a different manner since we have unplugged from 'normal' society.

Daily Chores
Water - Our water now comes totally from our rain catchment system. If you have been following our adventure from the start, you may recall that we started by filling water jugs at a car wash half an hour away. Then we learned of a spring 20 minutes away, so we started driving there to fill an 275 gallon IBC tank we kept in the back of our large pick-up. We have not made that trip now in almost two years. We also used to manually pull water out of our well by lowering a special bucket (torpedo bucket) down the narrow well pipe to the water 120 feet below. We have not done this in over 1 1/2 years. Both of these options are still available to us if we find ourselves in a drought that depletes our rain water supplies.

Using the Sawyer Filter for our
potable water supply.
We currently collect water off three sections of our roof. A tank outside the utility room, a tank outside the bathroom and a tank under the deck on the north side of the house that is only used for the North garden. Each of these tanks holds about 275 gallons, and we also have one additional reserve tank behind the house that is not connected into the collection system. When our catchment tanks are full and there is more rain in the forecast, we transfer water into this fourth tank from the utility room IBC, it acts as an extra holding tank to use during dry periods. We have also installed a 55 gallon holding tank inside the house to be used whenever the water lines freeze in the winter.

Our water system for the kitchen, which is behind this wall.
Our daily water chore is the filtering of our collected water to maintain our potable supply. We chlorinate the collection tanks and use a whole-house coarse type filter as we pump water from the tank outside the utility room, but for potable (safe drinking) water we run water through our Sawyer water filter. In the past we stored our potable water in marked 2 1/2 gallon bottles in the utility room that we would then use for cooking, washing dishes and drinking. This winter we installed a small water system for the kitchen. We now put the potable water into a 15 gallon holding tank that is connected to a pump and a water heater. This system now pumps potable water (both hot and cold!) to the kitchen sink. No more carrying all our water into the kitchen and heating it on the stove to wash dishes. The hot and cold water comes right out of the spigots - image that!

The tubs in the sink basins cut down
on the volume of water we use.
Washing Dishes - I wasn't going to include this daily chore in the off-grid list now that we have hot and cold running water in the kitchen, but there are still off-griddy elements to washing the dishes. We still place plastic tubs inside the sink basins. These tubs are a couple of inches narrower than the sink basins in both directions and thus we need less water to fill them compared to filling the sink itself. We also make sure we don't just keep the water running to rinse off dishes. One of the basins holds a tub of hot soapy water and the other holds a tub that starts out empty. We place the washed dishes in the empty tub. Once there are a few dishes waiting to be rinsed we turn on the water, rinse the dishes and collect the rinse water in the tub. As the rinse water accumulates we can use it on subsequent dishes without running more water out of the kitchen tank.

The thought we put into conserving our water supply comes as second nature to us now, in fact when I am back on-grid I find it now feels very decadent to keep the water running while brushing my teeth. We recently read an article about water usage that stated the average person uses 60 gallons per day for all their water needs (drinking, cooking, washing, laundry, toilet, shower etc.). So we added up our water usage for a month and divided by 30 days, and came up with 16 gallons per day!

Power- Our solar system really doesn't have any daily maintenance requirements, however we do find ourselves monitoring our power supply on a daily basis - seeing if the batteries are fully charged, how much power we are currently using, etc. On sunny days, the batteries are usually fully charged before noon and the system goes into float mode - basically topping off the batteries and throwing away a lot of power. At that point we try to work on projects that will use up some of that excess power. I will run my dehydrator, which is a power hog and only gets used on sunny days, we will fully charge computers, phones, rechargeable batteries etc. and also work on projects requiring power tools.

A few months ago we upgraded our charge controller with the addition of a unit called the 'Whiz-Bang Junior'. The charge controller is a black box that is connected into our system between the solar panels and the batteries, it's job is basically to regulate the amount of power the solar panels are dumping into the batteries. The Whiz-Bang Junior provides more options to control and fine tune the feeding of the batteries. Alan has an interface on his phone that connects via the Internet into the charge controller, so even when we are not at home we can check on how the batteries are charging.

Work Work - We tend to refer to our professional jobs as 'work-work', as in "Do you have any work-work you need to get done today?" Both Alan and I have computer related jobs that we work from home. On a daily basis we have the normal day to day business correspondence along with writing computer code for whatever project(s) we are currently working on. Sometimes this work can take up our entire day except for what we absolutely have to get done on the property, while at other times we may be in between projects and just check our email several times throughout the day to make sure nothing has popped up that needs to be handled. The unpredictability of our work-work schedules leads us to strive to keep everything else in our life as flexible as possible. That way, if it ends up one of us needs to put 12-18 hour days in on a coding project we can do so without feeling like the rest of our world is falling apart.

Seasonal Daily Chores - From October through March carrying in fire wood is a daily chore. Our deck stretches the length of our house and is about 5 feet off the ground. We stack our supply of  firewood under the edge of the deck. Our daily routine is that Alan will go down to the stacked wood and  place the supply for the day up on the deck. I will then carry it into the house and stack it by Reggie, the wood burning stove. Another daily chore during this time period is sweeping up around our indoor wood stack and around the wood burner.


I start many of our garden plants indoors and until
it is warm enough for them to go outside they
sunbathe in our one south-facing window.
Mid-February to mid-April is seedling time, step one in the garden preps. In January I start looking through seed catalogs and planning our garden. The first part of  February I start making a list of all the seeds we have saved from last year and new varieties we have purchased. Then I determine which seeds need to be started indoors so that they are ready to go into ground as healthy young plants after the last frost. Once various seeds are started indoors, the daily chores begin of watering, moving them around so they all get some sun throughout the day, and transplanting them to larger containers as they grow.

I am expanding my gardens yet again this year and I have started way more seeds than in past years, it has been a busy daily process of trying to keep everyone happy, especially when it is too cold, too rainy or too windy to set the baby plants out to get more sun. We only have one south facing window in the house so I crowd all the flats around my kitchen window when I can't put them outside. All the gardening books state that seeds and young plants need to be started under grow-lights, but that is not an option when living off-grid. Therefore, I tend to move my flats around a lot on a daily basis - either shuttling them all outside if it is warm and calm enough and then bringing them all back in at night, or finding the sunniest places in the house and giving them all a turn to bask in the sun coming through the windows.

From April through September the daily garden chores move outside. Watering is almost a daily occurrence, except for days when we get rain. The raised beds help cut down on the amount of weeding that needs done. Most days also include some other type of puttering around in the garden - building supports, staking tomatoes, checking for pests, and then from June through October harvesting whatever is ready.

Semi-Weekly & Weekly Chores
You can see samples of my sourdough bread in the upper left.
This array of sourdough goodies was in preparation for a talk
I gave on sourdough.
Baking Bread- Sourdough bread has now become a staple at our house. The recipe I use makes two loaves and this will last us 5 or 6 days. In the winter the bread will keep in the bread box for this long as sourdough keeps longer than yeast breads. But, as the weather has started to get warmer, I keep the second loaf in the fridge until we are ready for it. We often have sourdough toast for breakfast using a stove top toaster. And I have learned that if I ask Alan what he would like for lunch the answer will most likely be grilled cheese on sourdough.

Feeding Hooch- While doing some research on sourdough for a talk I was giving, I discovered that many people name their sourdough starter. I then named mine Hooch because that is what the liquid is called that forms on top of the sourdough starter in between uses. The longer the sourdough sits between feedings the more hooch is generated. And yes, the hooch is basically alcohol, but not drinkable. Some people pour the hooch off, but it is perfectly safe to stir the hooch back in at the next feeding, I think it helps add 'tang' to the sourdough products. I feed my sourdough every time I use it, and since I make multiple sourdough items each week Hooch gets fed often enough through use. If, however, you do not use you sourdough on a weekly basis, you still need to feed it regularly as it is a living entity. Hooch's meal consists of equal parts of water and flour. These measurements should be by weight but I am not a stickler for accuracy. Since water weighs more than flour by volume, I simply add a bit more flour than I do water and Hooch has been perfectly happy with this diet for about three years now.

Laundry- Depending on our current water supply, I will do between 1 to 3 loads of laundry per week. Laundry is actually one of the more time and energy consuming chores, no just dumping a load in the washer and walking away. Here are the steps to complete a load of laundry:
1. Grate part of a bar of Fels Naptha into the laundry and add some Borax.
2. Use the hose in the utility room to add about 3-4 gallons of water to the tub.
3. Let water sit in the tub to dissolve the soap, then add clothes. (A load consists of 5-6 shirts or the equivalent in volume)
4. Use the washing plunger to agitate the clothes to make sure they are all thoroughly wet and then let soak for an hour or so. 'Or so' can be up to a day or two if I forget about them.
5. Use the washing plunger in earnest for about 150-200 strokes depending on how energetic I am feeling.
6. Remove clothes to a 5 gallon bucket and then run them all through the hand crank wringer that is attached to the utility tub.
7. Use the utility tub hose to rinse off the wrung out clothes while dropping them back into the 5 gallon bucket.
8. Run the rinsed clothes back through the hand crank wringer.
9. Hang the clothes out to dry.
10. Bring in the dry clothes and enjoy how good they smell.

Feeding the Worms - The worm farm survived the winter and the population is once again increasing. The worms are our composters and they produce worm juice to fertilize our gardens. I have two 'scrap buckets' (5 quart plastic ice cream pails) on our kitchen counter, one for the worms and one for the crows. Everything suitable for the worms goes into their bucket, everything else goes into the 'crow bucket'. Every few days I take the worm bucket down to their farm, dig a hole in their dirt and dump in the bucket contents for them to chow down on. On a side note, the crow bucket contains kitchen scraps that are not good for the worms such as bones and old bread. This bucket is dumped out in a designated area of the yard where the crows congregate during the day and raccoons and armadillo wander through at night.

Monthly Chores
Our  eight 6V golf cart batteries. Four series banks
of two batteries each connected in parallel.
(Each 2 batteries in series creates 12V and then these 4 pairs
are connected in parallel for storing our power.)
Battery Maintenance- The storage batteries in our solar system need to have their water levels checked regularly and the water levels need to be 'topped off' at this time. Our batteries are in a Rubbermaid storage cabinet in our utility room. We have 8 golf cart batteries that are lined up on two shelves in the cabinet. This used to be a two person job involving funnels, rubber tubing, a flashlight, dental mirror and distilled water. It was quite awkward checking the vent caps on each battery, especially on the upper level of batteries

However, Alan had a great idea on improving the process that has now simplified it to a one-person job by using a hand-pumped sprayer with a long modified nozzle for adding the water to the batteries.

Sanitize the Water Storage Tanks- This chore isn't exactly monthly, but is more dependent on when we have rainfall. Whenever we get new water in our collection tanks we treat them with chlorine. The tanks sometimes get treated in between rainfalls as well if there has been a long dry spell since the last rain. We do NOT use bleach.

Canning & Vaccu-canning - Again, these chores are not exactly monthly but are dependent on when there are sales on meats or dry goods, when we get low on some of our favorite canned items, and when we have enough produce for a batch of canning. I would say that on average I can once or twice a month and vaccu-can every couple of months.

Our home built Vacuu-Canner!
I know I have talked about my canning before, but I can't recall if I shared how we vaccu-can other food items. Vaccu-canning is a way to preserve our dry goods for a longer shelf life. This is especially helpful in the summer since no air-conditioning and a humid climate can cause little critters to appear in flour, etc. We saw a vaccu-canner at a self-reliance expo and knew we wanted one but we didn't have spare cash for the $420 price tag. So, Alan did some research and built one for us. Basically he converted a pressure canner to be the vessel to hold the jars to be vacuum sealed. By modifying the lid, a vacuum pump can be attached to suck the air out of the canner and thus the jars of dry goods are vacuum sealed.

Seasonal Chores
Applying Tick Repellent- By now, anyone who reads this blog knows my aversion to ticks as well as the abundance of them on our property. The first summer, we used a granular product that is spread over the ground and this worked quite well. However, since then, with our more abundant water supply and pressurized outdoor hoses, we have switched to applying a permethrin solution that is diluted and dispersed through a sprayer on a hose. We have hoses at both the north and south end of the house that utilize our water tanks and 12 volt pumps powered by the solar system. With these two hoses we can cover all the gardens and 'yard' with the tick repellent and one application in the spring lasts the entire season.

Preparing the Garden for Winter- Our growing season ends in either late October or early November with the first frost. After that, I remove all the plants from raised beds and container gardens. This year I also plan on keeping up with fall leaf removal from around the raised beds. I did not do that this year and has a lot of piles of wet, deteriorating leaves in the rows between the beds. I am also planning to dose the garden areas with worm juice throughout the winter to replenish the depleted soil.

We can adjust the angle of our solar panels seasonally.
Adjusting the Solar Panels- In summer and fall we need to adjust the angle of the solar panel to better line up with the sun. For the Harbor Freight panels on the deck, Alan screwed decking screws part way into the deck to act as 'stoppers' to hold the panels at the correct angle. For the Grape Solar panels, the frame Alan built to hold them is attached to the deck rail and is hinged so that the angle of the frame can be changed by adjusting the position of the concrete blocks that the frame rests on.

Dehydrating- This activity is not necessarily seasonal, but is again dependent on when I have abundant supplies of produce. I have ideas for a solar dehydrator that we hope can get built this summer. Until then, whenever I have stuff to dehydrate, I start off by using my oven with just the heat from the pilot light as a dehydrator, and then finish off the batch with 2 to 3 hours in my electric dehydrator. On sunny days, I can run this dehydrator off the solar system and still have excess power going into the batteries. As Alan claims to be chlorophyll intolerant, he does not eat a lot of the garden produce 'as is'. However he will eat the vegetables I add to soups and stews, as long as they are not overly-abundant. I have also started making various vegetable powders by dehydrating them and then running them through my mini food processor. This year, after I harvest my tomatoes, I want to experiment with making tomato soup from my tomato powder.

Well, that is all the basic off-grid chores I can think of for now. I am sure there are some I missed as well as new chores just around the corner.