First let me say I have struggled with this blog a lot. Not because of writer's block, but just the opposite. I always have so much I want to talk about when it comes to my gardens that I have a hard time sticking to a subject. My goal today is to introduce you to this year's gardens, then in subsequent blogs I will discuss various aspects of the care and feeding of our gardens throughout the season. And hopefully, in return, their care and feeding of us.
 |
The rabbits' salad bowls filled with foraged greens
from the property (weeds) and baby carrots that
were on sale at Aldi so they got a treat that week. |
As with every other year, we had a couple of expansions planned for this year, not only in the physical size of two of the gardens but also in the variety of produce we are planting this year. When we added the raising of meat rabbits to our self-reliance endeavors, one of the goals that goes along with this project is to develop a feeding program that does not require buying commercial rabbit feed. Our plan is to be able to grow and forage all of their food off of our land. This entails harvesting not only enough fresh food for them daily during the growing season, but also enough to dehydrate and store up for the winter months. This past winter we experimented with feeding a variety of store bought and home-grown produce that we dehydrated in addition to commercial pellets, and the rabbits preferred the produce. They often seem to prefer some of the dehydrated options over fresh ones. As we add in more and more produce, the adult rabbits often leave their pellets untouched between feedings. The young rabbits we are growing out to butcher still finish off all their greens
and pellets, but we are fine with that as we want them to reach a decent weight soon.
 |
| A raised bed of crimson clover. |
Honestly, I did not digress from my garden topic. I was just explaining the large influx of vegetarians we are now feeding. If I had not, you would probably be questioning some of the new items we're planting this year. For example, we have raised beds full of crimson clover, plantain and thai basil for the rabbits. Alan also ordered 10,000 dandelion seeds from Amazon.com, not for the rabbits but for the honey bees which will be moving in this May. We'll save that for another blog.
(As I am proof-reading this, we got a call a couple days ago that the bees were already set to be picked up and they are now moved into Clive, the hive on our property.)
I decided the best way to introduce the gardens, without going into a lot of details that I plan to cover in subsequent blogs is to give you a verbal, virtual tour as if we are taking a walk around the property and I am pointing out the gardens to you. I have also included a visual aid, as I was planning out our extensions this year I re-acquainted myself with an old friend - my graphics design program - to create layouts of each garden and I am also including links to PDFs of the schematic I created for each garden.
View Kitchen Garden PDF
 |
| A typical 'path' to the gardens. |
So put on some sunscreen and watch your step. I have been clearing some rocks in areas I consider pathways to the gardens and to the rabbitry, but it is a loosing proposition. I dig up the rocks that are sticking up, the ones that trip us if we're not looking, but given a month or two and a few rains others soon take their place. There are also quite a few roots that have broken the surface along the drive and the path, on occasion I have dug up a rock only to realize the empty space has now exposed the side of a root to make an even greater tripping hazard. We have recently spread cedar mulch in the rabbitry to smooth out the 'floor' in front of the cages and that has helped immensely.
 |
Sometimes we buy dirt by the truckload, other times
we pick up bags of top soil. Either way, it then gets
mixed with other ingredients before going into the
gardens. This spring, so far, we are up to 68 bags of
top soil - 2720 pounds carried, mixed, and dumped. |
The same is true inside the garden areas, it is so rocky there is no dirt. In each area we have cleared the ground of overgrown vegetation and all the large rocks. We then dug up as many visible rocks as we could to make the ground even and covered the entire garden plot with landscape fabric. The actual gardens are then comprised of raised beds and various containers. One area we are not self-reliant in is dirt. we have to bring all of our dirt into our gardens. In the near future I plan to write about how we make our garden soil.
Here we are at the first garden, we call it the kitchen garden. We originally named it the south garden, because it is on the south side of the house, but a couple years ago we added in the garden that is a little farther south down the slope. We considered calling that one the south-south garden but thought it might be confusing, and I liked the idea of having a 'kitchen garden'. Technically, this garden is not outside the kitchen door like the term usually refers to, but the kitchen window over the sink does overlook this garden. By the way, we now no longer have a south garden because we started calling the other garden the 'bottom garden' because the original section was at the bottom of the slope going down towards the road.
 |
| East half of the Kitchen Garden |
As we open the gate in the cattle panel fence, you probably notice all the pallets laying in this garden. These are all of our strawberry beds. We currently have three varieties of strawberries. The lion's share are Ozark Beauties, but last year I bought two plants each of Berries Galore and Ft. Laramie. We love the Berries Galore, they are a tiny little berries with super flavor. They hardly ever make it into the house, because of their size they are more of a little treat than a real food source. The Ft. Laramie are a bit of a dud and will probably be replaced with another test subject. The Ozark Beauties have been a great producer and taste great. We have also been able to propagate them with no work on our behalf. I had planted about eight plants in a kiddie pool two years ago. Last fall I had noticed the pool was really crowded so I moved an extra long pallet that some of our solar panels had shipped on into the kitchen garden, prepped it for planting and transferred all the berry plants from the pool. I only placed plants in every other row of the pallet so that they would have plenty of room to send out stringers to start new plants. It ended up that there were now so many plants in the pool I had to also use another normal sized pallet in order to transplant all the berry plants. However, with the plants all spread out this year they do not look as healthy as they did overflowing the pool last year. I am sure they will soon expand and grow into their new home.
 |
| West half of the Kitchen Garden |
Next to catch your eye are probably the dozen concrete blocks arrange in groups in this garden. They are all lying on their sides with the holes facing up and filled with dirt. This was one of last year's experiments as an herb garden. It was very successful with different herbs in each hole. So far this year I have not re-planted the herb garden but quite a few are coming back on their own - Italian oregano, orange mint, peppermint, spearmint, sage and thyme. I did use a few of the bricks to plant the last of my indoor starts, a couple peppers and marigolds, when I was trying to get everything in the ground one afternoon and ran out of dirt to fill more containers. I am calling it another experiment to see if the peppers will have enough room to grow in that limited space.
There are also a couple of tires in this garden. Some people frown at using tires for container gardening but I have never come across anything in my research to prove there is any harm in using them and they work great for vegetables like squash and pumpkins. Since you usually plant these types of seeds in 'hills' rather than rows, I consider each tire to be a hill. I place them along the fence line for trellising. I just planted a pumpkin in one of the tires, I don't even know what kind it is because it was given to me by a barista at a coffee shop we frequent. She grew it from seed but did not know if it was a pie pumpkin or not. But is does have a name, in fact other than the Seven Dwarfs (see my last blog) this is the only plant in the gardens that has a name. The pot the pumpkin came in was labeled 'Basil' so he is Basil the pumpkin.
The other tire has one of our ubiquitous luffa gourds. The first year of gardening I grew these on a whim. I had always thought luffas were sponges until I saw the seed packet for luffa gourds. That fall as I peeled the dried gourds, shook out the seeds and cut the fiberous gourd into hand sized 'sponges' I was hooked and I grow them every year. Last year we discovered the rabbits absolutely love to eat the luffa leaves, blossoms, vines and immature (2-3 inch) gourds, so this year we have tripled the number of luffas and hope to have them vining along the fence lines of all the gardens. They also blossom all season long and attract lots of pollinators so the honey bees should appreciate them, too.
All that is left to see in this garden are the tomatoes. The eight extra-large planters on the southern fence line have Amish Paste tomatoes. When I started looking for tomato varieties, I wanted determinates as I planned to can all that we harvested. Determinate varieties set all their fruit within a short time span while indeterminate strains spread their production out over the entire growing season. Amish Paste are actually inderteminates, but that is no longer a factor to me as I mostly dehydrate my tomatoes now. It is actually a plus that I do not have to process them all at once and these are a very meaty tomato that remind me of an overgrown Roma. The extra-large planters will hold two 5-gallon buckets of dirt. Many people grow tomatoes in 5-gallon buckets so this year I have doubled up my tomatoes in a few of these containers as another experiment. Well okay, I had more tomatoes than containers so I created another experiment, five Amish Paste are planted individually and six are doubled up in three planters.
Right next to the deck we have our second variety of tomato, Mariglobes. Five of these are planted in large planters which hold about a 5-gallon bucket worth of dirt and then another four are planted in half of a plastic 55-gallon drum that sits in the back corner of the garden. I will not call this an experiment, I just had way more tomatoes than expected thrive through my seed starting process this year. Without grow lights, I am always rotating my seedlings into my south facing window during the day for light and then move them over by the wood burner at night to keep them warm. I start more seeds than I plan to plant knowing I will loose some before it's time to move them outside.
Now on to the Bottom Garden, it's just a little ways down the hill but watch you step. There are a few big rocks along the path I could not dig up, I call these the icebergs - they may look like just a little pointed rock sticking up out of the path, but once I started trying to pry them up with a crow bar or the 6-foot pry bar. If they look to be larger than a bowling ball they are allowed to stay.
View Bottom Garden PDF
 |
The newest extension to the Bottom Garden.
You can see the water tank for the shed roof
on the slope above the garden. |
This garden has been expanded twice. The gate where we are entering used to be the upper edge, last year we expanded up the slope another ten feet or so and then this year we added the narrower 'ell' that goes further up the slope and has the kiddie pools on terraced steps. Look up the hill by the shed and you will see Alan added in another water catchment tote that gets rain from the shed roof. We can gravity feed the water down to this garden and Alan added in a 'T' and a second hose to go along with this year's expansion.
I forgot to show you our watering system in the kitchen garden. We use the water from our main tanks which are pressurized. We also treat that water so I always make sure not to water the kitchen garden for about 24 hours after Alan adds the chlorine powder to the tanks. If need be, I can always carry a bit of water up from the bottom garden in 5-gallon buckets if something up there needs watered right after the main tanks hve been treated because we never treat the tank connected to the bottom garden hoses.
 |
| This is the rhubarb I started from seed. |
I hope you're not getting tired yet, I will give you a quick synopsis of what we have here and then we can pop over to the North Garden. Down along the south fence in the original section we have mainly perennials. There are raised beds of ground cherries, elderberries, blackberries, raspberries and rhubarb. I just transplanted the rhubarb this last winter as it was in a bed that was blocking the entry to the new extension, I am glad to see it is doing so well. I started that rhubarb from seed two years ago and this is the first year for harvesting. I have been getting several stalks from each plant for the last few weeks.
 |
The cutting I took from the healthy black current plant
and transplanted to the pot on the right. |
There are a few other perennials besides the ones I listed in the raised beds. The two brown planters have black currents which are Alan's favorites. I planted them last spring and we lost one, but it looks like a cutting I took off the healthy one has taken. If all goes, well I will start a couple more cutting this fall. We also have another variety of elderberry in that plastic barrel ring. We go elderberry picking along the roadside every year, but I am excited that the 'sticks' I planted last spring have propagated so much. These are all domestic varieties that I ordered and I am going to try to start some cutting in the clearing across the road down by our creek this fall.
 |
| Grapes getting ready to blossom |
I almost forgot, turn around and you will see our grape vines. Sorry I don't know what kind they are. I bought them on clearance the first fall we were here and I planted them in the plastic totes. I really didn't think they would do well, but last year they had lots of little grapes until one morning I came down and they were all gone except one - it tasted great by the way. This year we will be taking some early defensive measures to protect the grapes from birds and critters. Look close and you will see all the tiny little blossoms that are in bunches where the grapes will be.
 |
The raised bed in the foreground are two types of beans.
The cattle panel fence is the grape trellis and behind that
are elderberries. The pots on the right are the black currents. |
There used to be tires all along the grape trellis, which is a full section of cattle feedlot panel like we use for fencing in all of our gardens. This spring I moved all the tires to various nooks and crannies around the garden to make room for these four raised beds. We were playing musical chairs as the raised beds came out of the North Garden to make room for some of the fruit trees. Two of these beds have yellow beans and two have red anasazi beans. As another density experiment one bed of each variety has two beans planted in each hole. I also have a raised bed each of Hutterite Soup Beans, Clay Cow Peas and Rice Cow Peas. I allow all my beans and cow peas to dry on the vine and store and use them as dried beans. I particularly like to use the cow peas in batches of soups and chili that I can in the fall. Alan is not a fan of beans and the cow peas are smaller. So far he has liked all the home made meals I have canned that include them.
The vines in those six tires across the path from the beans are already taking over that part of the garden. Those are my favorite vegetable that I grow each year - Candy Roaster Squash. These squash can grow to about two feet long and are banana shaped. They are a great tasting winter squash with a very smooth texture. I used to grow delicata squash as well, but they are so small the yield is not worth it. One of the differences between gardening for self-reliance and gardening as a hobby is that for self reliance you want to grow types and varieties of produce that will give high yields on a hopefully consistent basis. If I get three little delicata squash per plant (weighing 4-6 ounces each) vs.even just one candy roasters per plant (weighing 5-7 pounds each), the candy roasters are a much higher yield. Plus they are better tasting and the prep time for dehydrating is less because you would need to peel, clean and slice a couple dozen delicata to get the same amount of 'meat' as you would from one average candy roaster.
That raised bed at the bottom of the garden was just filled with dirt a couple days ago. I turned it into a second bed of ground cherries because our little granddaughter loves ground cherries. Last year I mailed her a package of them and also made her a ground cherry pie at Thanksgiving. So now that bed has been dubbed "Hanna's Ground Cherries".
 |
This view is from up in the 'ell' extension we added to the Bottom Garden.
As everything grows, I will include more detailed photos in my updates.
Right now, many would be just dirt and I wanted to give an overview. |
We have four varieties of tomatoes in this garden: St. Pierre, Roma, Italian Heritage and Rutgers. Some of these are on trial, especially the Rutgers which were iffy last year and only two made it to the planting stage this year. Last year I bought a few different heirloom tomato plants at a farmer's market. That way I could try out single plants to see if we liked them and then save the seeds to add them into our garden plans this year. That is also how I got the Italian Orange Bell Peppers that are in the pots between the bean beds.
These three pots over by the St. Pierre tomatoes have cayenne peppers. I plant cayennes every year, not because we use a lot of them but because I like how they look growing in the garden and also how they look dried whole and stored in glass jars. They make a nice gift. The favorite way I have used them is adding a few flakes to my pickled pineapple chunks that I can - yummy!
The tires over by the rhubarb have a new squash for this year called Trombocini. This one piqued my interest because it can be harvested as a summer squash and a winter squash. I have not found a summer squash that I like, and you can image how Alan feels about them (he claims to be chlorophyll intolerant, remember) but reviews say this one tastes better than zucchini. The reviews as a winter squash are not as glowing, but if it can't compete with my candy roasters - I am always looking for more rabbit food. And if the rabbits don't like it (they can be picky eaters), well some experiments are bound to fail.
 |
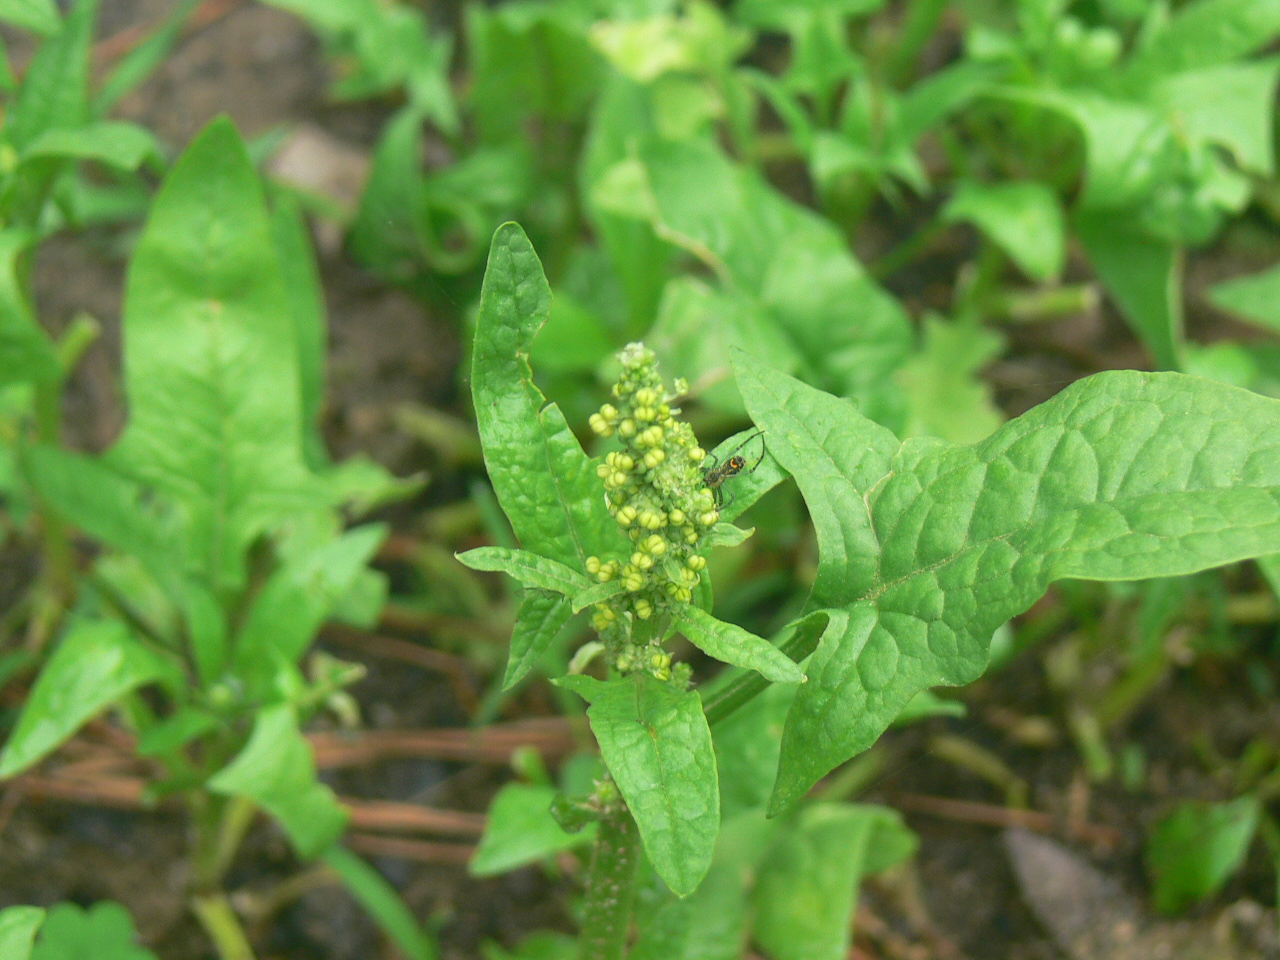
| Spinach starting to go to seed. |
Just a couple more things to see here before we head to the other side of the property. Let's head up into the new extension. As I was clearing this area, I terraced the slope so that we could have kiddie pools sit here on level(ish) ground. I started working on this last fall and, even though it wasn't yet fenced in, I planted kale and spinach in two of the pools in December. I have been harvesting micro-greens since mid-February (it has been a mild winter) and look, the spinach has just started going to seed. I am excited to see if I can successfully save these seeds, as well. The majority of our gardens are now planted from seeds we save from the previous year - another difference between self-reliance and hobbiest gardening.
I skipped pointing out a few of the tires, some have luffas, of course, and a couple have tomatoes as an 'experiment' because I ran out of large pots and I have never tried planting tomatoes in tires. I have one tire in which a monster resides. I have transplanted luffa plants into this tire several times and each time I came out the next day and at least one of the plants was completely gone. The ground was not disturbed, it was not dug up, there was no sign of a stem or leaves - it was completely gone. No sign it had ever been planted. If one remained, it disappeared without a trace by the next morning. After this happened three times, I decided to plant two tomatoes in that tire instead. As I planted them I did find the remains of a luffa stem just below ground level so something was breaking or chewing them off very cleanly just below the dirt and then either removing or devouring them. Anyway, the next morning I came out and one tomato plant was gone. To date, about a week has gone by and the other tomato is still there. I guess the monster decided it doesn't like tomatoes. I have now extended my experiments to include the monster and I have planted some luffa
seeds in the tire to see if the monster will allow them to sprout.
Okay, if you're not tired of the gardens yet we can head to the other side of the house to the North Garden, it won't take long, I promise. We can stop and say Hi! to the bunnies on the way. We can grab some of that spinach and kale because they are always looking for greens if we go into the rabbitry.
View North Garden PDF
 |
| East side of the North Garden |
And here's the North Garden. Last year it was very neglected, the path became over grown and this side of the house always seems to have more mosquitoes. That and the fact that I had only planted about half the beds was enough of an excuse for me to not make the trip over to tend to it as much as I should have. This year we have dedicated several of the raised beds to rabbit food so I will be coming over almost daily to forage for the rabbits.
The first thing you will probably notice is our Seven Dwarfs, the dwarf fruit trees we planted this spring. Six of them have leafed out and seem to be doing well. One, the bartlett pear, is still dormant and we are starting to fear it may not be viable. He has been dubbed
Sleepy. Other than the trees, most of this garden is raised beds and here is a rundown of what is currently in them:
 |
| West side of the North Garden |
Plantain
Swiss Chard
Black Berries
Red Salad Bowl Lettuce
Thai Basil
Red Russian Kale
Lemon Balm
Crimson Clover
Teddy Bear Sunflowers
Cinnamon Basil
Green Oakleaf Lettuce
Black Beauty Zucchini
There are also luffas in this garden and a new winter squash I am trying called 'Sweet Meat'. While I rave about my Candy Roaster Squash, I always like to have a second variety to fall back on in case one should have a bad year, another self-reliance contingency.
Well, that is where the gardens stand for now. I still have a few empty raised beds and smaller pots that are still available for planting. My plans are to add some marigolds and zinnias. The marigolds are critter inhibitors when I place the pots around the edges of the gardens and both types of flowers are treats for the rabbits. Come on back in a few weeks and I will let you know how we filled the rest of the beds and show you how everything else is doing.
I have certainly enjoyed this garden tour. It is the first time I have spent so much time in the gardens in April without a single tic, chigger or mosquito bite!