 |
| Bringing home garden supplies. |
If you ask Alan, he would say the title of this blog is an oxymoron as he claims to be chlorophyll intolerant when it comes to eating anything green. And, hopefully, if you ask my children whom I home schooled, they would say that the first word should be
palatable. However, I am currently experimenting with various horticultural options on our dirt-less property and some of my experimentation includes wooden pallets.
 |
| Berry bush in blossom! |
Last year we attended a workshop on raised bed gardening. The instructor started by asking how many people had moles in their gardens. A small percentage raised their hands, and he responded "Congratulations! That means you have dirt!" We were not so 'lucky'...
So, how do you attempt to garden when your land consists mainly of old hardwood forest and the small amount of open land is 75 percent rocks and 25 percent clay? As usual, I started by googling and first on the list was raised beds. You may recall that last fall I constructed a raised bed for some raspberry and blackberry plants I found on clearance, and I am happy to report that all the plants survived the winter, and are now sprouting lots of shoots and green leaves and even a few blossoms. This is now dubbed my berry patch.
There was also a raised bed 'of sorts' already in our front yard, near the road. The yard has a slight slope and the previous owners built up the lower edge (east side) with landscaping timbers, and filled in the north and south sides with landscape timber wedges so that the west side of the bed is the original rock and clay yard and the 'bed' extends east from there and gets deeper as it approaches the road. So the top soils is about two inches deep on the west side and 12 inches deep on the east side against the landscaping timbers along the road. This has become my first garden patch.
 |
Digging up bulbs to
make room for vegetables. |
This bed, while already established, had not been used for vegetables. It was filled with various flower bulbs and as spring arrived, more and more spring flowers started to pop up out of the ground. I got busy and started digging up all the bulbs as their plants began to appear. It took several weeks to complete this eradication as I would think I had dug everything up, and a few days later more would appear. The east side of the garden ends at a steep embankment that drops down several feet to the road. As I dug up the dozens and dozens of bulbs, I tossed them down this bank hoping that many will take root and form a spring flower bed along this embankment. So far, it looks like some of them are taking root.
 |
The Domed Deer Deterrent for
the young rhubarb plants. |
The first things I planted in the garden patch were rhubarb and asparagus. As these are perennials and can take over large portions of the garden if not kept in check, I wanted to establish their plots and set their boundaries. My rhubarb shot up very quickly and I had to quickly construct a make-shift deer barrier to protect the tiny shoots. This was solved with some chicken wire and tomato stakes. I am still waiting or the asparagus to make an appearance. I then planted onion sets and garlic in this bed as well.
 |
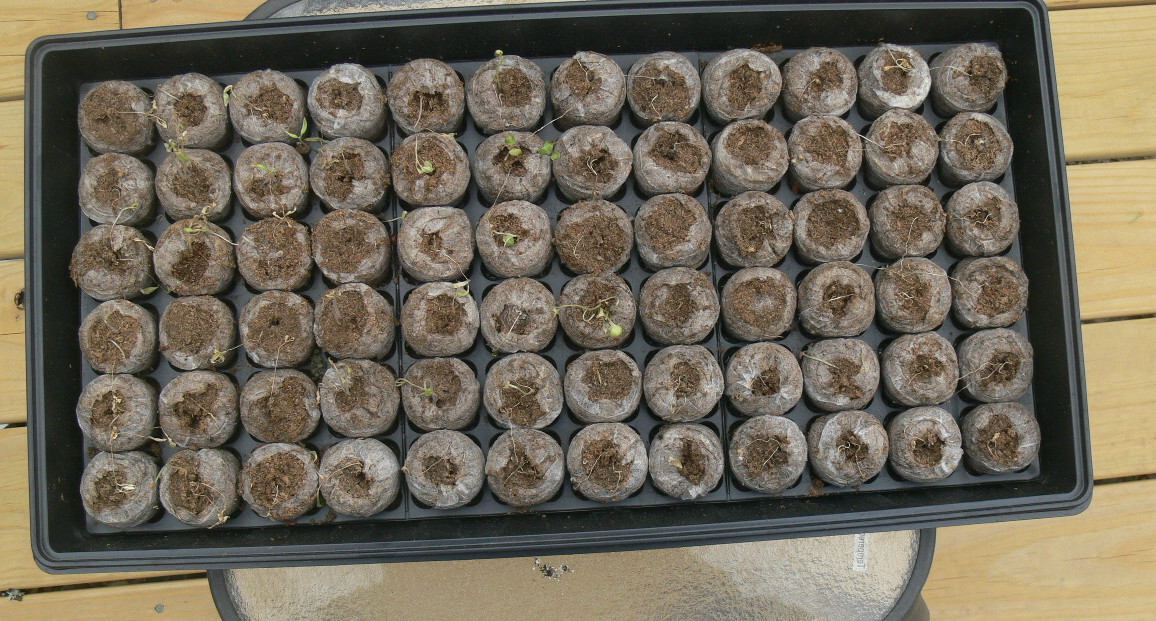
| Time for do-overs. |
While preparing the raised bed, I was also starting seeds in the house. I was a little to gung-ho and started the first batch too early, little did I know this was going to be a cold spring with frosts very late in the season. We even had snow in May, which broke records that were over 100 years old. Since I couldn't plant my sprouted seedlings outdoors when I had planned to, they became very spindling and many died, so I decided to start over with a new batch of seeds. I started peppers, tomatoes, celery, spearmint, acorn squash, cabbage and several other items as seeds.
 |
| Pepper plants in a pallet row. |
I then started working on the
palletable portion of my garden. My gardening research had turned up using pallets for gardening:
Turn A Pallet Into A Garden. I have obtained several pallets and, to date, I have constructed one pallet garden based on the instructions found at this link. This first pallet garden leans against our deck on the south side of our house, the same side as the solar panels.. This is my test pallet to see if the sun will be too strong there so I can determine if I can add more pallet beds, or relocate this portion of the garden to the east side of the house, which still gets sun, but not the full sun that is on the south side of the house. I planted two types of carrots (from seeds) along with peppers and celery (from my seedlings) in this part of the garden.
 |
Potato plants peeking out from the
first addition of soil and compost. |
My next experiment is a modification of container gardening. Someone had told me they had read about growing potatoes in a barrel, so I googled it and came up with a web site with instructions:
Growing Potatoes In A Barrel. Following the instructions, I prepared a 55 gallon plastic barrel by drilling drain holes and then added soil and compost. I planted eight pieces of seed potatoes and once they sprouted and grew a few inches, I started the process of adding soil and compost periodically as the plants grow. I made one modification to the instructions, I placed a brick under one side of the barrel to angle the opening towards the sun so that the plants get more direct sunlight rather than being in the shadows of the barrel while they are growing down inside the barrel. Since this is an experiment, I also set up a 'control group' by planting eight seed potatoes in my raised bed garden as well, then I will be able to compare the volume of the harvest from both locations.
 |
May 3rd? Really?
This is NOT Wisconsin. |
I also received some tomato plants from a friend; two plants each of four different varieties. I decided to use container gardening for these and transplanted then to large planters on my deck.These were fairly large when i received them and they are now staked and flourishing on the sunny deck. Due to the several nights with freezing temperatures during the end of April and first part of May, we got lots of exercise carrying all the large pots inside every night and back out to the deck each morning.
 |
The deer are gossiping about
the new buffet that is being built. |
By the second week of May, the weather seemed to bounce back to normal, except for an abnormal amount of rain. So, I planted some other seeds in the raised beds including green beans and Mexican black beans. I also transplanted my squash seedlings into plastic buckets. I did not want to use up all the space in the raised beds with the squash plants as they vine and spread out, but I knew they would not grow in the rocky clay somewhere outside of the garden, so I decided to use the buckets to see if container gardening would work for the squash. If they seem to stop growing due to the limited root space, I will make another raised bed to transplant them into. I plan on adding more raised beds anyway, so this would just be the one I'll add next.
 |
Garden fence version #1. Not a successful design, but
easily re-purposed for the berry patch. |
With the onions and garlic coming up in the garden, and my control potatoes hopefully sprouting there any day, we had to come up with a permanent deer determent to replace the chicken wire cage I hastily constructed over the rhubarb. Over the past few weeks, we had been checking out local gardens as we drove into town to see what other people used to protect their gardens. We first decided to build a wood frame and attach plastic fencing using a staple gun. The idea being that we could attach this to the landscape timbers with hinges and flip the cage open when working in the garden. This cage went together beautifully, but unfortunately was not stable enough to flip open. However, it was also a good size for the raised bed I had constructed for my berry patch, and since we do not have to work in there on a regular basis, we moved this protective enclosure over to the berry patch and started thinking of another option to protect the garden patch, yet still have easy access into it.
 |
| 16 foot feedlot panels form a trellis in the truck bed. |
We decided that metal posts and fencing would be a good option. We stopped at a Tractor Supply to look at options and we saw some rigid fence panels in their outdoor lot that looked like they would be a good option for easy set up. The rigid panels, which we learned are called feedlot panels, come in various heights and grid size. We decided on cattle feed lot panels which are 16 feet long and 50 inches tall. The first question is
How do you transport 16 foot long panels home in a pickup truck with an 8 foot bed? The salesman at Tractor Supply said they could load up to four panels into a pickup at a time. These panels are about $18 each which seems very reasonable. We purchased the first four and had them loaded into the truck bed. They looked a little
unusual as we drove down the road, but with the use of a couple of ratchet straps they transported very easily.
 |
Hopefully, the deer will not jump over the fence.
But, if they do, we will just raise deer instead! |
We connected the panels using plastic zip-ties. Because they are rigid and we were not making long stretches of straight fence we only needed to drive a couple metal support posts at key locations. This made us very happy as it is not easy to drive fence posts into the rocky ground. As we were working with the feedlot panels, actually as they were sitting in the truck, I got an idea of how to use them in another part of the garden. I was contemplating adding some grapevines at some point and one of these panels is flexible enough to make a trellis for the vines.
So, at this point, much of the garden is planted in the various locations and formats and the deer are hopefully blocked from making it the new buffet in town. Everything is set except for one big problem - we are now leaving the property for several weeks to head back to Wisconsin for the birth of grandbaby number three! I keep telling myself that this year's garden is experimental, so if things do not survive while we are gone, that is just a part of the experiment and I will compensate by making more trips to the farmer's market and purchase produce to can and dehydrate this year. Besides, that would help the local economy! I did place my tomato containers in plastic totes and put several inches of water in each tote to hopefully act as an automatic watering system. I also placed leaf mulch in my potato barrel and squash buckets to help retain water when it rains.
 |
| I give this experiment a 60% chance of success. |
As I am writing this, we have been back up north for a few days (no grandbaby yet) and I keep checking the weather back at the property. So far, it has been warm, but there is rain in the forecast so all should be well for now. Alan rigged up a remote camera for the inside of the house, perhaps next time he can set one up for the gardens too. He already told me he has designed an automatic watering system for the next time we are gone for any period.
We will be staying in Wisconsin for 2 weeks after the baby is born, so the newly planted garden could be abandoned for about a month. I will be sure to take pictures of what everything looks like when we arrive back down south because at the start of this blog I did promise to share the good, the bad and the ugly!


No comments:
Post a Comment