Can't Stop Canning
First on the list for me is canning. It's not very fun to be canning in a 90+ degree kitchen, so I usually only can what I must during the summer - produce from the garden or a sale at the grocery store that I can't pass up. But for most of the summer, we use our pantry of foods I had canned during the fall, winter and spring for quick meals that do not add a lot of extra heat to the kitchen. So, come September, our pantry shelves have a lot of empty canning jars that need to be re-filled.
There was a 'perfect storm' for my fall canning frenzy:
- A local grocery store had a sale on ground beef in 10 pounds packages, as well as beef roasts.
- Another store had a '10 for $10 sale' where I picked up pears (10 pounds for $10) as well as chorizo (10 packages for $10).
- I had picked up a large supply of used canning jars off of Craig's List this summer and they were all cleaned and waiting to be used.
- I had just finished up a couple work projects (computer coding) and had a few days with nothing on the schedule. And most important of all...
- It was now much cooler in the house during the day and I was in a canning mood.
The one issue I have with canning when there are sales on meat is that, with no freezer, once I buy anything in bulk to can I really can't stop until everything is in the jars. I can space the canning projects out over a few days as long as I have space in our fridge (remember it is a small chest freezer converted to be able to sustain refrigerator temperatures).
 |
| Using a jar lid to form patties to make sure they will fit into the jars. |
 |
| Meatloaf patties to be browned off in the oven. |
While my pressure canner holds 7 quarts, I can fit 20 pints in it because I can double stack them. I prefer to can most of our meats in pints because that is enough for a meal for Alan and I. I use quarts for soups and stews and other ready made meals. So, I started filling various types of canning jars with my plethora of meats - 6 pints of cubed beef, 6 pints of ground beef and three wide mouth pints of polish sausage - it's easier to fit the sausage link segments into the wide mouth jars. That leaves the left-over chicken and the chorizo. Remember, the chicken was from making bone broth, so it was already well-cooked, as it had already simmered for three hours. I try to be a little creative when canning this left-over chicken. One batch of bone broth yields enough chicken for 2 or three pints and since it had simmers so long already and then will be in the canner for 75 minutes, it is relegated to soup use. This time, I filled my pints about 3/4 full of chicken and then topped it off with some of my waiting chorizo. I can't wait to open these up this fall and winter and concoct some sort of chicken-chorizo soup and/or stew. The rest of the chorizo went into half-pint jars. A little bit of chorizo goes along way, and we love scrambled eggs and chorizo in flour tortillas. This last batch of meaty goodness was completed in half a day start to finish including the prep work.

I decided to put my pears in wide mouth pints. The pints were better for a serving size for the two of us, and the wide mouth pints would be easier to fill with larger chunks of pears. I can cut them smaller when I open the jars if I want, but the larger pieces would stand up better to the canning heat.
Pears, as with all fruits, are water bath canned rather than pressure canned. They do not require the higher temperatures achieved through pressure canning, and the lower temp of water bath canning preserves the integrity of the fruit. However, you do have to submerge the jars completely under boiling water, which requires a lot more water then pressure canning - one of the reasons I don't like to water bath as much as I like to pressure can.
While my meat prepping of the previous day took very little time, I knew the pears would take much longer. First I wanted to estimate how many jars I would actually be using. I placeed my jars inside the pot I was using as a water bath canner to see how many would fit (8 - no double stacking in a water bath canner). I then prepared my 'holding water' - a half gallon of water (yes, sigh, using more water) and three crushed vitamin C tablets to keep the pears from browning while I was peeling and cutting them all. Next I prepared 2 pears to see how much would fit in one of the jars (about 1 1/3 pears). Now come the math - 1 1/3 pears times 8 jars equals 10 2/3 pears per canner batch. I had 26 pears, so I had 2 batches worth, with a few pears leftover for snacking.
I quartered, peeled and cored my pears. I cut each quarter in half to form largish chunks. I then made a very light sugar syrup to pack the pears in. After all the prep work, the actual canning went fairly quickly. When all the jars were filled and in the boiling water, I decided to prepare another batch since I already had the water up to boiling and all my canning paraphernalia was strewn about the kitchen. So, I raced my canner - I had 20 minutes to prep another 8 jars of pears. So, that days canning yielded 16 jars of pears. That doesn't seem as productive as the previous day of meat-a-rama, but I am sure we will enjoy the pears this winter.
Can't Stop at Free
 |
| Before the new panels |
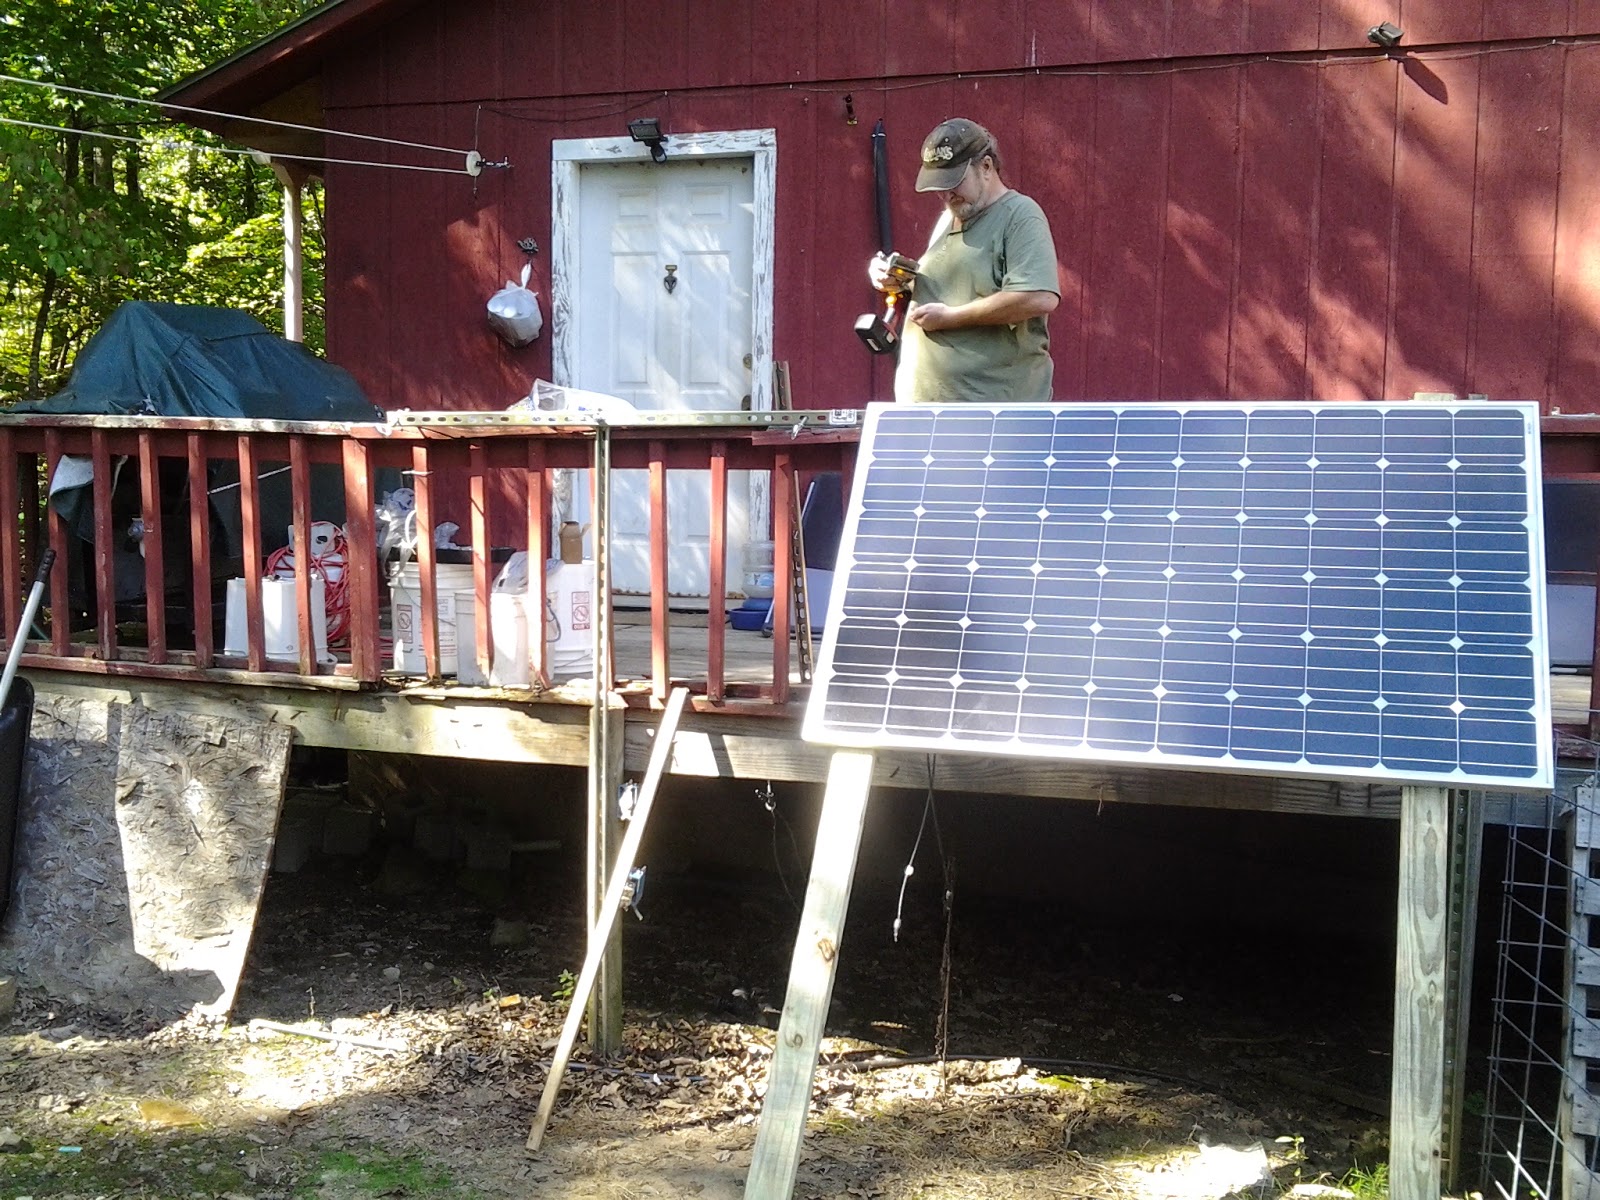 |
| Building the new frames for the panels |
 |
| The two damaged panels added in |
With the free panels, which would cost about $600 new, we decided to go ahead and purchase the new charge controller so that we could start making use of them. We placed the order and impatiently waited for it to arrive. In the mean time, Alan downloaded the user manual and got more and more excited as he read each page. This is a super-duper, highly technical controller compared to our previous models. When it arrived, Alan was watching a DVD of how-to videos that had come with it. As was listening along while I was canning, at one point the manufacturer was listing a multitude of statistics that that are stored on the unit. I commented that it sounded like a good opportunity to set up a spreadsheet (my gardening spreadsheet will soon be going dormant for the winter and I know I will be itching to start organizing statistics on something else). Well, not even three minutes later, the narrator on the video give instructions on how to download an Excel file (spreadsheet) of all the data, oh well they already thought of it and had all the fun of creating it themselves. Maybe I need to come up with a list of stats to track on my worm farm instead.
 |
| The awesome new Midnite Classic charge controller |
We quickly installed the new charge controller, which by the way has an awesome art deco design, and cabled in all four of our large panels - our two Grapes we had been using and the two damaged-but-free panels. After much experimentation of hooking in various combination of the four panels, we were disappointed to come to the conclusion that the panels were damaged to the extent that they were dragging down the production of our original panels rather than giving them a boost. (I think it may be time for Alan to write another article to go into more technical details.)
Here is where we stood: we had just purchased a new charge controller so we could use our new 'free' solar panels, which in turn slightly decreased our power input. But now that we spent all the money on the new charge controller what should we do? It so happens we have a friend with a Grape panel that he has not yet installed. We asked if he would be willing to sell it to us. He agreed, so we removed the damaged panels and gave them to another friend who wanted to 'play around' with setting up a small back-up system for his camper. We then added the new Grape panel to our system. So, our two 'free' panels led to the purchase of a new charge controller and a new solar panel. We decided we can stop here, for now, but we do want to add in one more panel in the future since our new frames were designed for 4 panels and we selected the new charge controller because it could handle four fully operational panels.
Are we disappointed we accepted the offer of those two damaged panels? We both agree we are not. As I said, we were almost 100% certain were were going to make these upgrades sometime in the near future and those panels just provided the slight nudge to have us get this upgrade in the works now.
Can't Stop Drying (until it's crispy)
 |
| Tomatoes ready to dry |
 |
| Dried but not yet crispy. |
 |
| My first batch of tomato powder. (aka Stealth Vegetables) |
Can't Stop Freezing (so what's the alternative)
 |
| Indoor water storage in our utility room. |
 |
| Plumbing made easy - garden hose going through the guest room. |
Really, We Can't Stop!
What led to the title of this blog is some frustration we have been having with our vehicles recently. We have four vehicles, so you would assume we would always have options as to what we are going to drive. We have
(1) our little Dodge truck (named Truck) that we used to move our stuff from Wisconsin that we wanted down here (it has a full size 8 foot bed),
(2) our old, dilapidated Kia Sportage (Rodney) that was our original four-wheel drive for down here,
(3) our large diesel, dually, crew-cab pick-up (Hoss) we use for hauling big heavy loads as well as hauling people as it seats six comfortable, and the newest member of the family
(4) the Isuzu Trooper (Stormy).
We took Stormy in for repairs a couple weeks ago for a power steering leak, and an oil leakage problem, and also a sporadic lack of power when he is under a load such as climbing hills. The leaks are fixed, but he is still at the mechanic as the loss of power issue has not yet been resolved. Meanwhile, we went to loan Hoss to a friend and discovered he had a broken brake line. We took him into a more local mechanic for his repairs. We were then going into town with Rodney and discovered (on the first downhill portion of the trip) that he also had very little braking ability. We took him to the yet another mechanic we have used which is on the first paved road we hit when leaving our place. So three of our vehicles - Stormy, Rodney and Hoss were all in the shop, or I should say three shops, being worked on at the same time, and two of them were break issues. That leaves us with Truck as our only vehicle and the funny thing is, before all this happened, we were discussing that we have to get Truck into the shop because his brakes are getting a bit soft. Now I know some of you are probably thinking you guys are supposed to be self reliant and fixing these vehicles yourself. But, as with several other things we have found down here, mechanics fees are much lower than up north and as long as the funds are available, it is not worth the hassle to do it yourself when there are other projects waiting on the list to be completed. Especially when you don't have a hard flat surface to work on, jacking up a truck on a sloping gravel surface is a dangerous idea.
Speaking of projects lists, we really can't stop working at crossing items off our list right now because two of our grandsons will be visiting for a week soon, and I am sure they will be keeping us so busy there will be no time to stop and get anything else done while they are here. And that's a good thing!
NOTE: The grandsons have come and gone and we had a wonderful time. I had this blog written before they arrived but had a few more photos I needed to take before publishing it. We were so busy having fun with the boys I did not take the pictures until after they had left.
No comments:
Post a Comment