Wednesday, July 6, 2016

Time to Shrivel Up and Dry

Most of you know that I love to can, especially pressure canning. But this week I am going to talk about dehydrating. As the gardens start producing at full force and I find myself elbow deep in tomatoes it's time to start filling up the dehydrators.

I numbered the drying trays to help keep track
of where each type of herb is as the trays get
rotated during the process for even drying.
Why Do I Dehydrate?
There are several reasons and I find it interesting that they run from one end of the spectrum to the other:
1. Preserving Small Batches of Produce. Much of what I harvest out of the gardens is not enough for a canner load, at least not before some of it goes bad. For example, my strawberry beds are still very small, so I only get a handful of berries each day. In order to be able to make jam from my home-grown berries I could turn on the freezer and run it throughout the season to preserve each handful of berries as they accrue until I have enough for a batch of jam, but this would either require the sun to be very cooperative in charging our batteries, or require the occasional use of our generator, which seems a waste when I could simply run the dehydrator on sunny days to dehydrate the strawberries. The other advantage to this option is that once dehydrated the berries can sit in the pantry for months if I don't feel like making jam in hot weather. One of the best jams I made last fall was made from wild elderberries I had picked and dehydrated in August and pears I had canned the previous fall. On a side note, if you dehydrate strawberries for a specific project, be sure to set aside some extras because if you taste test them you will find out they taste like Strawberry Twizzlers.

5 pounds of potatoes sliced and
dried fit in a 1/2 gallon jar. Breaking
up the slices will save more space.
2. Saving Space With Large Volumes of Produce. Early this spring we received a 50 pound bags of potatoes for free. Then, a few weeks later we received another 50 pounds, and being early spring  these spuds were not going to store for very long. Well, we ate a lot of potatoes, I canned a lot of potatoes, I canned a lot of meat with potatoes for soups and stews and we still had a lot left. You have to take a couple extra steps when dehydrating potatoes or you will end up with gray slices - they will still taste like potatoes... if you can convince  yourself to eat them. I list the the basic steps for dehydrating at the end of this post, including how I dehydrate potatoes. The 50 pound bags of potatoes each contained ten 5 pound bags so as I was processing them it was easy to determine that I could fit a 5 pound bag of potatoes into a 1/2 gallon canning jar. This was keeping them stored as potato slices, I am going to break some of them into pieces that can be thrown into soups and stews and I will be able to fit 2 to 3 times as much into the same size jar.

Dehydrating is also a great space saver for the heavy producers in my garden. I do can a fair amount of tomato sauce to be used in other canning projects (meatloaf, meatballs, stews, etc.) but my favorite way to preserve tomatoes is also the best space saver - tomato powder. I slice the tomatoes and dehydrate them until crispy. Then process them in the food processor with just a slight amount of corn starch until they are pulverized to a powder. I can then add this tomato powder to lots of dishes as a 'stealth vegetable'. I have also grown a loose leaf cabbage this year (think kale) and have dehydrated it with plans to make vegetable powder from it as well.

The vegetables in the front jars each started as a one pound
bag of frozen vegetables - peas, broccoli & green beans
3. Keeping a Variety of Vegetables on Hand. I am not a fan of canned vegetables - that is the ones sitting in cans on shelves in the grocery store. Before we moved off grid, I would buy my 'long term' vegetables in the frozen food department. Well guess what, sometimes I still do ...and then I bring them home and dehydrate them! Yes, you can dehydrate vegetables that have been frozen. I do this for vegetables I don't grow in our gardens or if I find something I would like to add to my pantry. The other day we were at a store that had locally grown rhubarb in their freezer section. My rhubarb will not be ready to harvest until next year so I picked some of the frozen rhubarb up to process and add to my pantry to go along with my dried strawberries.

How Do I Dehydrate?
Solar or electric? While there are many plans out on the internet for solar dehydrators, my method of choice for off-grid dehydrating is to use our solar generated electric power to run our electric dehydrators. Using electricity to generate heat is not an efficient use of power, that is why we do not have a toaster, waffle iron, coffee maker, blow dryer, etc. However, I feel the electric dehydrators have enough advantages over the solar dehydrator to warrant the power usage. I just make sure I only run the dehydrators on sunny days when we are creating an excess of power.

The first of this year's tomatoes,
this batch was 4 trays of tomatoes
and two trays of blackberries.
With the electric dehydrator I know I will have a steady heat throughout the entire drying session, whereas a solar dehydrator has heat variations due to cloud cover, wind, etc. Also, from those I have talked to who do use solar dehydrators, the dry time per batch is usually more than a day which means there is more chance of mold or spoilage occurring in between the drying sessions. I feel I get safer, quicker results using my dehydrators and since I am using excess power we are generating on sunny days it is still free power from the sun.

Always have to remember to save
some seeds for next year's crops.
(More on that in another post.)
When we were researching dehydrators, our goal was not the biggest and the best, but rather the most power efficient. We chose a model from Open Country. This is one of the basic styles with six round stacking trays. The top cover contains the heating element/fan.  We did make an addition of creating screens that fit in the trays as small produce like peas tend to fall through the grates in the trays as they shrink during the drying process. We have been very happy with our choice, in fact it is efficient enough that we purchased a second and run them in tandem when we have a lot of produce waiting to be dehydrated.

I purchased about a dozen of these metal racks on clearance
for $2 each with plans for using them in a solar dehydrator.
But for now I use them as extra trays for drying in the oven. 
Back up and 'stand-by' drying option. Using the electric dehydrator does not mean every batch gets dried on the day I start it. Even on optimal sunny days, we do not have a long 'window' of full sun on our panels. Being situated in a north-south valley means we need to wait for the sun to climb up over the eastern mountain in the morning and then it dips behind the western mountain in the afternoon. And, our time is even more limited in the summer due to the arc of the sun and the tree cover. Our shortest solar days are actually mid summer when we only have full sun on the panels for about 5 hour a day. I always monitor our power usage while drying and turn off the dehydrator(s) if the power starts being pulled from the batteries, meaning they are no longer using 'excess' power. This is where my back-up solution comes into play - our oven. Our stove is propane and, in most cases, the pilot light in the oven provides enough heat to 'hold over' the trays that are partially dehydrated until the next day. Just remember to prop the oven door open slightly  so the humidity does not build up and defeat the purpose - I use the handle of a spatula. I have learned the hard way to not trust this method for wetter produce such as berries and tomatoes. If they have only had 4-5 hours in the dehydrator and I need to turn them off, I refrigerate them until I can return them to the trays and put them in the dehydrator again. Otherwise they tend to mold. On the other hand, if I have an  abundance of herbs, I often dry them from start to finish in the oven.

The Basic Steps. Dehydrating is a very simple process  with no exact time to follow. You have to judge that a batch is finished by the feel and texture as well as the conditioning step below.
1. Wash produce
2. Peel/Slice/Dice as needed. When slicing or chopping consistency is important for even drying.
3. (Optional) Treat fruits/vegetables that may turn brown due to oxidation. We grind up vitamin C tablets and dissolve the powder in water. As we slice the vegetables/fruits we place them in the vitamin C water. We keep them in this water until we are ready to start the dehydrating, anywhere from a few minutes to overnight. 
Guess which potatoes were
blanched and which were raw.
4. Steam or water blanch. Not all produce needs to be blanched. The rule of thumb is that if a vegetable is usually cooked before serving, then it should be blanched before drying. Blanching helps speed the drying process and also the cooking process after re-hydration. I prefer steam blanching for preserving nutrients but I water blanch potatoes to aid in color retention.
5. Place food on tray in a single layer, not touching to prevent edges from sticking together.
6. Dry until crisp - rotate trays every few hours and the slices may also be flipped over.
7. Turn off dehydrator and allow food to cool.
8. Condition by placing in zip-loc bag or canning jar over night. This gives time for any remaining moisture to 'even out' over the batch. Check for moisture the next day and dry for extra time if necessary.
9. Vacuum-seal or vacuum-can. We made a vacuum-canner which we use to vacuum-pack dry goods in canning jars.

The vaccu-canner Alan built. We use this to vacuum can dry
goods such as flour, sugar and dehydrated produce in
canning jars. Being vacuum sealed in jars protects them
from humidity in the summer and also allows for long term storage.
So, while I love to pressure can and enjoy the versatility and creativity of what I make in my canner, I appreciate my dehydrators for the ease and speed with which I can process the produce as it starts flowing out of the gardens in the heat of summer. Then, as the weather turns cooler, I can pull out the jars of dehydrated goodies, start cooking up some larger batches of jams, soups and various one pot meals to can for our winter larder.

Thursday, June 23, 2016

Starting Year 5 - Time for a Change

I am including some garden photos with this post.
The new pumpkins I am trying this year
(long pie pumpkins) are taking over part
of the bottom garden. 
The last couple of weeks I have been contemplating how I would like to make some changes to my blog posts. We have started our 5th year living  at the Geek's Quad and I want to start sharing more of what it means to live off-grid as well as to pursue a more self-reliant lifestyle. For the past 4+ years my blog posts have been informative, but also chatty and rambling, covering many topics in each long circuitous post. The purpose was mainly to let friends and family know what we were doing. I now feel we have enough experience under our belts that we can share knowledge on a wide range of topics and my goal is to post more often and focus on a single topic each time. In the future I plan to cover topics such as canning meat, seed saving, vermiculture, doing laundry off-grid, rain water catchment, an explanation of solar power in everyday terms, raising meat rabbits, etc. My goal is to have a new post every 1 to 2 weeks.

My first post in my 'new & possibly-improved' blog came about from an article I read about 'Why New Homesteaders Fail'. Now we do not consider ourselves as homesteaders, but as off-gridders striving for self-reliance. You may ask What's the difference? and if fact these three terms - homesteading, off-the-grid and self-reliance are often used to mean the same thing, but there are differences. I am a fan of Venn diagrams and maybe this will will help illustrate what I mean:
When talking about 21st century homesteading Mother Earth News says "It's about using less energy, eating wholesome local food, involving your family in the life of the community and making wiser choices that will improve the quality of life for your family, your community and the environment around you. "
While the term 'off-the-grid' has been defined as living without reliance on one or more public utilities. Under this definition there are varying degrees of being off-grid based on how many public services you choose to forgo.

This Roma has more tomatoes than leaves,
hopefully it can sustain itself until they all ripen.
Last count was 14 tomatoes on this one plant. 
So, homesteaders may have no ambitions to sever their connections to the public utilities and off-gridders may have no inclinations towards organic gardening and raising their own free-range chickens. Each of these groups have a degree of self-reliance, but no desire to push the envelope to see how self-reliant they can become. They do not have the goal to become self-reliant, they have the goal to be homesteaders or off-gridders. Four years ago we jumped into the Off-Gridder Circle (above) and started working our way towards the Self-Reliant Intersection as that was our goal. If you knew us before we started our adventure you would agree that we were much more likely to jump into the Off-Grid pool than the Homesteader pool based on the definitions I provided above.

Back to how reading an article on failure prompted my contemplation of our own venture to date. First off, no, I do not think we are failing. We are thriving and still enjoying the adventure. I did however find it insightful to reflect on the three reasons brought forth in the article and how they pertained to our endeavors. Oops, I did say these blogs were going to be shorter, well actually I said I wasn't going to ramble as much, so on to the three reasons the article stated as to what causes new homesteaders to fail, all of which can apply to anyone striving for a more self-reliant lifestyle.

I was experimenting with using small paint brushes to
transfer pollen from the male to female blossoms on the
squash and pumpkin vines, but these little guys
were doing a much better job.
Reason #1 - Failure to Define Your Plan
There are so many aspects to self-reliance and so many paths you can travel down,  you must choose your priorities from the myriad of projects you feel pulling at you from all directions. In our case, we made severing the grid ties a number one priority. In fact, we severed all those ties in one fell swoop by moving to a property that broke all of our ties to public utilities and services. That in turn meant our priorities remained focused on establishing our own alternatives through solar power, rainwater catchment, etc.

At the same time we did 'tinker' with other areas of self reliance we wanted to explore, such as gardening, but we were careful not to spread ourselves too thin in too many directions at once. This is the fourth year for our gardens, which we have expanded each year, and it is the first year that I feel they are really becoming abundant producers. I still consider them to be in the experimental stage of learning what vegetables are the best producers, especially for the least effort and square footage of garden space - more about that in another post.

This Betalux tomato plant also has about a
dozen tomatoes on it. The yellow arrows  show
the twine and clips I am using to support
branches on most of the tomato plants this year.
I used to feel a little guilty that we did not have livestock, yet (unless you count my worm farm- more about that in another post.). But after reading Reason #1, I felt vindicated that we did not rush out and get a lot of animals we were not prepared for. We had several reasons for making livestock a lower priority, one of which was the fact that we were still travelling back up north on a regular basis to visit grandchildren (oh, and children). By the way, we are in the process of setting up our rabbitry and the breeder rabbits will be arriving soon - more about that in another post.

Reason #2 - Failure to Have Backup Plans
Often people plan for years for when they will have the property of their dreams and the lifestyle they have imagined that will go with it.  They scrimp and save and as soon as they have just enough they invest all they have and take the plunge only to realize they are flat broke with lots of things that still need to be bought to make their dream anywhere close to becoming reality. Wow, that sounds depressing, but what I am trying to say is make sure you leave some wiggle room in the budget for the unexpected.

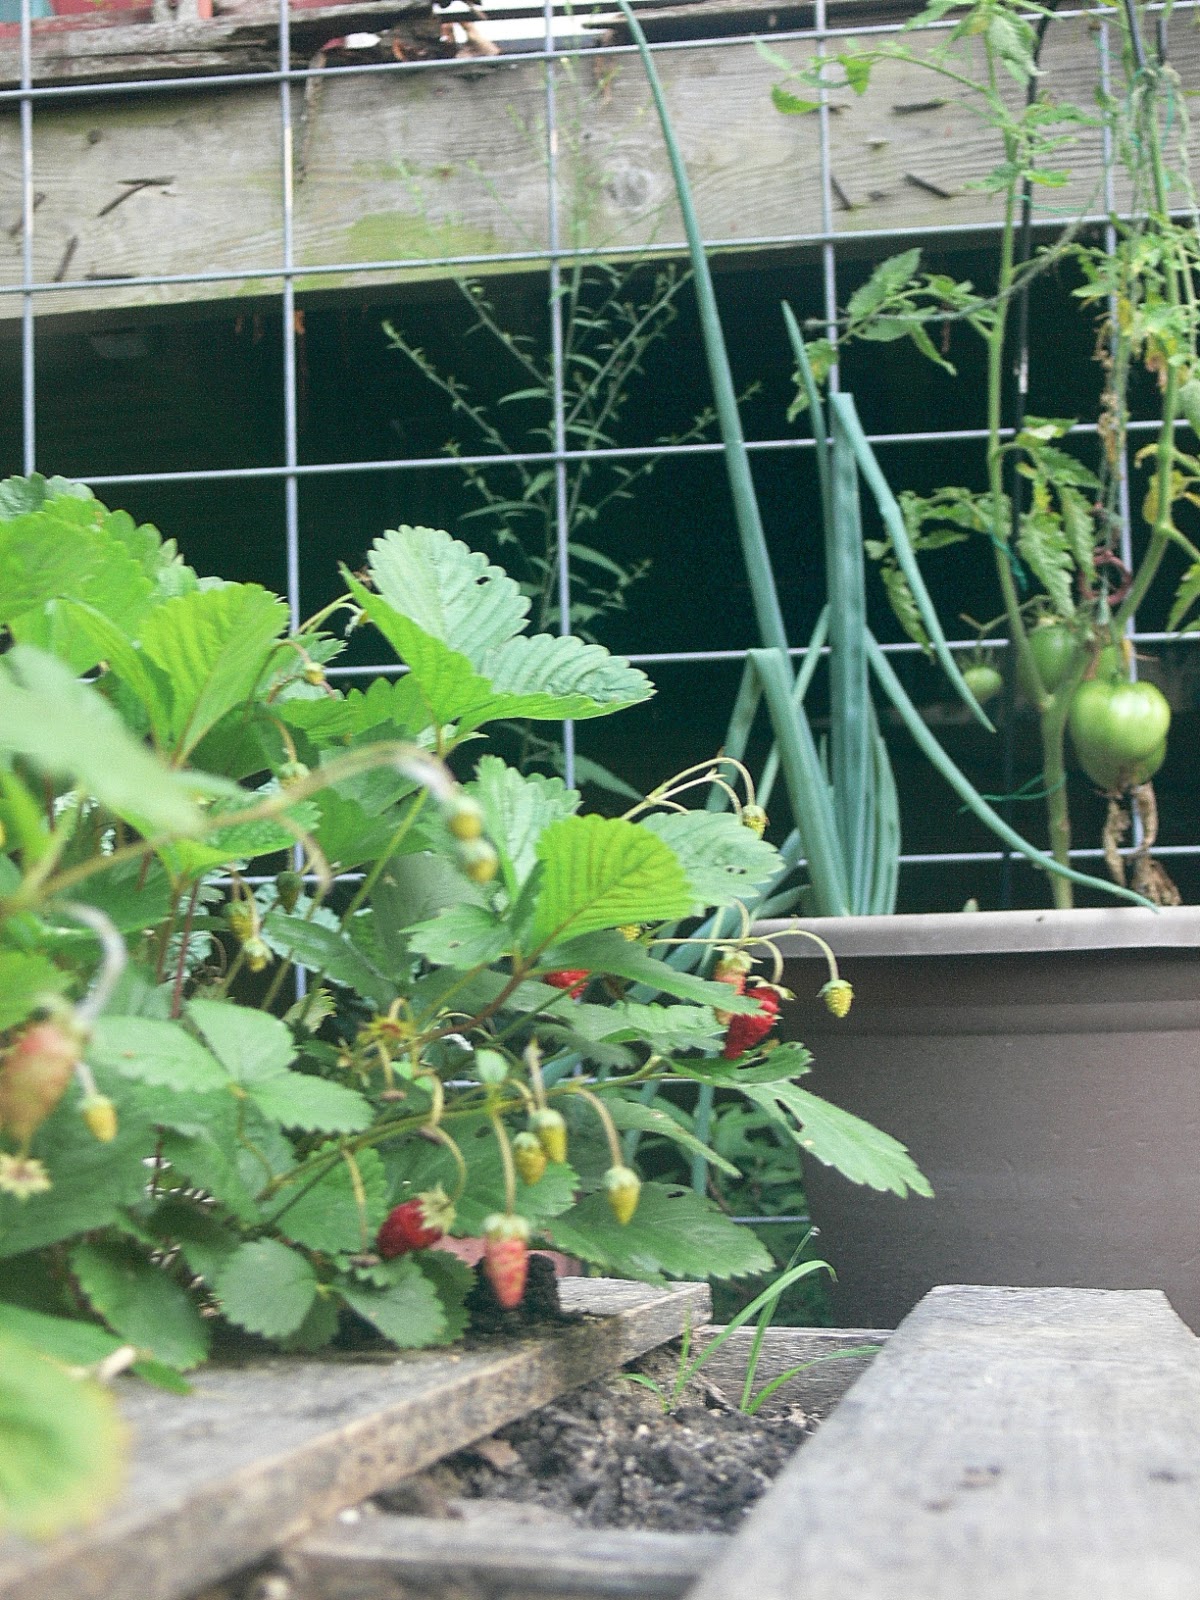
Most of our strawberries are 'Ozark Beauties',
but I just picked up a couple of these 'Berries
Galore' this year and they are amazing! About
the size of a Peanut M&M but very sweet.
Also, as your dreams become realities sometimes they do not fit into the exact same mold that took shape in your mind through all those years of planning. Don't cling to Plan A just because it is always what you said you were going to do when this day arrived. In the reality you are building today some of the projects and goals may not match the dreams you planned over the years for several reasons:
     - products or technology has changed and there is a better solution for what you are doing
     - the land/home you have does not lend itself to your initial plan
     - time has passed, you are older, you may not need some of things you planned a few years ago
     - time has passed, you are older, you may not be able to do some of those things you planned
In other words, be realistic in your goals and expectations, be flexible and roll with the punches and do not take on more than you can handle at one time.

Reason #3 - Failure to Prepare
Very excited that our grapes are producing for the 
first time this year.
At first glance this reason seems to coincides with the backup plans. But to me, the backup plans  are for ideas that for one reason or another are not going to work in the real world or have not worked after trial and error. The need to to be prepared comes with the realization that even as you become self-reliant in various areas of your life,the time may come when something unexpected happens. For example, you may feel your garden is adequate because it meets your families needs each year, but what if there is a summer of droughts or floods and you can't put away any produce for the winter? What if you lose your crop and can't gather seeds for next year, and have none set aside? You need to think about areas where your self-reliance can be vulnerable and make preparations to cover more than 'just getting by'. Self-reliance is more than being able to handle the expected day-to-day needs, it is also being able to rely on your provisions during unexpected tough times.

In our case, we enjoy challenging ourselves in becoming more self-reliant. There is a lot of gratification in realizing you are responsible for providing the electricity that powers your house, the water that flows in your pipes and the food on your pantry shelves. It is also humbling to realize how much time and work providing these daily needs requires and how much we used to take it for granted.

Tuesday, April 5, 2016

Growing Pains

This is the area that was designated to become the 
'Upper Extension' of the Bottom Garden this year.
We had a very mild winter this year, not once did I have to warm rocks on the wood burner to take down to my worm farm at night to keep them from freezing. Our herd of worms were very productive this winter, providing us with about 10 bottles of worm juice for the start of this year's gardens. We also have had no measurable snow fall… yet. The balmy weather in January and February means I was getting antsy to start gardening projects. Just like the start of years 2, 3 and 4, as we approach the beginning of year five of our off-grid life I have plans for more garden expansions.

As you may recall, last year I created the ‘bottom garden’ on the bottom half of a sunny slope just a little south of the house. When clearing out area for the bottom garden I determined the upper limit based on how many rocks I would have to remove if I wanted to take it any further up the slope. I convinced myself there was too much shade cast on the upper slope and thus, I didn’t need to put in the effort to clear that rockier area. And then, throughout the garden season I tracked the amount of sun on the upper slope and confirmed that with the most recent trees we removed to open up our ‘solar window’ this upper slope would make a good garden extension. Unfortunately, this meant we had to remove all those rocks I chose to ignore last year.

Getting started - briers and tall weeds have been removed along with
all the loose rocks that could be tossed to the side of the garden. We
later pulled that log out using Stormy, our Isuzu Trooper.
We started by clearing brush, which was about 80% briers and cutting out small saplings. We then set to work on the rocks. While our property is very rocky, most of the rocks are small enough to pick up by hand and toss to an area outside of where the garden fence will be going. Once all these were removed it was time to start digging up the ‘icebergs’ – those pointed edges of rocks sticking out of the ground that I had kept tripping over while doing the other work. Just like icebergs, we never knew how big these rocks actually were until we attempted to pry them out of the ground. Most were pried up fairly easily as most rocks also tend to be fairly flat on the property. I found that if you were able to budge the rock on the first couple of tries with the crowbar, then it was likely to come out relatively easily as the rock was only 2 to 4 inches thick and we were able to get the crowbar under it for leverage.

Alan making another attempt at the
largest rock we tried to move.
However, after removing several dozen rocks by hand and by prying them up there were still a few that were too large for the crowbar. We made a trip to Tractor Supply and bought a very large pry bar – 16 pounds and almost six feet long. With a lot of effort, and sore muscles, we were able to get all but one of the largest rocks out of the garden. The large pry bar (believe it or not, we haven’t named it, yet) has a point on one end and a short flat blade (think spatula) on the other and between the two we could work the bar under all but one of the rocks to get enough leverage to work them out of the ground. As for the one rock that remains – I am cutting the bottom out of a plastic tote, placing it over the rock and creating a small raised bed. I just have to remember to not dig to deep in that planter or I may break my trowel.

As I started laying the landscape fabric I kept tripping over a
small piece of rock that was still sticking up out of the ground.
Alan was working on another project so I decided to dig it up
myself. Here is a picture of it after I rolled it to the edge of the
garden. The red circle shows the part that was above ground.
While working on this upper extension to the ‘bottom garden’ I also decided to create a lower extension as there is a flat area at the bottom of the slope. We had ended the original area of the bottom garden at the bottom of the slope not because of rocks but because of a tree that would be inside the garden area if we went any further in that direction. This year I decided I would either work around the tree or have Alan take it down for me. My plan for this area is to make it into a berry patch. I cleared the briers, saplings, etc. from this area and then Alan and I measured it to determine how many feed lot panels we would need to fence it in.
The completed extension. And yes, I realized we spent a lot
of time and effort removing rocks only to place some of them
back on top of the landscape fabric to hold it in place.
While measuring, we discussed the various possibilities, including the life expectancy, or lack there of, of the tree at the edge of the current garden. We determined that, as this section of the property is not as flat as I thought (the brush and briers were hiding a dip) the feed lot panels would better fit the contour of the land if we created a new garden that started several feet past the tree rather than extending the current garden in that direction. This is also the area where we park Hoss, our large king cab dually pickup we use for hauling. We can leave his parking spot and make a 16’X16’ berry patch (feed lot panels are 16’ long) or we can find a new parking spot for Hoss and make a 32’ X 16 foot berry patch. I am opting for the 16’X16’ this year so I can already start planning for another extension next year.

While all this hard labor has been going on outside, the garden activities are also in full swing inside the house.  Every year I try to start some of my indoor seedlings earlier in the season. I have several plants I grow that have fairly long growing seasons and I want to give them as much of a head start as I can before transplanting them outside. The problem is I only have one south facing window, the kitchen window over the sink, and grow lights would require way too much power. With the limited natural light it is always a balancing act once my seedlings germinate – rotating the various flats so they all get enough sun so they do not become spindly before I can plant them outside. It has been so mild the past couple of months I have been able to put my seedlings outside much more than in past years.

Seeds lined up on damp paper towel for germination.
I did have a lower germination rate on several varieties of seeds this year. I started them as I always do, including keeping them close to the wood burner to make sure they are warm. My only thought is that the mild weather has meant we have not had a fire in on some days, and even a few nights, so while the temperatures have been mild, that has actually caused the house to be a bit cooler.  I took stock of which plants I had a shortage of and set about germinating more seeds. I have been wanting to experiment with soilless seed germination and decided to give it a try. I placed a paper towel in a glass casserole dish, moistened it and laid out rows of the various seeds. I covered the dish and placed it in my oven as the pilot light keeps it nice and warm. Within a day some of the seeds had sprouted. As each variety sprouts I transfer them to the seed starting flats that are filled with a seed starting mix. This method is also a good way to start older seeds that may have a lower germination rate because you are only planting the seeds that have been proven viable rather than filling starter containers with non-viable seeds.

Part of the excitement of each year’s garden is determining what new plants and varieties I want to try growing. Some new garden family members are chosen for the challenge to see if I can grow them, while others are chosen to replace varieties that were not successful producers. My two tomato go-to varieties have been Amish Paste and German Red Strawberry. Both are determinate varieties which mean they all ripen within a short season (good for canning) rather than having a few ripen at a time over the entire summer. Both varieties are also very meaty, another plus for canning, however I tend to get frustrated with the German Reds because while they are supposed to be large and shaped like strawberries, many of mine are irregular shaped – more like conjoined strawberries. While they have a single stem, it looks like two tomatoes grew together. This year I am adding two new tomato strains to my arsenal – St. Pierre and Betalux. I am currently disappointed with the Betalux for their poor germination rate and failure to thrive, but maybe they will surprise me.

I was pleased with the ginger I grew last year, so this year I have added tumeric to the list. I also have plans to try more herbs as well. I have not had any luck with carrots since I started gardening . My plan was to not grow carrots this year, but then I remembered I did have success in saving carrot seeds last year. Carrots are a biennial plant, which means they do not produce seeds until their second year. Therefore, you must earmark a couple of your plants as seed producers and not harvest them.

Carrots seeds I saved from last year - time for an experiment.
In our area, it is mild enough that I can leave them in the ground over the winter and the next year they shoot up long stems with flowers that look like Queen Anne’s Lace (which is in the carrot family). Allow the flowers to dry on the plant and then cut them off into a paper bag. I stored them in the paper bag last fall with all the other seeds I saved from my 2015 garden. When I saw the bag in with all my other seeds from last year I decided I had to try carrots one more time just to verify my seed saving worked. I have always been able to grow carrots plants, they have just never produced any decent carrots, so as long as I get carrot plants I will consider the biennial seed saving successful.

I have also wanted to experiment with making my own seeds tapes, and as one of the problems with my past carrot patches was probably the fact that I did not thin the seedlings enough (I hate throwing away baby plants) this would be a good reason to make carrot seed tapes. If you are not familiar with seed tapes, a Google search describes them as “Seed Tapes are the perfect, no-waste way to plant. Each strip of biodegradable paper is embedded with perfectly spaced seeds; simply unroll into a planting furrow and cover”. You can buy pre-made seed tapes wherever you buy garden seeds but I wanted to make some with my carrot seeds. Here is the process I used:

  1. Artisan Seed Tape!
    Mix up a thick flour paste – 2 teaspoons flour to 1 teaspoon water. You want the paste to be thick so it dries quickly and does not start the germination process.
  2. Use a strip of toilet paper (unused!) that is an easy length to work with. I made mine about 4 feet long as that length would become a row in my raised beds.
  3. Cut the toilet paper in half length wise and then fold the strips in half to make a crease down the entire length of the now half-width strips of toilet paper.
  4. Using a toothpick, place dots of flour-paste along the crease line. Space the dots the recommended distance  for your seeds. In my case the carrot seed spacing is every two inches and toilet paper squares are 4 inches long so I placed a dab about an inch on either side of each perforation of the toilet paper.
  5. Use the same toothpick, it now has a sticky end, to pick up individual seeds and place one on each dab of paste. As for my carrot seeds, I was a little freaked out when I shook out my saved flower heads and discovered that individual carrot seeds looked very similar to ticks!
  6. Refold the paper strips along the crease to encase the seeds in the paper strip and allow to dry. Note: as I placed the dabs of paste for each seed I used the toothpick to make a streak of paste toward the long edge of the paper strip, this helped glue the paper strip together more firmly.
  7. When ready to plant, dig a furrow the recommended depth for your seeds and plant the strip. 
Enough about the inside garden preps, time to go back outside. With the briers, rocks and trees cleared along with the landscape fabric laid and the fencing around the upper extension, now the hard work starts - bringing in truck loads and carrying it by 5 gallon buckets to fill various raised beds and containers. You may have guessed that the growing pains we suffer from are sore muscles.


Friday, December 18, 2015

Oh, What a Fowl Month

This guy was right across the road
from this year's Turkey Palooza house.
As many of you know, Thanksgiving is our family's favorite holiday and over the years it has morphed into a week long celebration/family reunion that we have dubbed Turkey Palooza. This year we had one of our best Turkey Palooza extravaganzas to date and that was the kick off to what I have dubbed a very fowl month.

This summer we partnered with Carol and Ron, some friends in our self-reliance group, to raise meat chickens. We built a chicken tractor together at their property, ordered in 40 chickens to raise from chicks and planned to butcher them at about 10 weeks, which happened to be when we were returning from Turkey Palooza. Upon our return, we scheduled The Day with our friends. We planned to kill and dress out all the birds in one fell swoop if we could.

Our chickens see the door is open on 'The Day'
and think they are getting fed.
Before I get into the somewhat gory details of The Day, let me give you a synopsis of how this past month has become so fowl. When my children were young, one of my favorite books to read to them was 'If You Give a Mouse a Cookie'. If you are unfamiliar with the book, it is known as a circular tale - a boy gives a mouse a cookie and then the mouse wants milk to go with it. The boy then gives him milk and the mouse wants a straw. This goes on through a dozen or so items and ends up with the mouse wanting a cookie based on the last item the boy gave him. As my fowl adventures progressed I found myself feeling somewhat like that mouse:
Cooling down the new freezer by adding
some frozen turkeys saves on power
from the batteries.

If an off-gridder raises a bunch of meat chickens she's going to want a freezer to store them in before canning. If you give her a freezer, she is going to want 6 frozen turkeys to quickly cool down the freezer when she brings it home. If you give her the six turkeys she is going to make a lot of bone broth to can. If she makes a lot of bone broth she is going to want a lot more canning jars. If you give her canning jars, she is also going to cook and can all her frozen chickens.... you get the idea - it has felt like an unending process. And yes, we bought a small freezer that we can run off our solar system (in sunny weather). Our plans are to use it sporadically as needed, like when we find good sales on meat. And as a side benefit, or what I have been calling a Christmas Miracle, we currently have ice cream at our house!

Back to The Day. I must admit I had a lot of trepidation as to how this newest adventure in homesteading would go. None of us had ever done it before. Carol admitted up front that she did not think she would be much help, and while Alan was game to try, we had already had discussions that once we started hunting game I would probably be the one cleaning it. Our skill sets actually compliment each other in our various chores around the property and this was one area we both agreed was more in my ballpark than Alan's. Albeit, if it was worse than I thought it was going to be, he would owe me big time!

We woke on The Day and donned what we have since been referring to as our 'chicken clothes'. We packed up the items we thought might be needed to make this a more successful venture and drove to Ron & Carol's. As we got out of the truck, Alan said 'Hello, Chickens' and I asked if we shouldn't be saying 'Good-bye' to them instead. That was just the start of the some-what macabre humor we injected throughout the day.

Ron already had water on to heat up, the plucker ready to go and a cleaning station set up. First item on the agenda was to determine who was doing what, well actually first we had to decide what actually needed to be done. Here is the basic process:

Alan and Ron got the messiest jobs that day.
1. Ron would catch a chicken and hold it on the stump while Alan cut the head off with the corn knife we had brought. Note there was experimentation as to if it was better for Ron to first kill the chicken by stretching the neck and then remove the head.I think the jury is still out on the best way and some new methods may be tried next time. I was very proud of Alan taking on the job of head dispatcher (actually the dispatcher of heads not the chief dispatcher of the group). He did a great job even after an incident that included him being hit in the face by the headless, bloody neck of one of the subjects.

Adding chickens to the 'hanging tree' to drain.
2. The headless chickens, most still flapping, were then hung by the feet to drain. We had to think outside the box a bit as there was nowhere set up to hang the birds. Carol had a wrought iron 'tree' for holding four hanging plants leaning against the garage. I suggested we open it up and hang the birds on each of the loops that normally hold hanging baskets. Using this, we were able to kill and hang four birds at a time.

As steps 1& 2 could be a bit traumatic (for us - not the birds), I think we may try the killing cone method in the future which keeps the birds calm and is less messy.

Ron using the plucker.
You can see the scalding pot in the fore-ground.
3. Ron has an automatic plucker, so the next step was for him to dunk the chickens in scalding water and then run them over the plucker. This also took some experimentation as hotter water made the plucker more effective, but too hot and the skin would start to cook and would tear when the feathers were being plucked.

4. Even at optimal temperature the plucker did not remove all the feathers, I would estimate that it removed 75-80% and those that remained were mostly on the legs and wings. So, the next step was plucking the remaining feathers by hand. I would start this tedious process while Ron was running each batch of 4 chickens over the plucker. Then he would join me to finish up the hand plucking.

5. The step I was dreading - eviscerating (gutting). I had prepared as best I could by reading up on the technique in several of our homesteading books and googling it as well. After a bit of muddling through on the first one, I found it was not complicated at all. You just have to take special care in several areas to not nick any internal organs (i.e., intestines) to keep the bird clean (i.e., no escaping poop). To aid in this goal we did stop feeding the birds 24 hours before The Day.


Yep, check this off my bucket list.
All in all, I did not think the process was as bad as I expected, I think the most disconcerting part was sticking your hand up into the bird and realizing it was still very warm. Logically I knew they would be warm, but mentally it was a bit disconcerting.

For those of you who plan on eviscerating a bird in the near future, here is the order I found most natural for me:
- don vinyl gloves.
- bend the legs at the joint at the top of the feet, where rough yellow skin meets feather. Using a sharp knife, cut between the joint to remove the feet.
- use garden pruners to cut of the wing tips at the first joint in the wings, my gardens pruners were a great addition for The Day but, being garden shears, they did complain that they were vegetarians.
- using a sharp knife, carefully cut a slit through the skin below the breastbone and running horizontally from inside thigh to inside thigh and stretch the opening with your hands.
- at this point, after some experimentation, I decide I liked to turn the bird over and cut around the vent (tail) being careful to not cut the lower intestine that is connected to the vent.
- I then used my pruners to carefully snip the back bone where I made the cut around the vent, this way, when it came time to removed the innards the vent was already attached to them and not attached to the bird.
- turn the bird back over so the cut/opening under the breast bone is facing you and stick your hand into the opening and work your hand around the cavity walls to break the innards free. There really is not much connectivity, it just feels a bit weird and warm.
- wrap you hand around the innards and pull them out through the opening, at first I was afraid of breaking open the intestines or some other entrail that may cause a lot of grossness but they are actually quite tough and will not tear when using your hands. You will actually need to pull with a fair amount of force to dislodge the wind pipe.
- as the entrails leave the body, verify the vent you cut away is also fully detached from the bird, if not, carefully trim around it some more.
- before the entrails fall into the discard bucket you may choose to pull the heart, gizzard and liver to save for giblets. Note, if saving the liver very carefully remove the gall bladder from the lower side of the liver. The gall bladder is greenish in color and if broken will taint the taste of anything it's come in contact with.
- now rotate to chicken to work on the neck.
- remove the skin on the neck by cutting the skin down along the neck and around the lower edge next to the chicken body.
- remove the crop which is a small sack on the chicken body next to the neck.
- you may see some wind pipe remaining at this end of the bird, it look a bit like a segmented worm and can be removed by pulling it out of the neck opening.
- use the garden pruners to cut the neck off as close to the body as you can, save the neck for making bone broth.
- rinse the bird and place in a cooler filled with ice water. After the birds had rested a bit we transferred them to a second cooler as the water in the first cooler was being discolored by slight amounts of blood and also had a few floating feathers that had stuck to the birds.


Cooling down the birds.
See, it really wasn't that bad, in our case we repeated the process 24 times that first day. After dispatching and cleaning 24 of the 37 birds we decided to call it a day. We were going to finish off the remaining chickens the following week, but later decided to let the remaining 13 birds grow for a few more weeks. If you wait too long it is supposed to be harder to pluck and process the chickens, but again we decided it was time for some experimentation to see if we could produce some bigger birds, our first batch average between 4.5 to 5 pounds when dressed out.

Wait, you may have noticed I did not mention Carol's duties for the day. She was our 'gopher' and she quickly volunteered to go for ice - twice.

By the way, we are going over to Ron & Carol's for Christmas Eve dinner and the only request we had was 'no chicken'. Carol said that ham is on the menu - they recently picked up a pig they had purchased and had processed by the meat packer. I wonder how many steps there are in butchering a pig, it may be time for some more research....
________________________________________________
Fresh broth on the left - canned broth on the right.
Canning the broth gives it a rich golden color.
HOW TO MAKE BONE BROTH
When not planning to can the broth, I only use 1 chicken. The broth keeps in the fridge for about a week and this makes enough broth for Alan and I to each have a cup at night and use it up before any of it spoils. When making broth to can I start with either one turkey or three chickens.


Ingredients listed for one chicken
  [brackets show amount for 3 chickens or 1 turkey]
1 chicken  [3 chickens or 1 turkey]
1 gallon water  [2 1/2 gallons water]
3-4 carrots  [6-8 carrots]
1 onion  [2 onions]
3-4 stalks of celery [6-8 stalks of celery]
3 garlic cloves  [6 garlic cloves]
Celery, carrots, onion, garlic and crystallized ginger.
2-3 slices crystallized ginger  [4-6 slices crystallized ginger]
3-4 Tablespoons kosher salt  [1/4 to 1/3 cup kosher salt]
2-3 Tablespoons apple cider vinegar  [1/4 cup apple cider vinegar]


As you can seen, most ingredients are an approximation. I like celery and tend to add a little extra, you can adjust the amount to taste.The important ingredient to not leave out is the apple cider vinegar, it helps draw the nutrients out of the bones.

Multi-tasking: pressure canning on the left and
making the next batch of bone broth on the right.
Peel carrots, onion and garlic.
Cut carrots and celery into 2 to 3 inch segments.
Thicker carrot segments can also be halved length wise.
Halve garlic cloves.
Add all ingredients to a large stock pot.
Bring pot to the point of boiling and then reduce to a low simmer and simmer for 3-4 hours
(You may take out the bird when fully cooked, remove all meat to save and place the carcass back in the simmering pot, but I usually simmer the full bird the entire time and then use the meat for chicken & dumplings, soups and stew.)
Remove bird, allow to cool enough to pull the meat from the bones, you will notice the bones are very brittle.
I thought I was well stocked with canning jars,
but I needed to add some to my pantry for
this canning session.
Remove vegetables from the broth, mine all go to feed my worm farm except the onions which worms don't like.
Strain the broth. I use a mesh sieve, but you can use cheesecloth if you prefer a clearer broth
If canning, pressure can at 10 pounds pressure (adjust for altitude) 90 minutes for quarts, 75 minutes for pints.

This must have been one of the first turkeys....
because I am still smiling :-)


Thursday, October 22, 2015

Wait for it.....

Using a food mill to process some of our tomatoes into
tomato soup for canning. We also dehydrated more of
our produce this year as well.
With temperatures often in the high 90's with close to 100% humidity, we are not very motivated to tackle new projects in the summer unless they are absolutely necessary. The daily chores get done, albeit at a slower pace but most everything else making its way onto our to-do lists is placed there with the caveat of 'wait for cooler weather'. That said, we have had a busy summer of gardening and canning but even that required some waiting for a different reason. This spring we found ourselves with a somewhat altered mantra of 'wait for the rain to stop' which was then quickly followed by the usual 'wait for cooler weather'.

So, with my love of lists, I decided this blog would enumerate the various times we have found ourselves waiting over the past few months, sometimes successfully and sometimes not.

Note the weeds in the center of this picture
are taller than the rake to the right of them
Weeds be gone...or not
We do not have a yard per se - no grass, only weeds and rocks. Each spring Alan has a two-part regimine to prepare what we call the yard for the upcoming summer. He sprays the entire area with Permethrin to control ticks and also with a defoliant to control the weeds. The defoliant instructions require the foliage be dry when it is applied and that there be at least 3 days before the next rain.

Well, if you recall from my blogs this spring and early summer, it was a very wet spring. We had rain so often, we were never able to apply the defoliant before I got my gardens planted. We considered using the defoliant later on in the summer as the weeds began overtaking various areas around the house, but were afraid the spray may be carried over into the various gardens. So we decided to live with weeds as the grew, and grew .... and grew.

The luffa qourds are flourishing again this year.
Now I just need to wait for them to dry on the vines.
Then comes the fun of peeling the dried skin away
to get to the luffa 'sponges'.
I pulled and chopped some that became a nuisance on the pathways to the gardens, etc. but those that were in outlaying areas were allowed to flourish. Some of these were actually very pretty with 6 foot stalks filled with small flowers. We also commented that we had a lot of bee and butterfly activity for pollination this year in the gardens as well as a lot less insect infestation destroying our produce. so maybe there were some benefits to living a bit more on the wild side.

Waiting for the harvest... or not
You may recall that we expanded the gardens this year by adding another container garden a bit further south of the house. And also that again due to heavy rains and other interruptions we managed to plant both the south and bottom gardens but did not get much in the north garden which is our main area of raised beds. Despite the near empty north garden, our gardens did quite well. I planted several new items this year and I found my self waiting for them to ripen so I could try them.

First were my Mother Mary's Pie Melons. I had read that these were good to mix with apples when making a pie and decided to try growing some even though I have not had much luck with other melons in the past. These melons grew quite well, but as I had never grown them, or even seen them before, I was not sure when to harvest them. There were several coming on at once and I picked one as a test subject when it started turning yellow, I then waited a few days and then picked another from that group that had ripened further to a full bright yellow. While the first one had seemed a little under ripe when I tasted it, the second one was more flavorful but a little mushy  I decided the optimum time to pick them was just as they were turning completely yellow, at that point they have the firmness of an apple with the flavor of a very mild melon.

Guess which Candy Roaster squash
I picked first (and a bit too early).
As other fruits and vegetables ripened over the summer, I discovered I always have a problem with the idea of  wait for it. Whether it was tomatoes, onions, blackberries, candy roaster squash or anything else that was ripening in the garden, I would always pick the first ones  a bit too early even after I had told myself I needed to wait a bit longer.

Ginger was another new plant I was growing this summer. I knew it had a very long growing season and I kept telling myself  'not yet' as my fingers kept itching to pull it out of the dirt to see how it was growing. Finally in late August the plant was large and leaf and I could see one of the rhizomes (the ginger 'root') starting to stick out of the dirt a bit. I could wait no longer, I grabbed hold of the plant and pulled it out.  I was happy to see a long row of rhizomes that were growing, but in all honesty, I had once again harvested too early and I quickly stuck them back in the ground in hopes they would continue growing despite my rude intervention. I am happy to report I have since harvested said plant and it had grown a bit more.

After pulling my ginger a little too early
I re-planted it and it grew a bit more.
An interesting side note on my ginger - I bought a 'hand' of ginger from the produce department at the local grocery store. I then soaked it for a couple hours to remove any growth deterrent that may have been applied. I then planted the store bought ginger as an experiment and it grew quite well. I am hoping to give it a longer growing season by starting it indoors over the winter.

Waiting for the birds to return... but not the raccoons
I love feeding the birds throughout the fall and winter. We get quite a variety and we always have several feeders and suets hanging from the deck rail and from the eaves of the house outside our living room windows. However, we have an ongoing war with the raccoons to keep them from ravishing the feeders. I can put up with the squirrels as it is quite fun to watch their antics as they hang upside down on the feeders, but the raccoons do their plundering at night and are much more destructive.

Alan working on the new Pulley system
for the bird feeders.
Alan had constructed retractable poles that are attached to the deck rails for hanging our feeders. We pull the pole in to fill the feeders and then push the pole back out so the feeders are about six feet out from the deck. However, we will still hear a raucous at night and when we shine a light out on the feeders there will be raccoons nimbly walking out the pole to enjoy a midnight snack and we awaken the next morning to empty bird feeders. This year we devised another plan to hopefully thwart the pesky plunderers. Alan rigged a pulley system like the one I hang our laundry on. We now fill the feeders, attach them to the line that stretches from the house to a tree about twenty feet from the deck. Now comes another wait. We are waiting to see (1) if the raccoons will attempt to reach the feeders (2) if the squirrels will be able to traverse the line to get to the feeders and (3) if the rig will be able to hold the weight of the full feeders (and possibly the additional weight of squirrels).

Waiting for water... really
After all the flooding I blogged about a few months ago, it's hard to believe that we have actually been waiting for it to rain for several weeks now. We have two tanks we use on a daily basis. The tank outside of our utility room which we use for water in our utility room (i.e. laundry) and also further filter to place in the holding tank for our kitchen use. We have an outdoor hose attached to this tank as well to use for watering the south and bottom gardens. The other tank designated for daily use is the one outside of the bathroom which supplies water for showers and flushing the toilet.

We have two other water storage tanks. One is under the front deck, has a pump attached and is used to water the north garden. The other is behind the house, near the utility room tank and is used as a reserve storage. Our water supplies were getting so low in the two daily-use tanks that we called upon the other two tanks as reinforcements. Since I had not fully utilized the north garden this year, that tank has been full all summer. This past week Alan transferred its water to the bathroom tank.

When we do get a good downpour, the utility room tank is filled and overflowing in just a couple of hours, so last week we decided to plumb the utility tank and the reserve tank so that they will act as one larger tank. This was a good time to do it as we needed to raise the utility tank a few inches so they would both be at the same level and thus fill evenly. The utility tank was nearly empty so we were able to power wash the inside, even though that meant using more of our dwindling water supply, and then raise it up to be level with the other tank. With the tanks plumbed together, the gutter still empties in the utility tank, but the water flows freely from that tank to the reserve tank so they fill (and empty) as one container. Well, that is the theory - we are still waiting for rain to see it in practice.

Waiting to start some new projects... chicky-chicks (hopefully)
We have several projects in the planning stages that will boost our self-reliance. All of these take place on more out-lying areas of the property so we are waiting for the end of chigger season before starting construction. These include a chicken coop, rabbit hutches and an orchard. I am writing about these upcoming projects in hopes that it will spur us on to get them completed this year.

There is an old structure at the north end of the property that we graciously refer to as 'the cottage'. We were told that it was built as an enclosed porch that had been added to an RV that had been parked there at one time. Our plans are to rehab this somewhat decrepit structure into a chicken coop. It is large enough that we have plans to build rabbit hutches inside of it as well. We will also add a run for the chickens that they can access from the coop.

There is currently a hole in the roof that we are going to cover with the corrugated sheets that are made of transparent fiberglass that are sometimes used on green houses, this will supply sunlight for the rabbits.  Due to fewer hours of sunlight, chickens tend to slack off in their egg laying in the winter. Many people have lights in their chicken coops that they use to extend the hours of light the chickens receive to keep up egg production. Our plans are to 'sacrifice' a few of our original, smaller, solar panels from our house system to set up a smaller solar system for the livestock.

As for the orchard, I have a list of about a dozen dwarf fruit trees I want to order in this fall. There is a clearing at the north west corner of the property that we want to fence in to establish the orchard. We had originally planned to plant the orchard last spring, which would have been wonderful since we had such a wet spring, but funds were not available before the ordering cut-off date for the trees. The fall ordering window is now open, so hopefully there will be funds available before the winter cut-off date. However that leads us to one final thing we are anxiously awaiting....

Turkey Palooza... our annual family extravaganza
Each year we have an extended (week long) celebration with our kids and grandkids. We rent a house big enough to hold us all and have a week filled with love, laughter and lots of quirky traditions. The past few years my parents have also been able to join us and they get to meet a new great-grandchild each year. This year's house is near LaCrosse, Wisconsin. The amenities include a 4-season room with heated floors and an out-door hot tub, but the extravagances I am most looking forward to are the washing machine and shooting range!

My next blog will talk about some new tools we recently purchased to help with our fall chores as well as some new hobbies aimed to improve our self-reliance. But you will just have to ....wait for it.