Friday, July 28, 2017

The Queen is Dead... Long Live the Queen?

Oh dear, where to start. First off, this story is not fresh in my memory because we have been away from the Geek's Quad for a week for our annual trek to Kentucky to help our daughter with her vendor booth at BreyerFest. We had a great time and she had a very successful year, but I did not write my next blog post as I had planned on during our time away. So now, I need to think back to several weeks ago to when this saga began to start this tale of woe, frustration and confusion.

You may recall that when I was first contemplating setting up a bee hive, I decided I wanted to be a bee-haver not a beekeeper. The difference being that, in my research, I discovered that beekeepers seemed to obsess over their bees and it seemed to me that they often micro-managed what was going on in their hives. With our desire to live as self-reliantly as possible, I also wanted our bees to have the same mindset.

I have just started to open the hive for inspection. 
The roof and top boardhave been removed. 
The queen excluder is still in place on the top of the 
second brood box. Worker bees can move freely 
through the spaces in the queen excluder. 
Things were going quite well from the first day we moved the bees in. Our bees are friendly, docile and quite easy to work with compared to stories I have heard from others new to the world of beekeeping. I would periodically open the hive to see how the bees were progressing in building comb on the frames, and as the brood box became fairly full we added a second brood box. Our overall plan for the summer was to allow the bees to fill the frames in this second brood box with comb that they would use to grow more brood as well as store honey for themselves for the winter. When this box was near full, we would add the honey super at the top of the hive above the queen excluder. The queen excluder is a screen-like shield that allows worker bees to move freely up into the honey super to fill it with honey (for us) but the queen can not fit through this divider so she can not lay eggs up in the frames where you plan to harvest honey from.

In most hives the honey super is box with frames for the bees to build comb on, just like the brood box. But in our case, we  have a Flow Hive which has a set of frames that have man-made comb already in place for the bees. When the bees fill them with honey, there is a tool to unlock the frames and the honey flows from the frames without removing them from the hive. Hopefully, we will be able to share more about this later in the summer, now back to our story...

The capped cells in this photo are filled with honey.
Honey cells have slightly concave caps and a
somewhat translucent appearance.
I checked in on the second brood box a few times and saw the bees were busy building comb. I then decided to do a more complete inspection and started by pulling out the frames one at a time and my untrained eye saw that the frames were very full and many of the cells were capped. I was very happy as it looked like we were ready to put the honey super on to start collecting honey for ourselves. I then decided to take off that second brood box and inspect the original box as well.

I lifted the top brood box off. Now this is a medium box, which is shorter that the original deep brood box, but I was surprised at how heavy it was from all the honey now in the eight frames within it. Again, this made me very happy, but as I started loosening and lifting frames from the lower box I became more and more concerned. The comb on all these frames was almost empty! There was a bit of uncapped honey in some of the cells but no capped honey (full cells the bees had closed) and no cells that had any signs that the queen had laid eggs in them.


Empty comb in the
bottom brood box.
I had never seen the queen in the hive, but she is often very hard to spot with the thousands of bees moving around on all the frames so I had never been concerned about it. But now, the lack of any sign of reproduction was a huge concern. Worker bees hatch in 21 days and drones hatch in 24 days so that meant the queen had not laid in at least that long. I was also seeing queen cells in the honeycomb along the bottom edges of the frame. Later on, in all my research, I would learn that this meant the hive was trying to make a new queen and the position of the queen cells indicated it was because there had been a swarm.

But wait, I am getting things out of order.With the lack of brood, I was pretty sure the hive was queenless, but I did not know the reason When I emailed the person I had purchased my bees from and described the situation he was fairly certain that the bees had swarmed and that the new queen that was left behind in the hive had not survived. When a hive becomes too crowded the bees will swarm. When this happens the current queen and about 60% of the worker bees leave the hive for a new location. I did not think this had happened because (1) we had just added a new brood box so there was a lot of new space and (2) there were still lots of bees in the hive. However, on a recent inspection, I had seen a bee in the 'attic' of the hive above the queen excluder that looked significantly longer than the other bees. Being new to this, it did not register at the time, but with Alan and I both researching trying to figure out what was going on we learned that, when getting ready to swarm, the bees will starve the queen so that she will loose weight and be able to fly again. That bee I saw was probably the svelte queen bee that could now fit between the slots of the queen excluder.

Here is an example of drone cells (left) and worker bee
cells (right). A queenless hive with a laying worker
only produces drones, there will be no worker bee cells.
So, our best guess, is that our bees swarmed and the new queen did not survive either her hatching or more likely, her maiden flight which is where she mates with drones before returning to the hive to lay thousands of eggs for the rest of her life. Since I did not catch this right away, our hive was in dire straights. We were up against the clock because if a hive is queenless for too long a worker bee will become a laying worker. This means it will start laying eggs, but it will only produce drones. With no more worker bees being hatched the hive will not be able to sustain itself. However, if you try to replace the queen after a laying worker has been established the laying worker will most likely kill the new queen.

My best chance for success was to either introduce a new frame of brood comb into the hive. This frame would have freshly laid eggs from another hive that the bees in my hive would select eggs of the right age to create a queen from. I could also purchase a new queen, place her on a new frame of comb from another hive and place it in our brood box. This second option would actually improve my chances because the hive would hopefully accept the new queen and we would have reproduction starting immediately, or if they did not accept the queen we would still have the fresh eggs from another hive for them to create a new queen which would delay reproduction by a few weeks.

Queen Buttercup and her attendants
arrived by priority mail.
I order a new queen bee and as the next evening was our weekly meeting of our self-reliance group I explained our dilemma in hopes of obtaining a frame of brood as we have several beekeepers in the group. Unfortunately  no one offered a frame to help save the hive. Alan offered some cash to help sweeten the deal (no pun intended) but we still had no offers so all we could do was wait for Queen Buttercup to arrive by priority mail, install her into the hive and are hoping for the best.

The worker bees are checking out Queen Buttercup
during our test to ensure the hive was queenless.
Prior to establishing Queen Buttercup into her new kingdom, we had a test that would indicate if there actually was still a queen inside of Clive (the hive). Now that we had a queen in our possession, we could place her cage on top of the frames in the brood box and see how the bees reacted. In any case, they should show a lot of interest in the cage and many should rush over to it immediately. The test would be based on the attitude the bees had towards the cage. If they climbed all over it but were friendly and curious then the hive was truly queenless and they were looking for a new queen. If, however, the bees were acting defensively and attacking the queens cage then we were wrong and there was actually a queen somewhere within the hive. We passed the test in that the worker bees were friendly towards Queen Buttercup.

The queen cage is placed between two frames in the
lower brood box and the bees start working away at
the candy plug to free their new queen.
When installing a new queen, they are placed in a small cage with a candy (marshmallow like) plug. It takes several days for the bees to eat through this and free the queen. This delay allows the bees to become acclimated to the new queen's pheromones and accept her into the hive. Her Royal Highness had been shipped in the queen cage along with six attendants. Her ladies in waiting are worker bees who care for her. Unfortunately, when I removed the frames in the hive to adjust the space for her little cage I saw larvae in some of the comb cells which means we now had a laying worker bee. I also saw a high number of drones in the hive, higher than would be expected for a normal hive, which also indicates we have a worker bee creating drones.

Nonetheless, I am still holding out a glimmer of hope. I did check the hive one more time before we left town for a week. I wanted to confirm that Queen Buttercup made it out of her cage. At first I thought she was still in there because the cage was full of bees when I took it out from between the two frames we had wedged it between, but then I saw the candy plug was gone and there were just a lot of bees in general going in and out of the little box. We had paid an additional nominal fee to have Queen Buttercup marked so that we could spot her more easily in the hive. When she arrived, I was a bit surprised to discover that she had been dabbed with yellow paint. Really? A yellow dot is supposed to make her stand out from the other bees? I then found out there are five colors used to mark bees and that one of the five colors is used depending on the year and yellow is the color for 2017.

We still have not seen the queen, they can be very elusive moving from frame to frame as you pull the frames from the hive to inspect them. I also do not like to handle the frames too much because there is always the chance of squishing the queen between two frames as you slide them back in place. It would be a shame if the queen just happened to be moving between the edges of two frames as you slid them together to insert another frame back into the hive. The chances are slim, and I always move the frames back into place slowly so the bees can move out of the way but it still can happen.

Sorry, I'll get back to the story. Back to that last inspection before we went out of town. The top brood box was still all capped honey. Most of the frames are quite full and it is very heavy to lift off to get to the original brood box. In the original brood box, I wanted to inspect the frames in the center as that is where the queen will usually start laying. First I pulled out an edge frame as this give me room to maneuver the other frames more safely without harming the bees. With the edge frame out of the hive, I can slide the next frame over and and then pull it out. I have learned that the side of the frame facing the center of the box tends to have more bees and more activity than the side facing the outside edge. Given the fact that there are hundreds of bees on the frames as you pull them out, it can be a bit challenging to move the frame around to be able to get a clear view of what's going on.

Here you can see cells of capped worker bees and some
uncapped larvae. The caps on worker bee cells have a
slight dome while drone cells will have a higher dome.
As I reached the frames at the center of the box my hopes began to rise. I was seeing a mix of cell types within the comb. Capped honey has a cap on the cell that is slightly concave and capped drone cells have a pronounced dome shaped cap on their cells. What I was looking for were capped worker bee cells, these would be evidence that Queen Buttercup was alive and producing worker bees. And yes, I am fairly certain I saw worker bee cells. They can sometimes be confused with capped honey because, while not concave, they appear to be flat topped or very slightly domed. But as the worker bees are smaller than drones, the cells containing workers do not have the high domed caps like the cells containing drones.

Alan took this photo over my shoulder during my last inspection, which
about a week after returned from our trip. I was ecstatic to see lots of
capped worker bee cells in the lower brood box frames. I also pulled some
frames for inspection in the upper brood box and found more worker cells.
So, in summation, the past few weeks have been a very high learning curve. It has been stressful - we have learned how attached we have become to our bees. It has been frustrating - every time we thought we had things figured out we would go up to the hive to confirm some research and realize things had changed or were not what we originally thought. And, it has been a needed reminder - I once said I wanted to be a bee-haver because I wanted our bees to be more self-reliant, like us. And yet, as I reflect back on this whole saga, the biggest frustration was we dropped our self-reliance and looked to others for help and it was not there. During our road trip last week, Alan and I had long hours to discuss many things and one of those was plans on how to avoid this in the future. I still want to be a bee-haver, I don't want the bees to become a consuming hobby, but in order to be a more self-reliant endeavor we need to have two hives.

Had we had another hive we would have had frames of brood we we were looking for to transfer into the failing hive, and even if the hive still failed we would have a second one that we could split. Ever since we started down the path of self-reliance, a favorite saying of Alan's has been 'two is one and one is none. '. This basically means you have to have a back-up for everything that you need. If you only have one option and it fails, you are in trouble. We have always designed our various system based on this principle, and while the bees are not a necessity, they are important to us. And so, we have made a decision and I would like to announce that next spring Clive (the hive) will be getting a baby brother!

Sunday, July 2, 2017

I've Got You Covered

Some of the pathways are getting
congested as the garden matures.
The gardens are definitely in full swing, and as usual, I did not get them fully planted. I did get a lot closer to every bed and space being planted than in past years, but I have a few raised beds that still need dirt in the north garden and I bought a few more kiddie pools to add into some open spaces. I plan on doing some late summer/early fall planting so these areas may still be utilized. But for now, let's see how everything else is doing.

In general, the spring and early summer has been cooler and wetter than average. We have been getting rain every week which has been keeping our water tanks full and while I still need to go out and water on a fairly regular basis, I mainly have to concentrate on the containers as they dry out much more quickly than the raised beds.

This is looking down into the bottom garden.
It's hard getting an overview photo of the gardens.
Maybe we need to get a drone...
This year the gardens feel like much more of a juggling act than in past years. I believe this is because that as they expand in size each year I need to better track what needs to take priority on a daily basis. I have learned this year that I need to stop myself from multi-tasking when I enter any of the gardens. You see, I always head out to the gardens with a purpose. It may be to water, to weed, to harvest various produce or to go to battle against squash bugs; but once there, I am assailed with a variety of tasks that need to be done and soon I find myself stopping in the middle of my intended task to 'just do this' and 'just do that'. Before I know it, gardening time is over (it is either too hot or too dark) and my original chore is left half-done.

One solution that I have found that helps me to stay focused is that I have buckets to carry the tools I use for various tasks - one holds what I need for harvesting, another holds items for staking and pruning tomatoes, and my most often used bucket holds my arsenal against squash bugs. What I keep in these buckets changes as the garden progresses and I repack them for specific projects, but making sure I am equipped for my specific project (and not for others) helps me stay on track. While out there each day, I do assess what the next priorities should be as they can change on a daily basis.

Back in late April, I took you on virtual tour of gardens as they were being planted. So let's go and take another spin around the gardens to see how they are doing and I will tell you about some of the things we have been doing for the care and feeding of our plants. We'll go in reverse order from the last trip, we can stop to say 'Hi' to the bunnies and then head on over to the north garden.

The thermostat is in the upper left corner of the photo.
Say 'Hi' to Roger.
You'll see we added the fans back into the rabbit area for the summer. The heat can be hard on the rabbits, much worse than cold weather. Alan has wired in a thermostat so the fans will automatically turn on at 80 degrees.  They will also turn off when the temp again falls below 80 in the evening which saves us a trip out at night amongst mosquitoes and June bugs. During summer heat waves we also fill two-liter bottles with water, chill them in the fridge, and place them in the rabbits' cages to help them keep their core temperatures down.

Cover #1 - Berry Patch Covers
The design for the netting to form
the new berry bed covers.
And here we are at the north garden. The first thing you probably notice is the addition of the 'covered wagon' on that raised bed at the end of the row. That is one of the new berry patch covers I made out of mosquito netting and pre-cut lengths of PEX pipe. Originally I was going to use PVC pipe for the arches holding the netting, but when I was at the store I tried bending the PVC so that the ends would fit into the width of our beds (30 inches) and discovered that the PVC was too rigid to be able to bend it into this much of an arch. So I started wandering around the store for another idea, which is how many of our problems are solved. That is when I learned about PEX pipe, which is similar to PVC but much more flexible. One of the options was pre-cut 5 foot lengths which I could easily bend into arches I needed to fit into the raised beds and I thought that length made a good sized arch over the bed so I bought enough to make up a prototype.

The PEX sits in the pipe clamp and is stopped from
sliding down by the screw right below the clamp.
The mosquito netting I purchased is 6 feet wide and the PEX is 5 feet long. My plan was to sew tubes to slide the PEX through to form ribs along the netting. With the netting being longer, I was going to have it drape over the outside of the bed while I attached the PEX to the inside of the bed frame as the arched PEX would be applying pressure outward. On my prototype, I screwed half-diameter pipe clamps to the inside of the raised-bed frames and slid the PEX arches into those. I partially drilled a screw into the frame below the clamp to stop the PEX from sliding further down into the bed. This worked okay, but the arches were a bit floppy, Alan had a better idea. He cut a few of my tomato stakes in half and I drove them into the dirt at the edges of my raised beds where I wanted the arches to go. Over a foot of the stakes remains above the dirt line when they have been pounded in, so when I slide the PEX arches over these stakes they are much more sturdy that the ones held by the pipe clamps.

The completed 'covered wagon' design
berry bed cover for this year.
As for the ends of the netting arches, I didn't feel the math had to be that accurate (yes, I hear all those that know me gasping!). I simply cut the netting rectangle going over the length of bed long enough so that each end would drape down past the top of the raised bed.

I had used some mosquito netting for berry covers last year but had secured the bottom around the beds with bungee cords which had torn the netting. This year's ah-ha! moment was pool noodles. I went to the dollar store and bought an armload of them (all one color, of course). I cut  the noodles so I had pieces the length of each side of the raised beds, sliced each noodle-piece lengthwise just through to the center hole and then used these as clamps to hold the netting snug along the entire length of each side of the bed. Once I had the noodles in place on the arched ends, I trimmed the netting along the bottom of the bed.

On the left is the raised bed of oak leaf lettuce. On the right are stacks 
of lettuce leaves, and a few blackberries, ready for dehydrating.
As for the rest of the north garden, almost everything is doing quite well. I can't believe both types of lettuce are still going strong with no signs of bolting (going to seed). We have had a cooler, wetter early summer but all that means is that we are in the 80's and have had only a couple of 90 degree days.

I pick leaf lettuce every 2 to 3 days and get about 100 leaves each time. Fortunately, I have come up with a way to dehydrate it that keeps it intact for winter storage and that the rabbits like to eat. Individual lettuce leaves are too thin and fall apart when dehydrated, but I wash them off and layer 5 or 6 together in stacks on the trays. They compress when dehydrating to form 'lettuce patties' and I have taste tested them on the rabbits. All four breeders have approved of these in their food bowls.

I have also been harvesting a lot of herbs out of the north garden, you may recall this garden has a lot of plots for rabbit food. As soon as the basil and lemon balm were tall enough to begin harvesting I started cutting sprigs aggressively to encourage the plants to become bushier and heartier. Most herbs will branch out if you prune a stem directly above a leaf pair, so I carefully slide the blades of the little nippers that I use down along the stem until I come to a pair of leaves and that is where I cut off a sprig of the various herbs. Then, within a few days there will be a 'Y' forming at that point on the stem as the plant branches out to become fuller.
Three of the herbs beds,  Thai basil, lemon balm and cinnamon basil.
The first two were scatter planted the last was planted in two rows.
Heavy rains right after planting washed the scattered seeds around.

The clover field growing into the
second-cutting.
You can see my bed of crimson clover looks like it has been  ransacked. I let it flower thinking that my bees would enjoy it, but alas, none of the girls came to visit it. I googled and the bees are supposed to like it, but the cover was becoming so overgrown in the bed it was dying underneath so I recently cut it back and am drying it for the rabbits. Yes, I am making my own hay manually. By opening up the upper layer of the bed I am expecting the under growth to green-up again and I will get a 'second-cutting' as we hay farmers call it.

Cover #2 - Diatomaceous Earth
And just look at the Seven Dwarfs! Our seven dwarf fruit trees have all flourished since we planted them this spring. They did not flower after planting so there will be no fruit this year but we are seeing a lot of growth. Our raised-holes seem to have worked well in providing a good start as they become rooted in the garden. We had a week of fairly strong winds and everyone remained firmly upright. I continue to water them, but not as often as I water the plants in the north garden. A couple weeks ago I did notice that almost all the trees had squiggly holes eaten in their leaves.  I could not find the culprits making swiss cheese out of our fruit tree foilage, but I gave the trees a dusting of diatomaceous earth, one of my gardening staples, and that has seemed to taken care of whatever was munching on the leaves. Diatomaceous earth is made from the fossilized remains of tiny, aquatic organisms called diatoms. It looks like a fine white powder to the naked eye,  but if you were to look at it under a microscope it would actually appear very sharp and jagged. To soft bodied critters that attack my garden, it becomes an impassable land mine field I lay down! Remember when you were a kid and played 'the floor is lava'? Well in this case, I play the leaves are covered in spikes with all the pests that want to eat them!
THE SEVEN DWARFS
Peach - Asian Pear - Bartlett Pear - Gala Apple - Cortland Apple - Cherry - Golden Delicious Apple
What have we missed in the garden...Oh, the Russian Red Kale is gone. It became so buggy I didn't even bother with the diatomaceous earth. I pulled it up and discarded it outside of the garden. I am going to plant a fall crop in that bed in another month or so. The Black Beauty Zucchini have also been a disappointment, can you imagine planting zucchini and not getting any squash? The plants look like Medusa with lots of leaves and blossoms sticking up on about foot long vines but not a single blossom has produced a squash yet. My new winter squash I am trying out in this garden are not doing well either, but I now know the reason for that and it is my fault. I will tell you about it as we head over to the bottom garden as I am having the same problem with some squash over in that garden as well.

Covers #3 & #4 - Egg Shells  and Calcium Water
An example of tomato blossom end rot,
caused by calcium deficiency.
So, the Sweet Meat squash in the north garden as well as the Tromboccini squash you will see in the bottom garden were both new for me this year. Both were growing well and producing lots of blossoms but when the young squash started coming on many of them quickly began rotting on the end and turning yellow. It reminded me of blossom end rot which I am familiar with in tomatoes, and sometimes peppers,  but not in squash. I googled and learned that it can occur in squash, and just like tomatoes it is cause by a lack of calcium. With my tomatoes, I have always sprinkled pulverized egg shells on the dirt around the bottoms of the plants. Watering and rains then slowly release calcium into the ground from the egg shells. I also make sure to include egg shells in the compost that goes out to my worm farm so calcium eventually makes its way into my worm juice fertilizer.

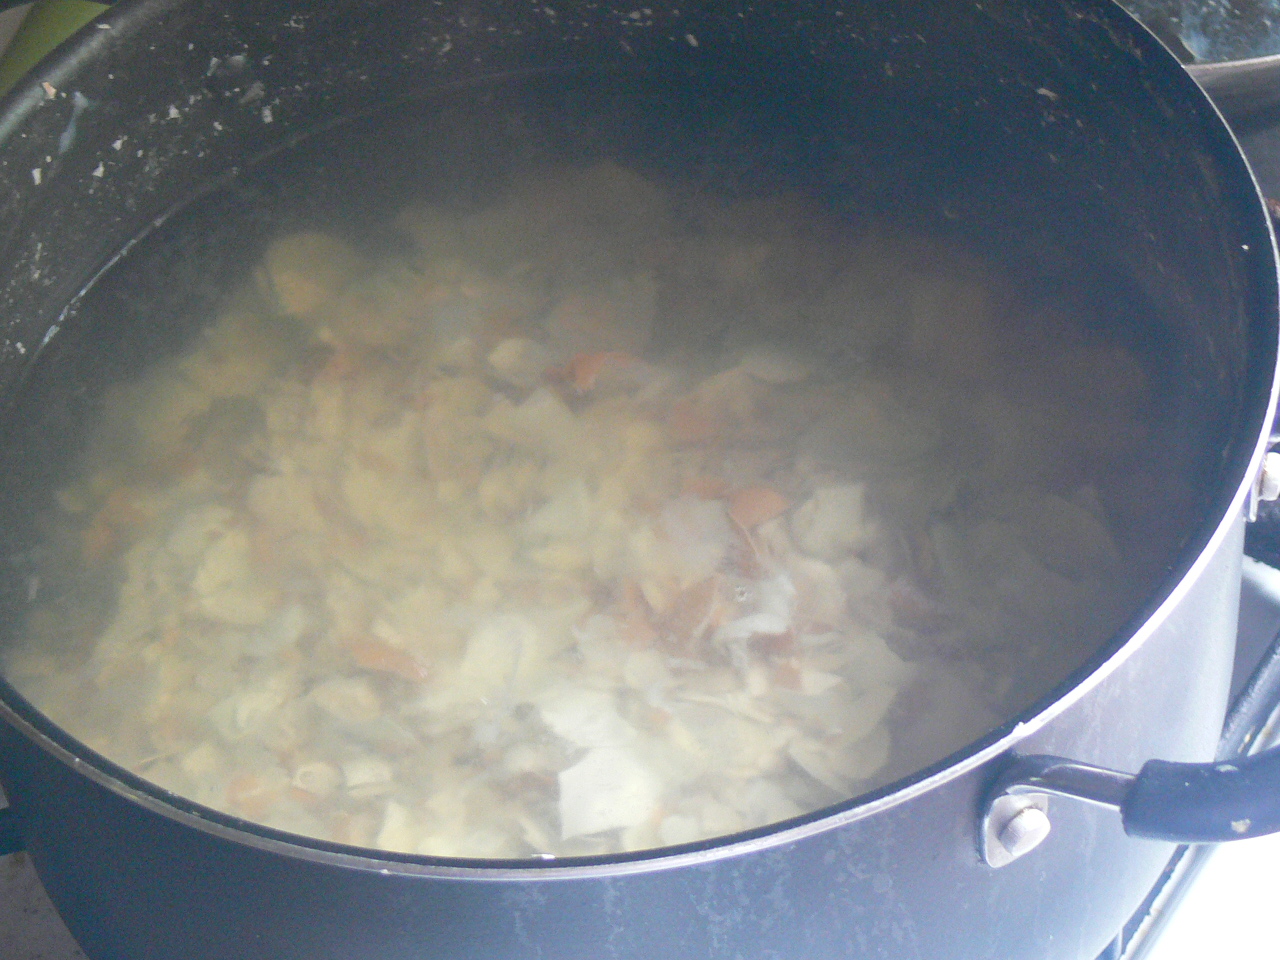
Cooking egg shells to make calcium water.
I recommend keeping the lid on the pan while
letting the shells soak in the water over night.
There is no way to reverse the blossom end rot that has already occurred, those squash had to be removed . I did cut off the rotted end and fed the remaining part of the baby squash to the rabbits. And, as usual, the girls liked the squash, the boys did not.

There were some suggestions to help prevent the end rot from occurring in new squash being formed. The one I decided to try was to use a calcium foliar spray which  is a direct spray onto the leaves. I made a solution of calcium water by boiling crushed egg shells in water and letting them sit over night. I then strained the concentrated calcium water into a bottle. I had no idea of the strength so I just made a guess and diluted it by half in a spray bottle and I sprayed it on the leaves of my squash and tomato plants.

After doing this, I realized I should have spritzed just a sampling of plants first  to make sure there were no adverse effects from the calcium water on the leaves. The next day I stepped out onto the deck and the only squash plant I could see from the deck, a zucchini in the kitchen garden, had all yellow and brown leaves and was definitely dying! But all the tomato plants were still green. I quickly checked the squash plants in the bottom garden and they were fine as well. It was just coincidence that a vine borer had gotten into that specific plant at the same time and killed it. Phew!

One of my larger candy roaster
squash so far this year.
Oh yeah, I said the blossom end rot was my fault. I already knew that blossom end rot was caused by a lack of calcium, but during my research I discovered that an over-abundance of nitrogen can cause calcium deficiency in plants. When I was mixing up my dirt for my new planting areas this year I added lots of rabbit manure, which means lots of nitrogen. My hypothesis was further proven by the fact that if you look at the the other variety of squash here in the bottom garden, the Candy Roasters that I plant every year, they are not suffering from blossom end rot. This variety was planted in dirt that had already been in place, not freshly mixed this spring. I added a little rabbit manure to the tires of dirt, but it is at a much lower percentage than the manure in the dirt mix I was making to fill new beds and planters this year. So, a new lesson learned.

Cover #5 - A Case for the Grapes
As we entered the bottom garden you couldn't miss the cover I made for the grape vines this year. The two grape plants are in plastic totes on either end of a 16 foot feed lot panel - the same as we use for fencing in the gardens. The vines of the two grape plants then grow along the fence towards each other. Last year something ate all of my grapes in one day just a day or so before they were ready to pick, so this year I wanted to come up with a way to protect them. I needed a cover that would enclose the grapes because I am not sure if it was birds, squirrels or some other critter that absconded with them.

The plan I came up with was for a cover made from mosquito netting that would drape over the feed lot panel 'trellis'  and be sealed shut on all sides. I started with a 18 foot length of netting. With the netting being 6 feet wide, I measured the height I would need to cover from the top of the planters to the top of the fencing and determined that folding the netting in half lengthwise (draping 3 feet on either side of the fence) would give me enough length to cover all the vines. I had just seen a bunch of sew-on Velcro strips on clearance at a fabric store so I  purchased enough to sew along the 18 foot length and the two 3-foot ends. As I was sewing it and then assembling it over the grape trellis I was thinking that there had probably been a better choice then Velcro along all those edges because the 24 feet of Velcro hook tape kept snagging and sticking to the mosquito netting and I had to carefully pull it away from the fabric. But in the end, it all fit nicely over the grape vines and I am pleased with the results.
The 'envelope' cover for the grape trellis.
I used pool noodles to encase the top of the wire fence panel.
Strips of sew-on velcro close the sides and bottom .
However, we do have another issue with the grapes this year and it is not just us. Another person in our self-reliance group asked me how our grapes were doing because his were turning black on the vine, shriveling up and falling off - all long before they are ripe. I told him some of mine were getting black spots but it did not sound as bad as his. Lest week it had got to the point that it was affecting about a quarter of my grapes. Back to Google and I learn this is Black Rot, but at least it is not my fault this time. Black rot is a fungal disease that is most prevalent in warm, wet seasons. It spreads easily, so if it appears you need to remove all signs of it in order to try and save the remaining crop. So, last week I unvelcro-ed the cover, folded it back and used my nippers to remove all the damaged grapes I could find. I am going to go back in a few days and repeat the process. Hopefully we will save some of this year's crop. Remember I said it wasn't my fault? I was being a little generous. In my googling I learned that proper pruning and thinning  will greatly help to prevent black rot. As I did not do this, nor know how to do this, I have bookmarked this page and will be learning how to properly prune my grape vines this winter.

Behind the grapes, that bed with the box-shaped berry cover has more blackberries. I am going to transplant them this winter because the elderberries to the left are blocking the sun way too much. I underestimated how much my elderberries would grow, they are about ten feet tall. That plastic ring to the right of the blackberries has a second variety of elderberries. It does not grow as tall, but this year it self-propagated to the raised bed to the right. That bed had a couple red raspberry plants I had rescued from a clearance rack, one died and the other had no berries this year so I am going to transplant it this fall and let the elderberries stay in that bed. Basically, the bottom half of the back row of this garden will now be elderberry canes. Unlike the blackberries and raspberries that only produce on second year canes, the elderberries produce every year but after four years the canes tend to produce less and you should thin them out then. So I need to come up with a system for marking my new canes each year to track their age.

Many people are not familiar with
ground cherries. The top picture is
a group of seedlings, the bottom is
the fruit in their paper-like wrappers.
Both of the ground cherry beds at the bottom of the garden are doing well. The bed from last year had many small groupings of seedlings coming up this spring from cherries that I had left in the bed last fall. As each cherry is filled with seeds, dozens of seedlings pop up where I had pushed each cherry into the ground. Just like with the herbs in the north garden, I found myself transplanting larger seedlings in each group to give smaller ones a chance to grow as well.

The bed of plants that self-seeded from last year is just starting to drop ripe fruit so I am going to move that berry cover from the blackberry bed over to the ground cherries. Last year something, I think squirrels, started eating the ground cherries as they ripened. When they are ripe, the ground cherries drop to the ground. They look like little paper Japanese lanterns and the yellow 'cherry' is inside. I kept finding the empty paper like shells on the ground as the critters stole the cherries out of them. That is when I made the original berry cover that is now on the blackberry bed. It is taller then the 'covered wagon' style and that is why I want to use it on this bed as the plants are quite tall. I will be moving the covered wagon cover from the north garden to the other ground cherry bed once I think they are all pollinated.

I planted that as a new bed this year so they are a few weeks behind the established bed. The arched cover should work with this second bed because I did not fill the bed to the top  with dirt as I did the first bed. The plants sit about 8 inches down in the bed so the cover does not need as much height above the edge of the raised-bed. frame.

This zinnia has taken over almost half of the rice cowpea
 bed. I plan on saving seeds from this gorgeous plant.
My various beans and cow peas are growing like crazy. I won't have anything to report on them until harvest, I pick them all after they dry on the vine. For the beans, I need to remember to track the amount I get from each bed as I am experimenting on the density at which I planted seeds this year. Oh, I do want to point out that large zinnia growing in the middle of my rice cowpea bed. Ever since we processed our rabbits, we have this saying that keeps popping up about various tasks I am doing. In this case the saying is "I can butcher my rabbits but I can't pull the zinnia out of my cow pea patch." Besides, my bunnies love to have zinnia flowers as snacks. Now there is some convoluted thinking.

Cover #6 - A Sprinkling of Epsom Salt
A sample of some of my St. Pierre tomatoes.
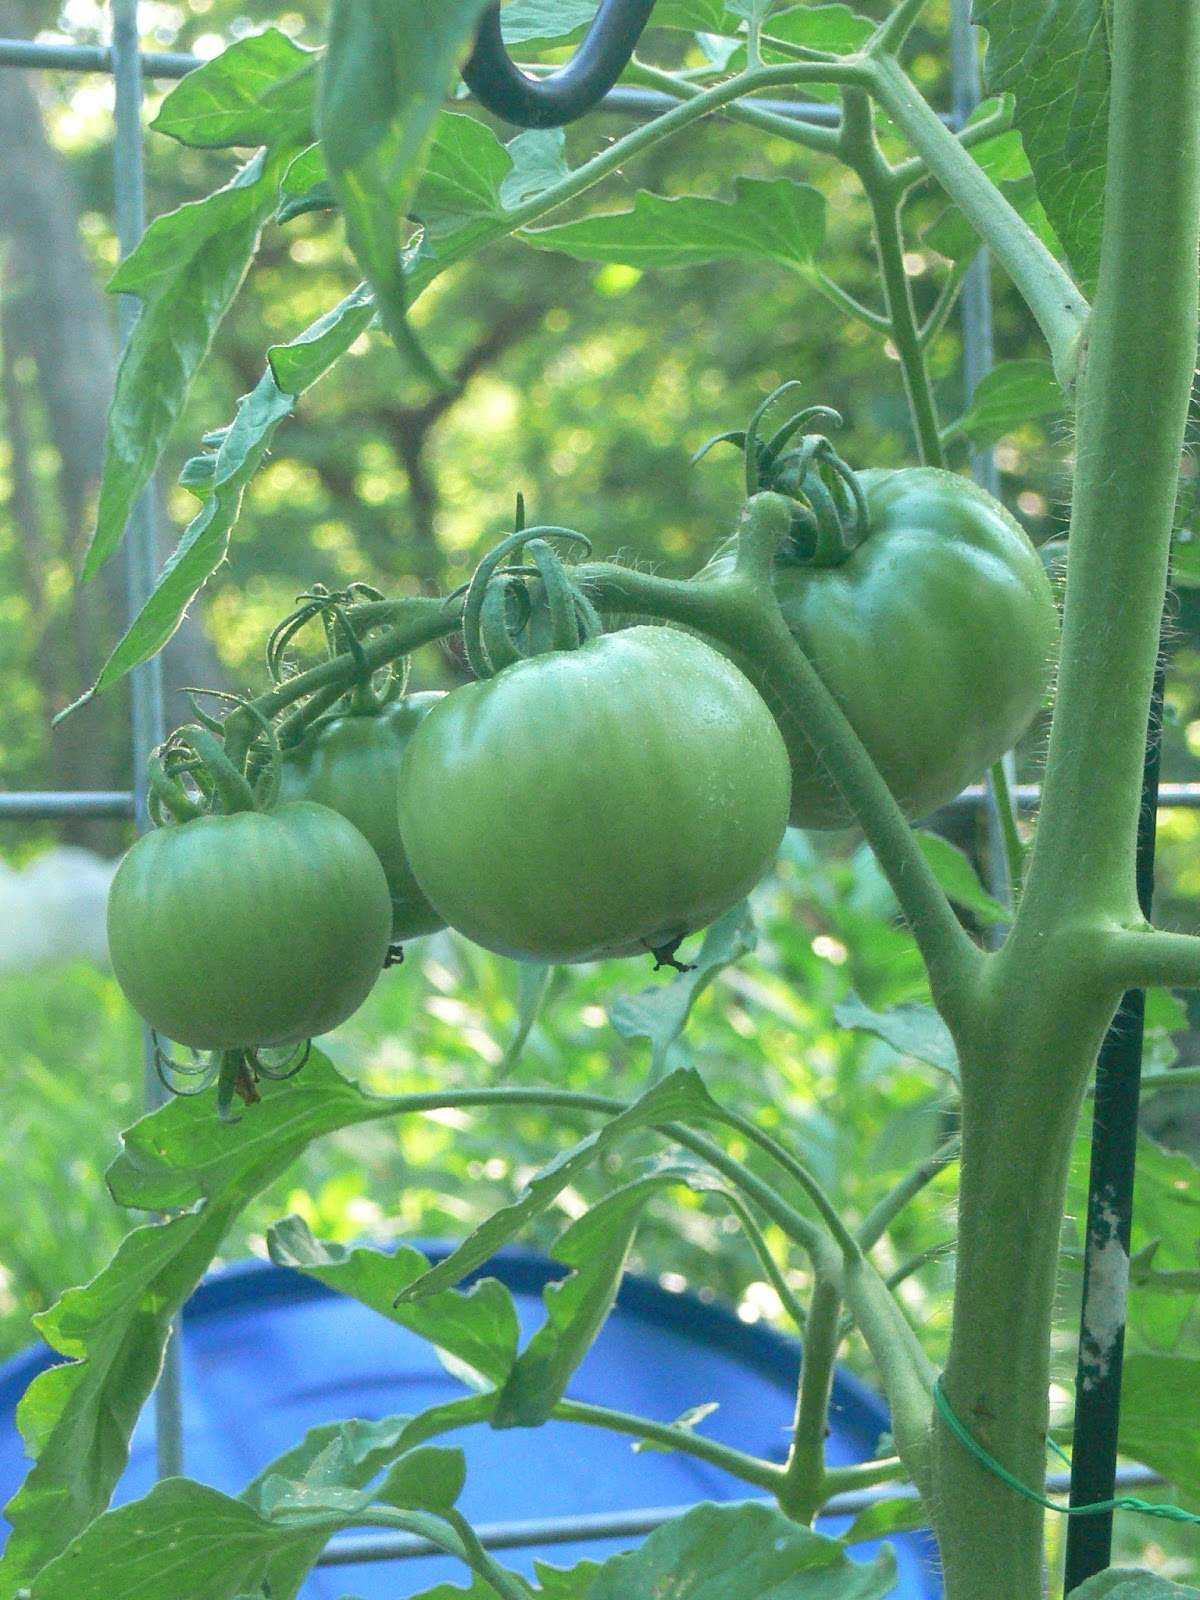
At last count I had just over 200 green
tomatoes across all six varieties planted.
And then there are my tomatoes, another problem child this year. I never have full, lush tomato plants and I believe this is because I always grow them in containers so their roots are limited to the pot size. I do use very large pots, most are about twice as large as a 5 gallon bucket which is what many people grow tomatoes in. This year I did not fill the extra-large pots all the way, but they do have more dirt in them than a 5 gallon bucket would. I started noticing problems this spring when my tomato plants started getting yellow leaves with brown spots at the bottom of the plants. My friend,Google, once again found the answer for me. It seems my tomatoes may have been suffering from root rot. Root rot is caused by over watering, but it was not my fault this time (really)! We had a very wet spring and the dirt did not get a chance to dry out between storms. Unfortunately there is no fix for root rot, you normally toss the plants, treat the dirt and start over. However, I decided it was time for some more experimentation to see if I could still get a crop from all these tomato plants.

I almost didn't grow any rutgers
tomatoes this year because I did
not have good results last year.
I had been reading how Epsom salt (specifically the magnesium in it) is very good for many plants in the garden. In fact, when I purchased a box at the pharmacy the first thing I noticed was that one entire side of the box was dedicated to directions for its various uses in the garden. I sprinkled a couple of spoonfuls around each tomato plant before the next time they were watered and I also trimmed away the dead and almost dead leaf stems at the bottom of the plants. And remember, I also used the calcium water spray on their leaves as well to negate the abundance of nitrogen from the rabbit manure in this year's dirt mixture. As you can see I have lots of green tomatoes on all four varieties I have in this garden and so far none of them have blossom end rot from too much nitrogen.

Cover #7 - More Nitrogen, Really?
The roma tomatoes are suffering a lot from root rot.
Hopefully the will survive long enough for all the
tomatoes to ripen that they have set.
However, I do keep getting more dying leaf stems at the bottom of the plants. Hopefully I will have enough viable green leaves to keep the plants alive until all the tomatoes ripen.  As more and more leaves were dying from the bottom up I really wanted to find something that would help. More googling suggested adding nitrogen...really? Well, maybe I could make it a balancing act between nitrogen and calcium water. I hadn't applied worm juice in a while, which contains both nitrogen and calcium, and is more of an all-around plant food so I opted for one more experiment. A couple days ago I gave half of my tomatoes a dose of worm juice and the other half a placebo (I watered them). I wish I could have made it a double blind test, because knowing which ones got the worm juice I am talking myself into the fact that they are looking a bit better.

And as we head up to the kitchen garden you will see the Amish Paste tomatoes which are my favorite. They are the only ones that were showing signs of blossom end rot and it was only on these first two plants by the gate. I am going to give them all another spray of the calcium water for good measure, but I have tons of green tomatoes right now. In fact, I need to tie up a few of the branches as they are being weighed down so much I fear they are going to break off at the main stem.

The strawberries are also going strong. I am getting more off the Ozark Beauties now than I did in the spring. They were slow starting out because I had transplanted them to the pallets. They spent the spring growing their plant structure out more than growing fruit but now they are fruiting like crazy. I had covered them with mosquito netting to protect ripening berries, but then realized I needed to uncover them every so often because there were a lot of new blossoms that needed to be pollinated.

Well, there you have it, another long winded tour of our gardens with explanations of how everything is kept undercover and hopefully safe and protected from various garden hazards. Well, everything except me, sometimes I want to crawl under the berry covers, too, to escape the mosquitoes.

Monday, May 29, 2017

From Cage to Cooler to Canning Jar

We did it. We have processed our first, home-grown protein. In other words, our first litter of meat rabbits are now residing in our pantry.

Did it go as I expected? Pretty much, except for some huge bruises on my backside!

I will write an outline of how the day progressed. And I apologize in advance for any dark humor that works it way into my descriptions. We do respect our animals, take good care of them while raising them and dispatch them as humanely as possible. In fact our breeding pairs, Roger, Jessica, Honey and Charlie are a part of our family. But, we also realize that Alan and I also have a dark sense of humor that gets us through the more grizzly aspects of living self-reliantly.

Alan was in charge of photos, I haven't looked over them yet to see which ones can be included in the post. As this was our first experience, the educational photos may not be available until the next batch are processed -I don't remember Alan taking pictures during the skinning and butchering process. Those of you who are truly interested in the process can google for videos and and other sites with photos. This was something I did the night before to make sure I was familiar with what we needed to do, and not do.

Preparations started a couple days before as Alan started filtering a larger supply of potable water than we generally use. We had purchased a chest cooler large enough to hold the 'batch' and the plan was to have ice water in the chest to chill the carcasses. I also suggested we have a five gallon bucket with potable water for a pre-rinse before placing them in the cooler. We filter our potable water into 2 1/2 gallon bottles that we usually pour into our small holding tank for our kitchen system.  As he worked on a supply of water for this project, Alan set the bottles aside as they were filled.

The day before the event, we turned on our freezer to make ice and also cool down some of the water. Alan filled some 2-liter bottles with water (no need to be potable) to freeze. He placed these and one of the bottles of potable water in the freezer. When the potable water was chilled he moved it to the fridge, we just wanted it cooled so it would not immediately melt the ice in the bottles when we added it to the cooler. We also mounted the 'Hopper Popper' and the 'Rabbit Cincher' on our deck posts, more about these helpful tools later.

Oh, one final 'prep' was to not feed the rabbits for 24 hours beforehand. Our breeder rabbits are housed in the same area as those that were to be 'dispatched' so I had a dilemma - I did not want to feed the breeders in front of the others, but I also did not want the breeders to go hungry just because we were withholding food from the ones to be dispatched. My solutions was to feed everyone the morning before (the 24 hour cut off), I fed the meat rabbits a very little amount while giving the breeders more than usual as I did not want to give them their usual nightly feeding in front of the ones we had stopped feeding.

The next morning we had a friend arrive who had offered to help. She had processed some rabbits the summer before and thus had some experience. As rabbits tend to scratch I put on work gloves (I was to learn this was a mistake) while Alan went to get the first one from the cage. Alan actually asked me which one I wanted first! We had 'named' all the meat rabbits Stewie but we always blamed Stewie #4 for any trouble that was caused in the rabbitry. When I was sexing the rabbits a few weeks earlier and learned we only had one male out our of the six, we designated him as Stewie #4. He was also the only one with dark gray ears so he was easily identifiable, so I said 'Bring Stewie #4'.

In the foreground is the Rabbit Cincher hanging from a hook
on our deck. Directly below the cincher in the photo you can
see the 'V' of the Hopper Popper which is mounted to the left
of the Rabbit Cincher.
We had purchased the Hopper Popper because it is designed to be a humane way of dispatching the rabbits. Basically, you slide the rabbit's neck into the metal 'V', hold the hind legs and lean back using your weight to dislocate the vertebrate. I took Stewie #4 from Alan, placed him in the Popper, held him by his hind legs, leaned back... and promptly fell backwards onto our very rocky ground. Note to self- do not wear gloves when trying to keep a grip on the rabbit's legs. Thus, the massive bruises on my lower back and backside - the final revenge of Stewie #4.

Placing Stewie #4 in the Hopper Popper.
(Gloves should not have been worn.)
Once each rabbit has been dispatched. We placed their hind feet into the loops of the Rabbit Cincher we had purchased. We went with the cincher in place of the typical gambrel hook to hold the rabbit for skinning/gutting because we thought it would be easier to use. After using it, I feel we made the right decision. The cincher is a basically two slip-loops of braided wire separated by a short length of small diameter pvc pipe. The wire is actually in a triangle configuration with a loop above the pipe for hanging and a slip-loop at each end of the loop for holding the hind feet. Where the grambrel hooks need to pierce each leg above the foot, with the cincher, you simply slide the feet into position and tighten the loop. The hanging loop also provides a lot of mobility for twisting the body while skinning the animal. Note: Place a 5 gallon bucket on the ground under the the rabbit cincher for all unwanted parts to drop into. We placed a garbage bag in the bucket to make clean-up easier.

The first rabbit took me close to thirty minutes to 'muddle through' even though I had read directions and watched a video. The second one was down to about 20 minutes, the biggest learning curve was that I realized I needed to be more aggressive, not hesitant, which came with familiarity with the process and the anatomy. Then I watched our friend do a couple. This was also beneficial because we were able to see difference in techniques that we both used and recognize advantages of changing some of our methods. By the end I could go from 'cage to cooler' in just over 10 minutes while our friend holds the record at just under 8 minutes.

Upon googling how-to instructions prior to The Day, I discovered there was no one set of steps that everyone agreed upon. Based upon my experience last year, when I butchered chickens for the first time, I familiarized myself with the various ways people suggested and then planned to figure out what worked best for me. The further we get into this self-reliance experience the more comfortable I am with figuring out what works best for us rather than trying to replicate what others are doing. By researching several different approaches, I can usually ascertain the important points that need to be adhered to - in this case be sure not to puncture the bladder or intestines - and can then work through the rest in a manner that works for me.

This means the first couple of rabbits were guinea pigs to put into practice what I had been studying. Below is a basic description of the process from the point the freshly dispatched animal is hanging upside down from the rabbit cincher. WARNING: The following details may be considered a bit gruesome by some readers.

A rabbit in the cincher.
Starting the skinning process.
1. Remove the head. Psychologically, this was always the hardest step for me. It was also the most difficult physically on the first rabbit because I did not realize how aggressive I had to be. I probably spent well over 5 minutes trying to delicately cut into the neck. I have a great Morakniv knife that I use for butchering and I was beginning to think that it was badly in need of sharpening when I could not make a cut into the skin. I then decided to toughen up and apply some muscle. That did the trick and once I broke through the skin the knife sliced with the sharpness I was accustomed to and the head came off quite easily after that. Lesson learned - be aggressive.

2. Start skinning at the hind feet. The two techniques I came across that I wanted to try were (a) to cut around each leg near the foot and then cut down the inner leg and pull the skin down the leg and (b) cut the skin up the inner leg from the groin towards the foot then you can easily pull the skin away from the leg  and slide your knife under the skin up by the foot and cut it loose. I found (b) to be quicker and easier. With (a) it was difficult to cut through the skin near the foot because it was stretched so tight at that location. Starting at the groin you could pull the skin up and poke with the point of your knife to get it started.

3. Pull the skin the rest of the way off. With my first two rabbits I took extra time to cut around the tail and also used garden shears to cut off the front feet before pulling the skin all the way off as these were steps included in my reading. However, when it came time for my friend to skin her rabbits she did not do either of these. Once she had the skin loose from the hind legs she simply added a little more muscle and continued to pull and everything came off cleanly. Lesson learned - be aggressive.

4. Open the abdominal cavity. Do not be aggressive. This is where you want to take care not to nick the bladder or intestines with your knife. I am pleased to say we had no such accidents with any of the six rabbits. I was surprised that even though we withheld food and water for 24 hours their bladders and lower intestines were not empty. Back to the technique - carefully make a small horizontal cut in the meat between the hind legs, you can use the hand that not holding the knife to pull the meat towards you a bit and thus put some space between it and the innards. Now you can place your finger in the slit, pointing down, to open up the space between the meat and the innards. Carefully insert your knife next to your finger with the sharp edge towards the meat and carefully cut the meat open. You will be able to cut down for several inches until the start of the rib cage.When you pull your hands away some of the insides may start to fall out, but don't worry everything is fairly 'tough' and will not break open.

5. Disconnecting the innards. Again their are various techniques, my choice is to turn the carcass so the back is facing me and carefully cut the tail bone below the tail. I find kitchen shears or small pruning shears work well when needing to cut through any bones.  Then I turn the carcass back around and carefully cut down along each side of the spine from the tail bone, basically along side where the intestine leaves the body. I just looked at this area closely on the first rabbit and figured out where to cut so that I could keep the tail and anus connected to the intestine and remove it all innards. Once you disconnect the small section up by the tail, everything will easily slide out.

Rinsing the carcass before
placing it in the cooler.
6. Empty the body cavity. This is actually very easy, everything basically falls into the bucket under the rabbit. If you want you can save the heart and liver. We gave all of ours to our friend, you would have thought we were given her treasure! She says rabbit liver is amazing, maybe I will try it next time. Sometimes I had cut off the front feet before skinning, but if not, I cut them off now. I find it easiest to cut them off at a joint, I prefer the knee joint as there is no meat per se on the lower leg. We then rinse the rabbit in a bucket of water and placed them in a cooler of ice water.

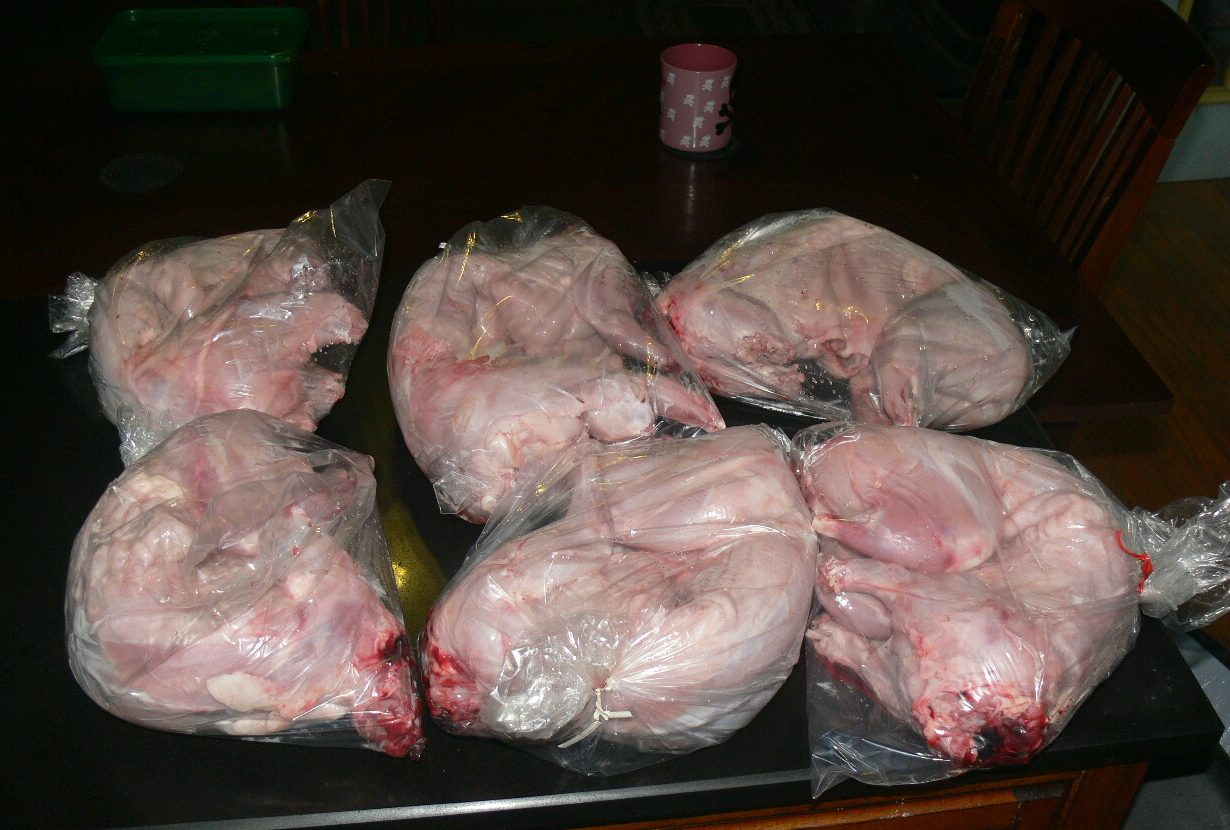
Six rabbits, bagged for a 24 hour cool down in the fridge.
The average weight  of these six bags was 3 pound 9 ounces.
So, that was day #1. As with all fresh killed animals, you either want to eat it within the hour or you want to let it rest in the refrigerator for 24 hours before cooking or freezing it. If you cook or freeze the meat during that 24 hours you will just have tougher meat. Since we pressure can all of our meat for storage, I wanted to prepare these rabbits in the same manner as I do chickens and turkeys to see if we liked the results. I always make a big pot of bone broth and then de-bone the meat, can the meat in pint jars and the broth in quart jars.

The bone broth continues to simmer
after removing the meat from the bones.
After they had been in the fridge for 24 hours I halved the rabbits and started a large batch of bunny bone broth in my largest stock pot. I could only fit five of the six rabbits in the pot, but we had friends visiting that day so they were gifted with Stewie #6. I added the same ingredients to my bone broth as I always do for chicken and turkey bone broth: onion, carrots, celery, garlic, crystalized ginger, kosher salt and apple cider vinegar. I simmered the rabbit until it was cooked through, removed them from the broth, de-boned the meat and then added the bones back to the stock to simmer a couple more hours.

Removing the meat from the bones. The meat will be
canned in pint sized jars and used in soups, stews, etc.
As the bones were simmering I chopped the meat (and sampled quite a bit!) and got the batch of pint jars filled and in the pressure canner. Pints of meat take 75 minutes in the canner after they have come up to pressure and then there is a cool down period. After that, I had the quarts of bunny broth which take 90 minutes in the canner. My pressure canner holds 7 quart jars and I ended up with more broth than would fit in one batch so I put some in the fridge to can a partial batch the next day. It was bothering me that I was going to do a partial batch because I consider that a waste of propane. Since I have the burner on the stove turned on for close to two hours, I want to can as many jars as will fit in the canner.

A sample of our first batch of canned
rabbit meat and bunny bone broth.
Guess which one we will be eating first!
As I was taking the pints of meat out of the canner I was listening to the 'pings' as the lids sealed. They always seal within a half hour or so and I very rarely have one that does not seal. Later I went over to the counter to check all the lids and I was disappointed to discover that one jar had not sealed. Of course, since it so rarely happens, you know what I blamed it on. Or should I say, who I blamed it on - Stewie #4 was in that jar. But, I got the last revenge this time... remember my partial canner load the next day? There was one more jar of rabbit meat getting canned a second time.

Friday, May 5, 2017

I Feel Like We Just Brought Home a New Baby

Have you ever brought a newborn baby home? If so, what is the first feelings that you remember as you found yourself totally responsible for this little being for the first time? Excitement? Fear? Trepidation? Help!?!

Who do you turn to? Friends and family? Your online community? Parenting support groups? Parenting books by experts? All of the above?

Clive, the hive. We set him up on a old
carpet to keep the weeds (and ticks)
down around the perimeter of the hive.
Do you wonder where I am going with all these questions? Well, last Thursday we found ourselves driving home with a bouncing... box of bees. And we were soon to find out that those memories of first coming home with a newborn would be triggered by some similar experiences in the next few days. You may think this sounds ridiculous, but let me be more specific. It was the endless flood of advice, and may I say almost always conflicting advice, every time we had a question about the new additions to the homestead.

First off, it was a premature delivery. We were not 'expecting' the bees until 'sometime in May' according to the local apiary we bought the nuc (nucleus hive) from. When we got a phone call on the morning of April 27th asking if we could come pick up our bees that evening you would think we would have everything ready. After all, I had ordered the bees and the hive back in January. But, with the gardens needing to be planted and a strong penchant for procrastination, the hive still needed a coat of tung oil and then had to be transported and set up in the clearing on the northwest corner of the property that we had designated as the bee habitat.

It was a Thursday, there had been torrential rains a couple days earlier and even heavier rains were in the forecast for Saturday. I was thinking that Mark, the bee guy, wanted to get the nucs distributed to his customers in between the storms. That afternoon, we managed to get the hive completed and set up and arrived to pick up our nuc at the designated time, about 7:30 p.m.

This is the flap on the nuc in the
open position. It is closed by
pushing it down into a matching
cut-out, like a puzzle piece, and
only held in place by friction.
A nuc is a small version of a working hive (think mobile home of the bee hive world), which means the bees are going in and out during the day. By waiting to pick it up later in the evening we were making sure most of the bees had returned to it for the night and would not be left behind when we put in in out truck to bring it home.  We took our truck that has the cap on the bed because we did not want the bees riding inside the vehicle with us. It turns out that the nuc, which is a fairly sturdy, weather proofed corrugated cardboard (Corflute) box (like I said, a mobile home - minus the wheels), has a little flap that closes quite securely to keep the bees in for the trip home. I say quite securely but it is just a flap that pushes in flush with the opening and is held by friction, so we were still glad they were in the back of the truck.

As we were getting ready to leave the bee farm, Mark said he would give us the same advice he gives everyone picking up nucs. Here is the gist of his advice, although he did throw in a lot more beekeeping terminology:
1.Feed the bees for the the first week or so. The solution for feeding in the  spring is a 1 to 1 sugar water syrup. After a week, check the brood box (where we transfer the nuc to) to see if they have drawn (made) comb on the new frames, if so add a second brood box or a honey super (has frames just like a brood box, but the queen can't get into it so it only has honey, no eggs, larvae, etc.). If the new frames are not well established with comb, continue feeding the bees and wait a while before adding another box.
2. Treat for mites sometime in August. If you plan on harvesting any honey the first year, treat for mites after the honey harvest.
3. In fall, after the August harvest, have either a second brood box or a honey super in place and start feeding the bees a 2 to 1 sugar syrup so that they can store up food for the winter.

I nodded and asked a couple of questions and hopefully sounded knowledgeable, while the whole time I am thinking how much of this do I really have to do, I want to be a bee haver, not a bee keeper. We are self-reliant and I want our bees to be self-reliant, too. Also I was starting to feel a bit overwhelmed, like when it's time to bring the baby home from the hospital and you wonder if you really know everything you need to know to care for this new addition to the family.

A sample of our road conditions after heavy rains.
When I mentioned bringing home the bouncing box of bees this was not just a cute reference to tie in with the baby analogy. Remember those torrential rains I mentioned? And you may recall that we have been told by some of the county road crew that we live on the worse road in the county. Well, to go pick up the bees we had to go out the north end of our road, which is the longer end to travel before getting to pavement, about 5 miles. The rains had caused quite a few wash-outs along with flooding where the creek ran across the road in several areas. This left the road in worse shape than usual, including rocks up to the size of dinner plates strewn across it as well as dead fall tree branches as large as fence posts washed down from the mountainsides and onto the road.

I was worried the bees would be upset
after  the last 20 minutes of our trip which
was on our washed-out road.
 By the time we ventured out, the worst of the debris had been pushed to the roadside, but it was still rough going. I hadn't thought anything about it until we were on the way back with the bees. As we turned back onto our road ans started bumping along I realized the bees were not going to be happy by the time we got back to our house after about 20 minutes of being shaken up in the back of the truck. Since it was also almost dark by this time, we decided it would be a good idea to leave the bees in the nuc for the night and transfer them to the hive the next morning. This was the first of many decision we had to make for our new addition to the family.

When we got home, we placed the nuc up by the hive but kept it closed for the night, after an in depth discussion on the pros and cons of opening the door of the nuc for that night. My thinking was that, since the nuc was a mini working hive, it would be fine left 'as is' for the night. It had five frames, where a full size brood box has either eight or ten. And, since the nuc was well established, these frames were full of everything the bees needed and they would be fine closed up for one night. Plus, since we had waited for them all to fly home for the night before picking them up we could assume they always stayed in the nuc all night. Nevertheless as soon as we were in the house I google how long can bees stay in a nuc and found all different answers, both confirming and contradicting my thoughts..

Alan and I stayed up googling quite a few things about bees that night. It's not that I hadn't researched beekeeping before this, in fact, I had taken a three month online course. But, just like when you read all the baby books and thought you knew everything, it all seems different as soon as you bring them home. Oh, and the one sure thing we learned that night was a tidbit Alan came across that he shared with me. It said: If you ask two beekeepers a question you will get three different answers.

This is what the nuc looked like when we opened the lid.
A fully established mini-hive with five frames. The bees
had even started drawing some comb on the box lid.
The next morning we lit the smoker, I donned my protective gear and we hiked up to Clive, the hive. I opened the little hatch on the nuc expecting a huge out pouring of claustrophobic bees, but only a few rambled out to look around. I then opened the top flap to view the frames, which were nicely filled with bees, calm bees I was happy to see. I wafted a little smoke over the top of the frames in the nuc to encourage the bees to meander down into the frames so that I could grasp the upper edges.

When you use smoke you do not want to flood the hive with it, in most cases more is not better. I like to think of it more as herding the bees in the direction you want them to go with puffs of smoke. In order to transfer the frames and bees from the nuc into Clive's brood box I wanted the bees to move off the tops of the frame and down into the nuc so that they were on other parts of the frames. If I had blown smoke into the entire nuc box I would have probably chased the bees completely out of the box and I did not want a few thousand bees to come flying out at me (a typical nuc contains 10,000 bees). While smoke is used to calm the bees, too much smoke will actually lead to an agitated hive due to the confusion it causes.

Using the hive tool to loosen the frames from the nuc box.
Before attempting to lift out the frames, I saw there was some cross comb visible between the frames. This is where the bees build the comb as a bridge between the frames. I could only see the top edges of the frames so I had no idea how badly the frames were stuck together. Time to make more decisions. I used my hive tool, which has a sharp wedge, to split the comb I could see between the top of two the frames. As I wiggled the tool down through the comb I could feel the first frame separate from the next. I then grasped the top edge with both hands and lifted. Nothing happened. The frame was still stuck in the box. I again grabbed the hive tool and this time I used the end that is bent similar to a crow bar. I slid the bent end under the lip of the frame that rest on the box edge and gently pried up to loosen the frame from the box. I did this on both sides and then the frame, along with all the bees currently working on it, easily lifted out of the box and I carefully placed it in Clive. Four more frames to go.

Transferring a double set of frames. The white strip closest
to me in the box is the top of one of the new frames. We are
using plastic frames that have been coated in bees wax.
It turns out, I only had to do this two more times because the next time I pried a frame loose, two came up together and I was comfortable supporting both of them together with my fingers under the lips of the frames. Since Clive is an 8-frame box, we had three new frames in the brood box in addition to the 5 we transferred. You always arranged your frames so that the transferred nuc is in the center and the transferred frames are always kept in the same order as they were in the nuc. So our brood box has a new frame on one end then the five nuc frames and then two more new frames. The bees will now get busy drawing comb (building honey comb) on the new frames to fill out the brood box.

This is the feeder I made to hold the
sugar water syrup. When inverted, a
vacuum forms so that it does not
continually drip through the holes.
What's next? We'll check the new frames in the brood box at the end of the week. At that time, I am fairly certain we will see the new frames on either side of the transferred frames have been filled with comb. Soon after that we will add our second brood box. It is a medium sized box, which is shorter than the current (deep) brood box. It will also have 8 frames for the bees to draw comb on, but these are shorter frames designed to fit in the medium sized box. We are thinking of this as an auxiliary storage area (self-reliance) to help our bees get through the winter. While many beekeepers wait to add this on until after they have harvested their honey, we want to let our bees store up their supply before we stake any claim for ourselves.


The honey super, with the
flow frames will be added
to the hive later in the summer.
Once we know our bees are well prepared with food stores we will then add the honey super. The honey super is normally just another box with frames that the queen does not have access to, but in our case it has the flow frames that we will be able to drain the honey from the frames without removing them from the hive.

You keep the queen out of the honey super using a queen excluder, a plastic grid that is large enough for all the bees except the queen to get through. This allows the bees to fill the frames in the honey super with honey while making sure the queen does not lay any eggs in the your honey.

Alan adding the queen excluder on top of the brood box.

The queen excluder can be seen
through feeding hole.
The feeder jar in place over the hole in the top board.
The roof of the hive has been removed in this photo.
One more analogy and then I'll stay away from the topic of bees for a while. Alan made a purchase this week that will serve multiple purposes. It is the Hive Genie. It is a hi-tech device (Purpose #1 a new toy) that monitors the health of the hive in a variety of ways (Purpose #2 aids in the goal of bee haver vs. bee keeper) that even comes with its own solar panel (Purpose #3 solar panel - enough said). Get the analogy? It's a bee monitor (as opposed to a baby monitor).